
BMW E36
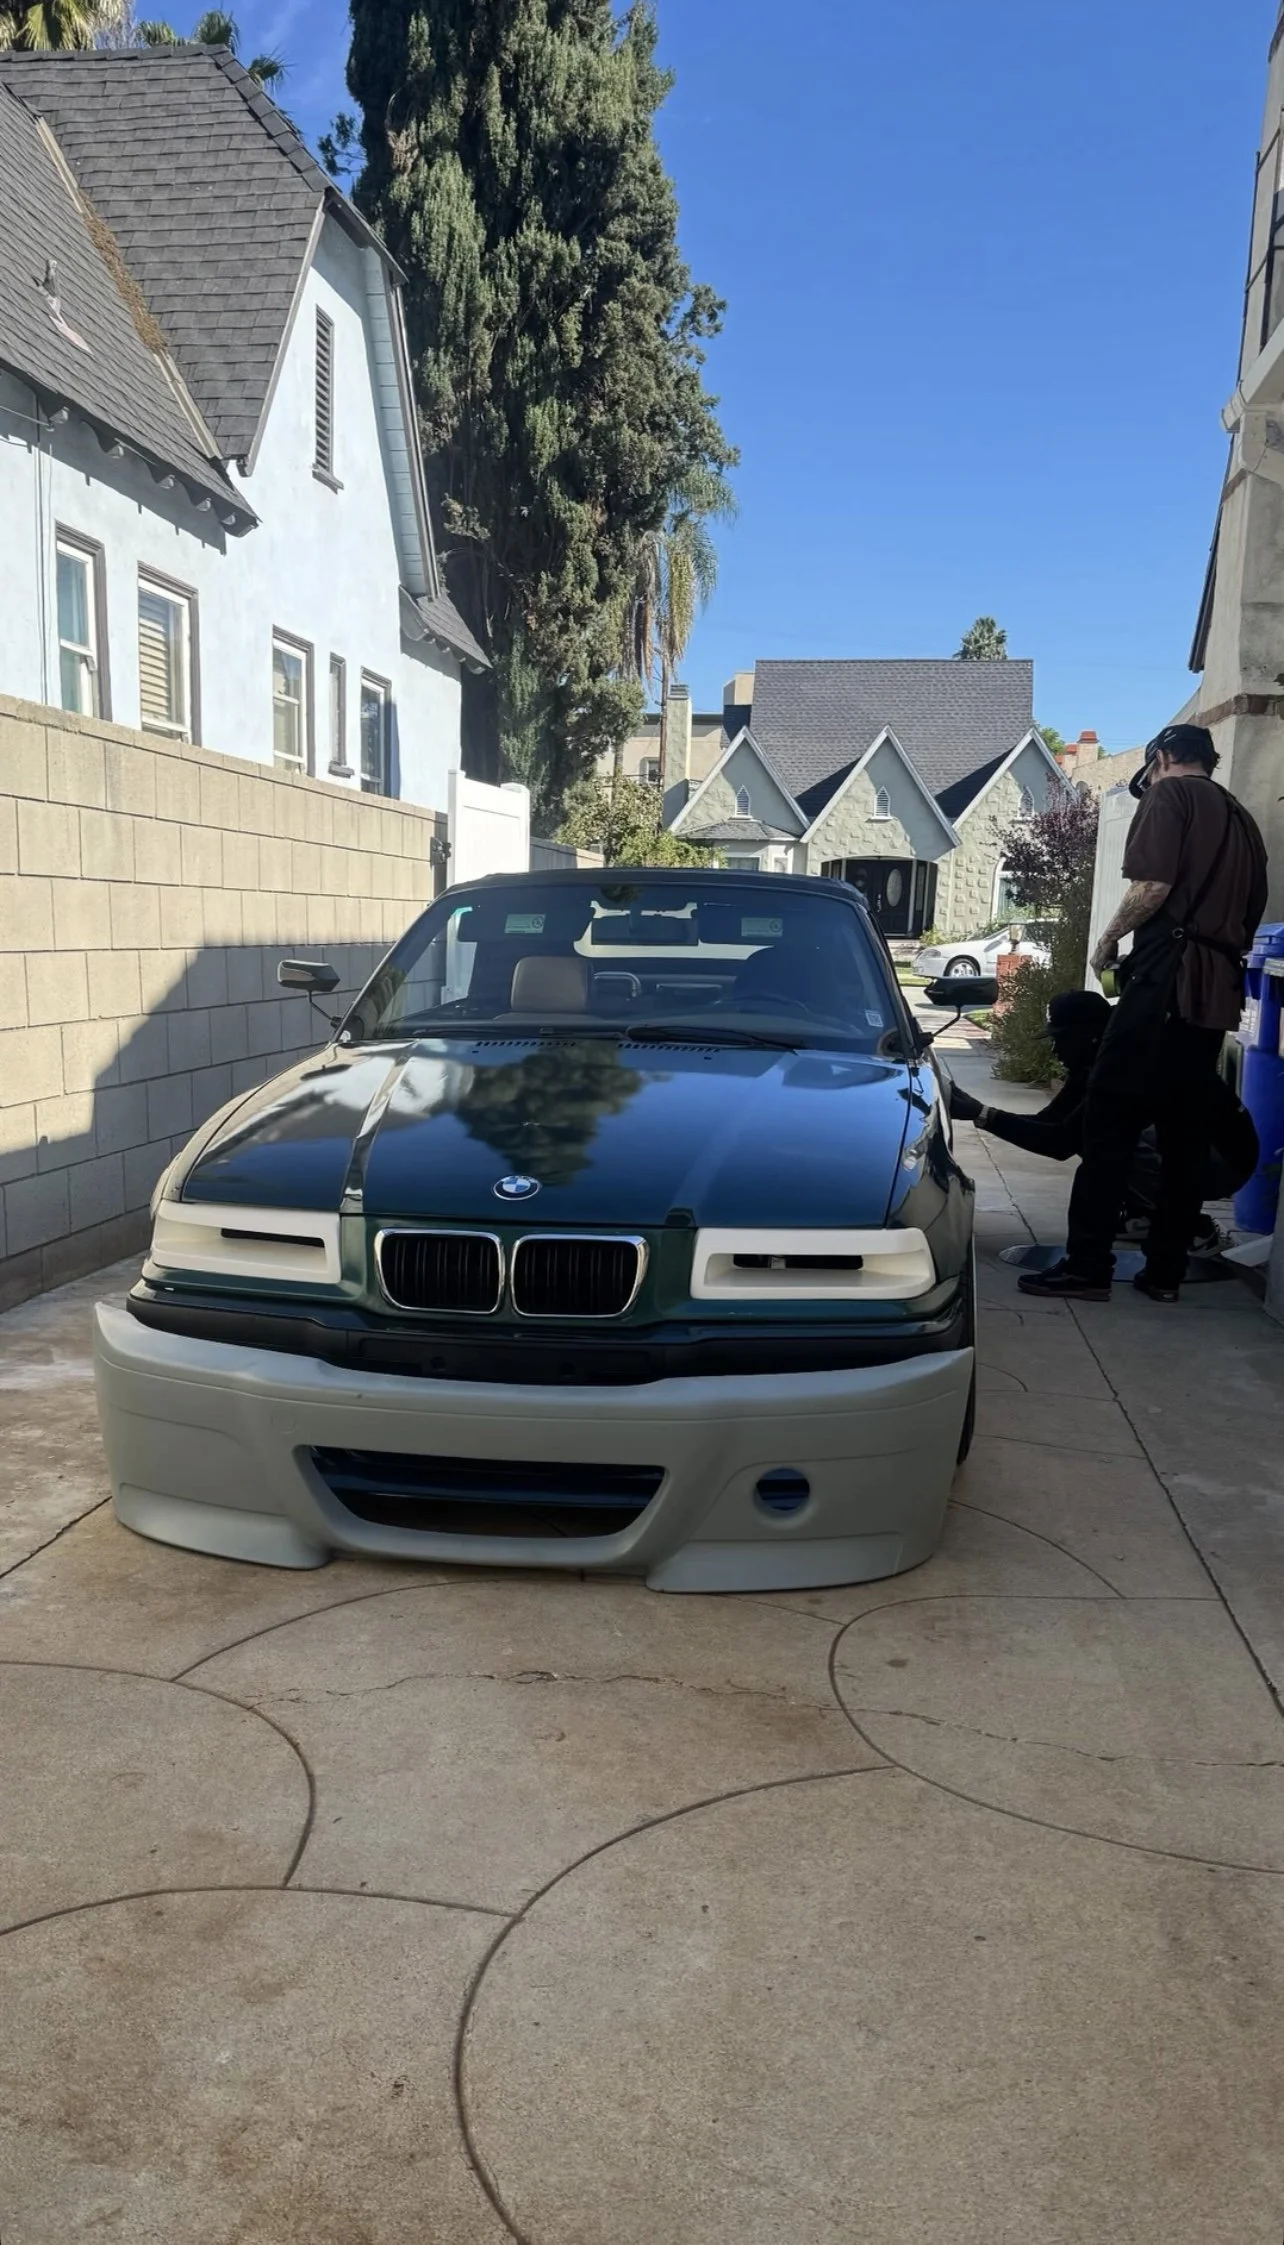
This BMW E36 came in for a plethora of upgrades, new items, refinement and general fab work. First up on the list is to build out a front bash bar.
Additional work includes:
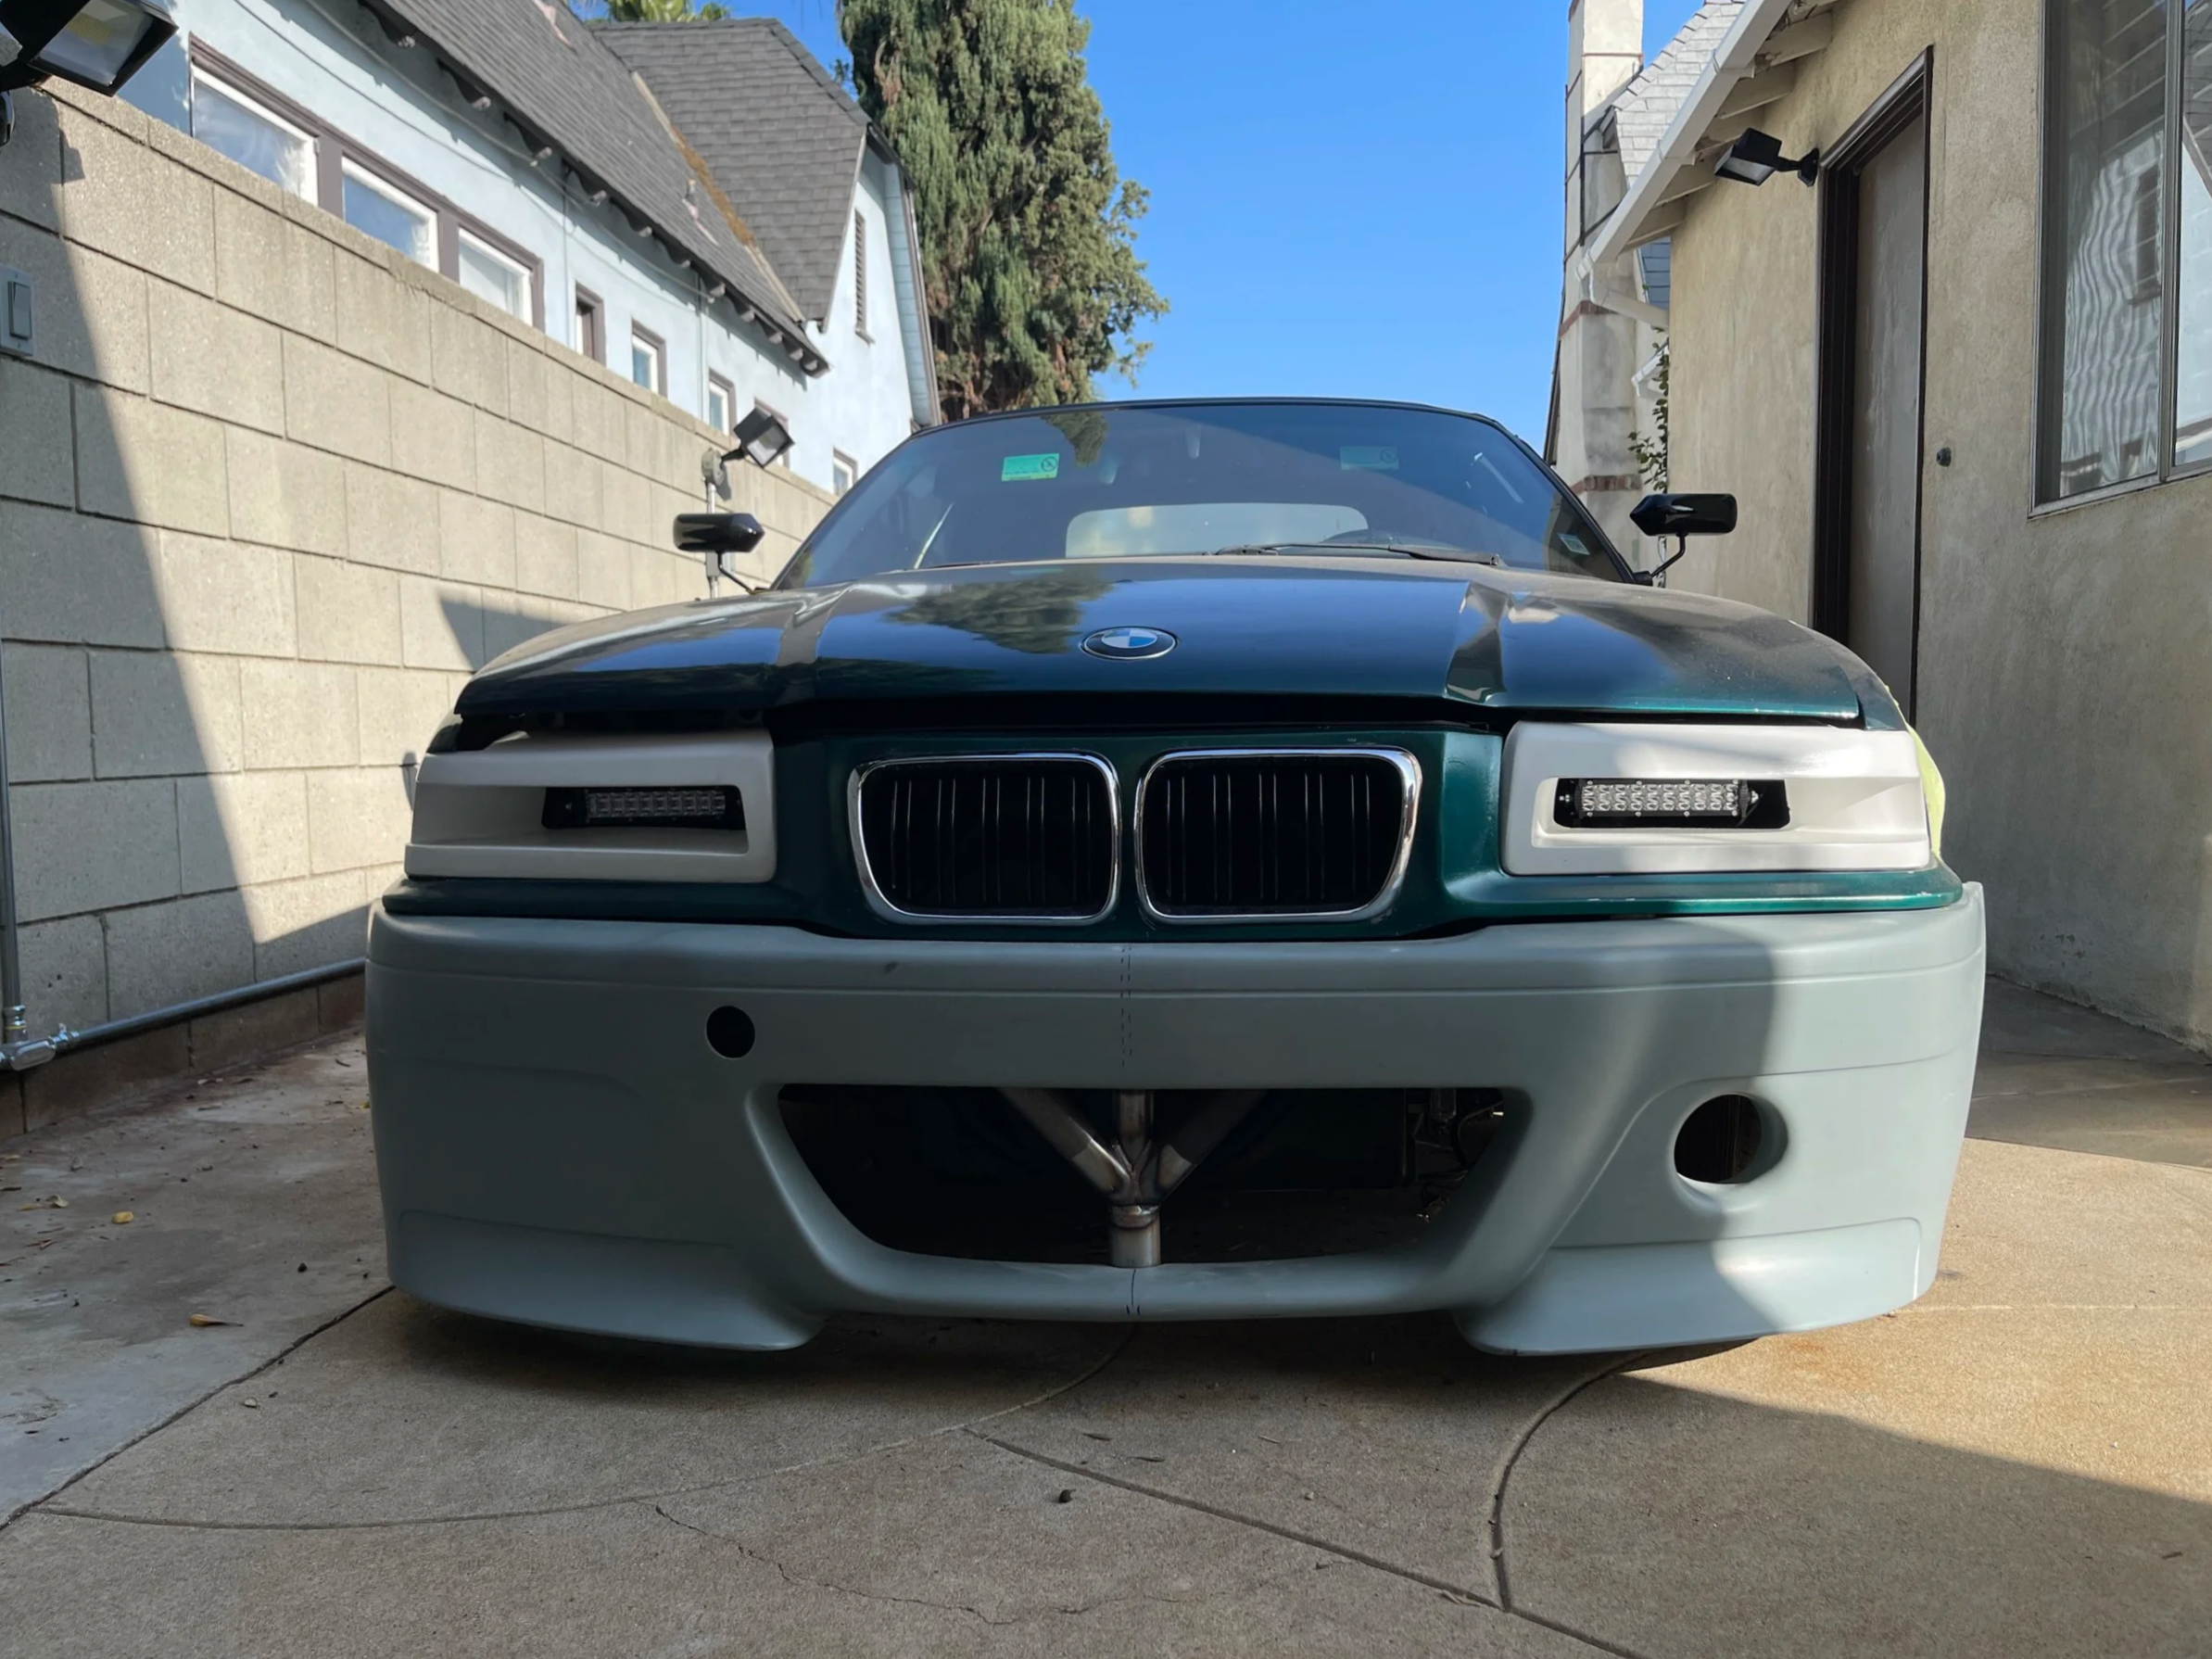
Mount an E46 front bumper / Rear bash bar / Mounting up some LED light bars for headlights
Floating floor plates / Interior tin work / Mount over-fenders / Rear lower Diffuser
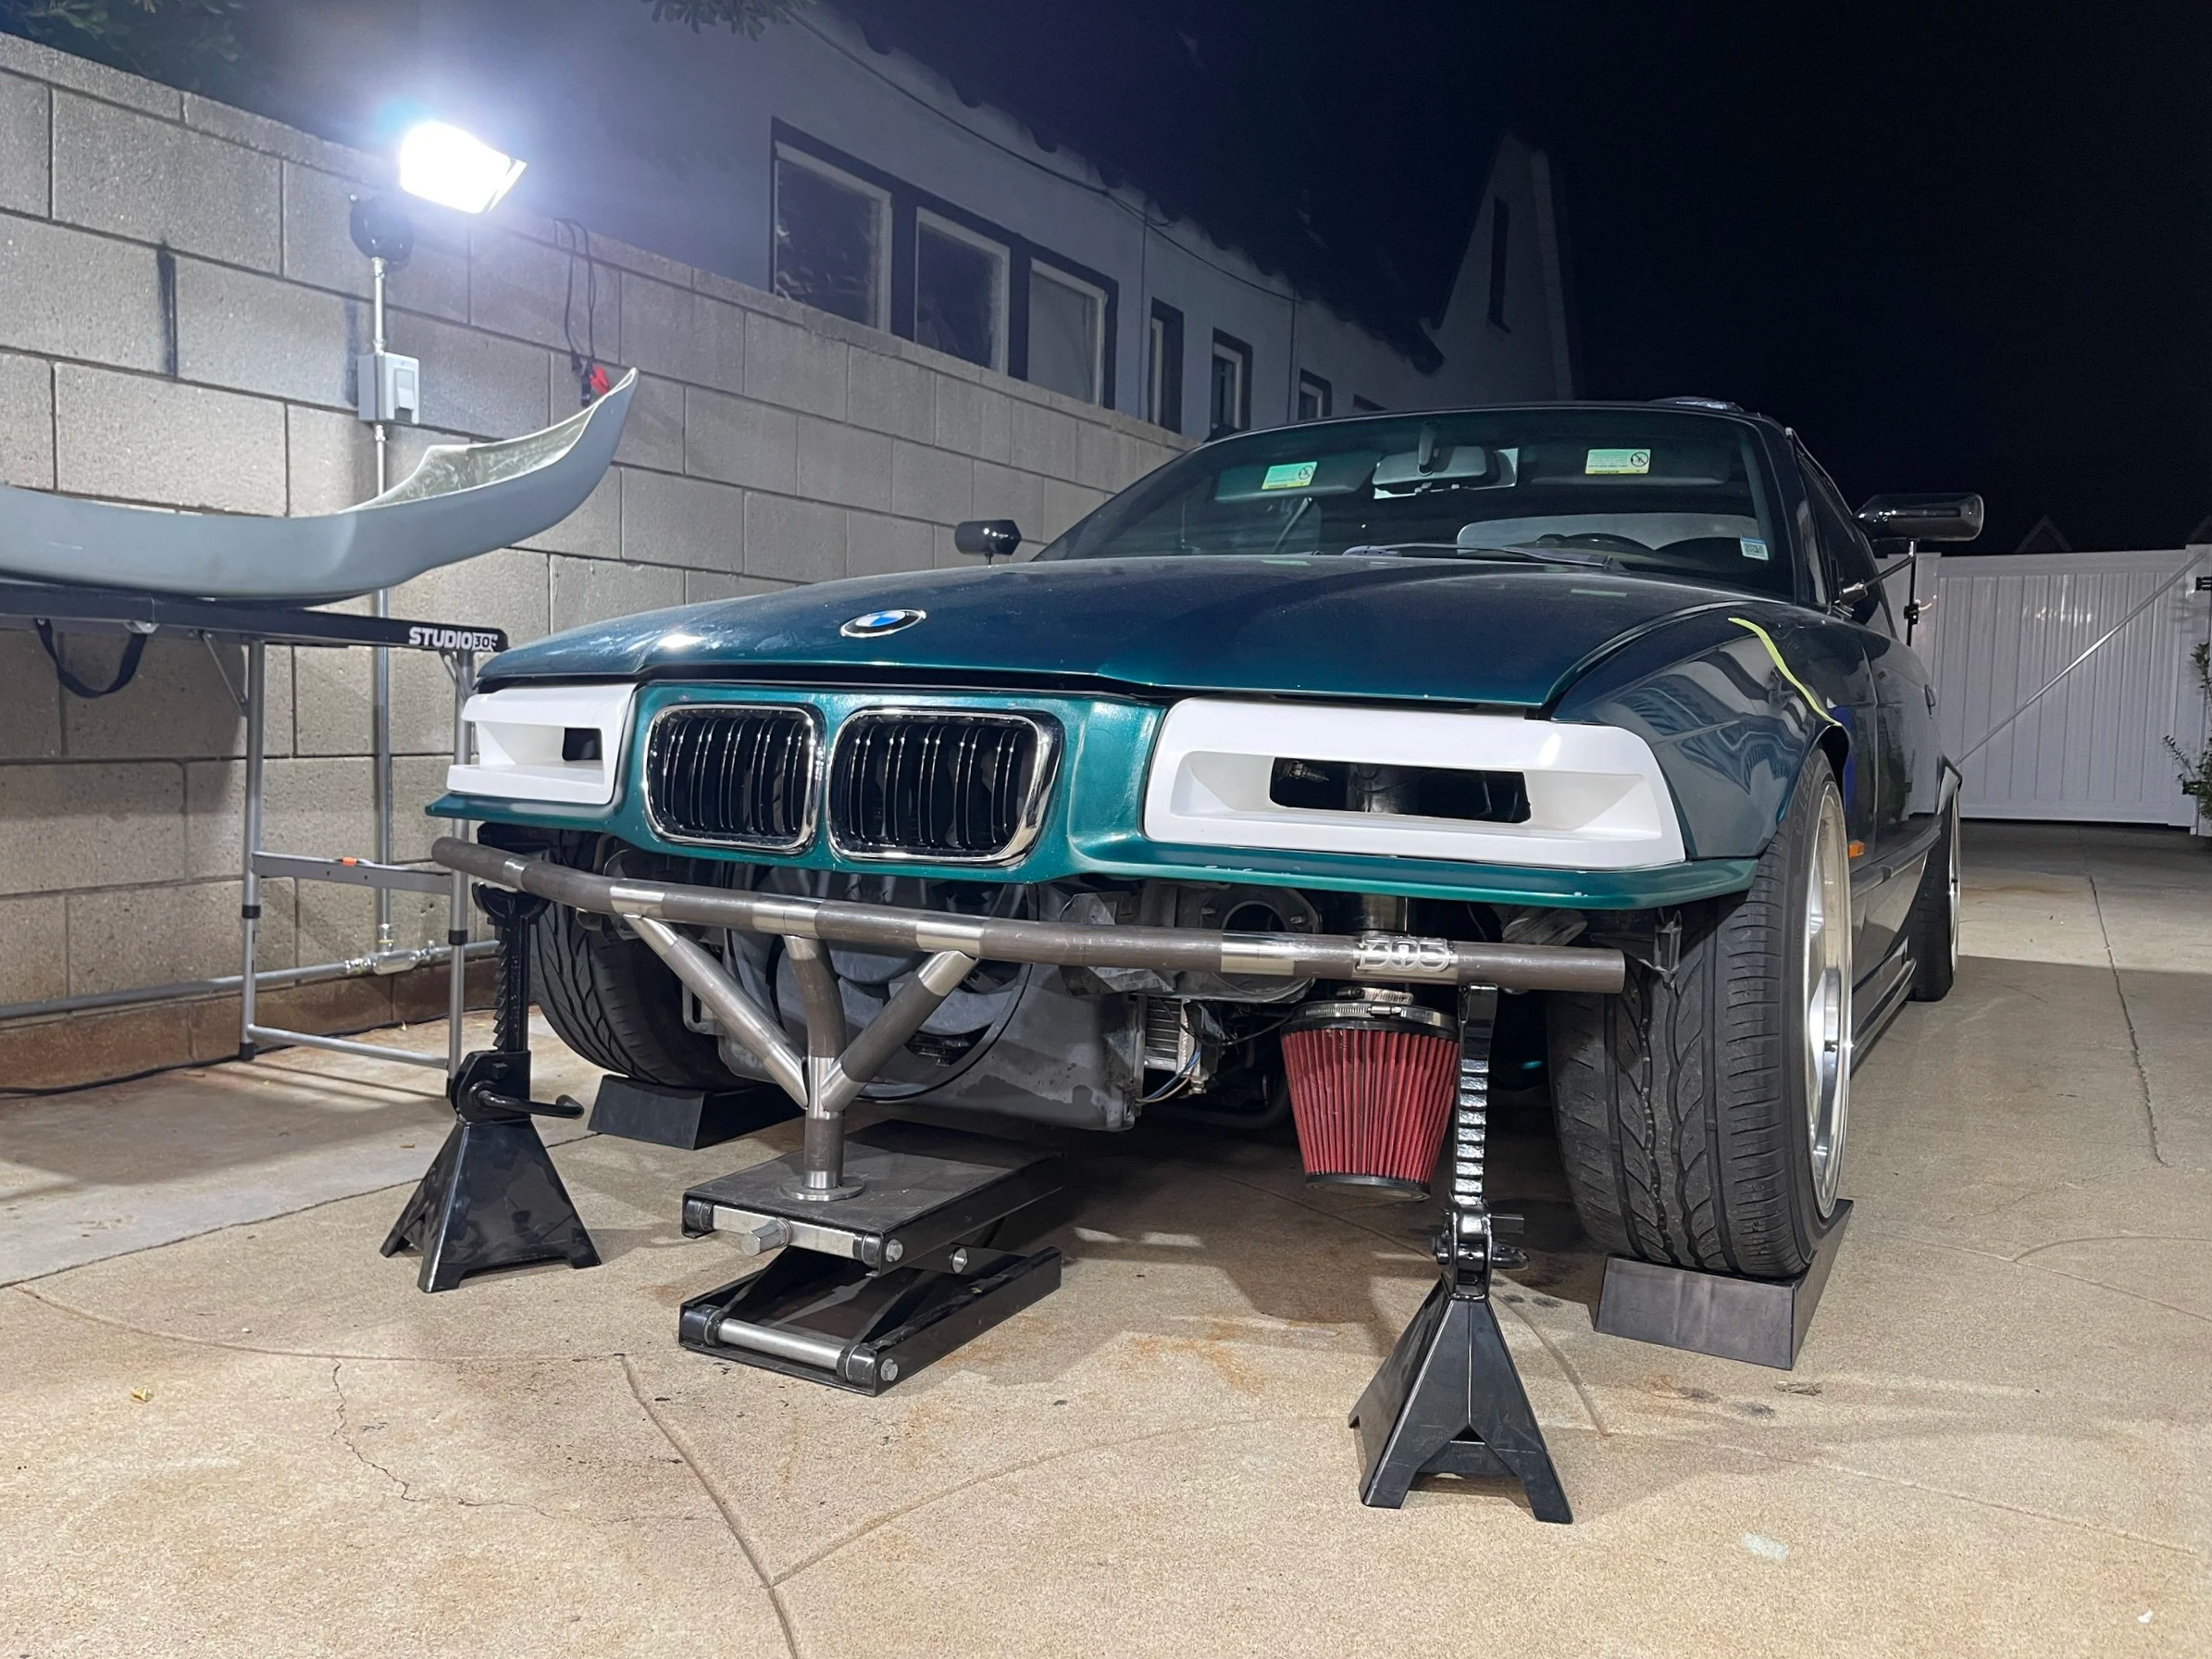
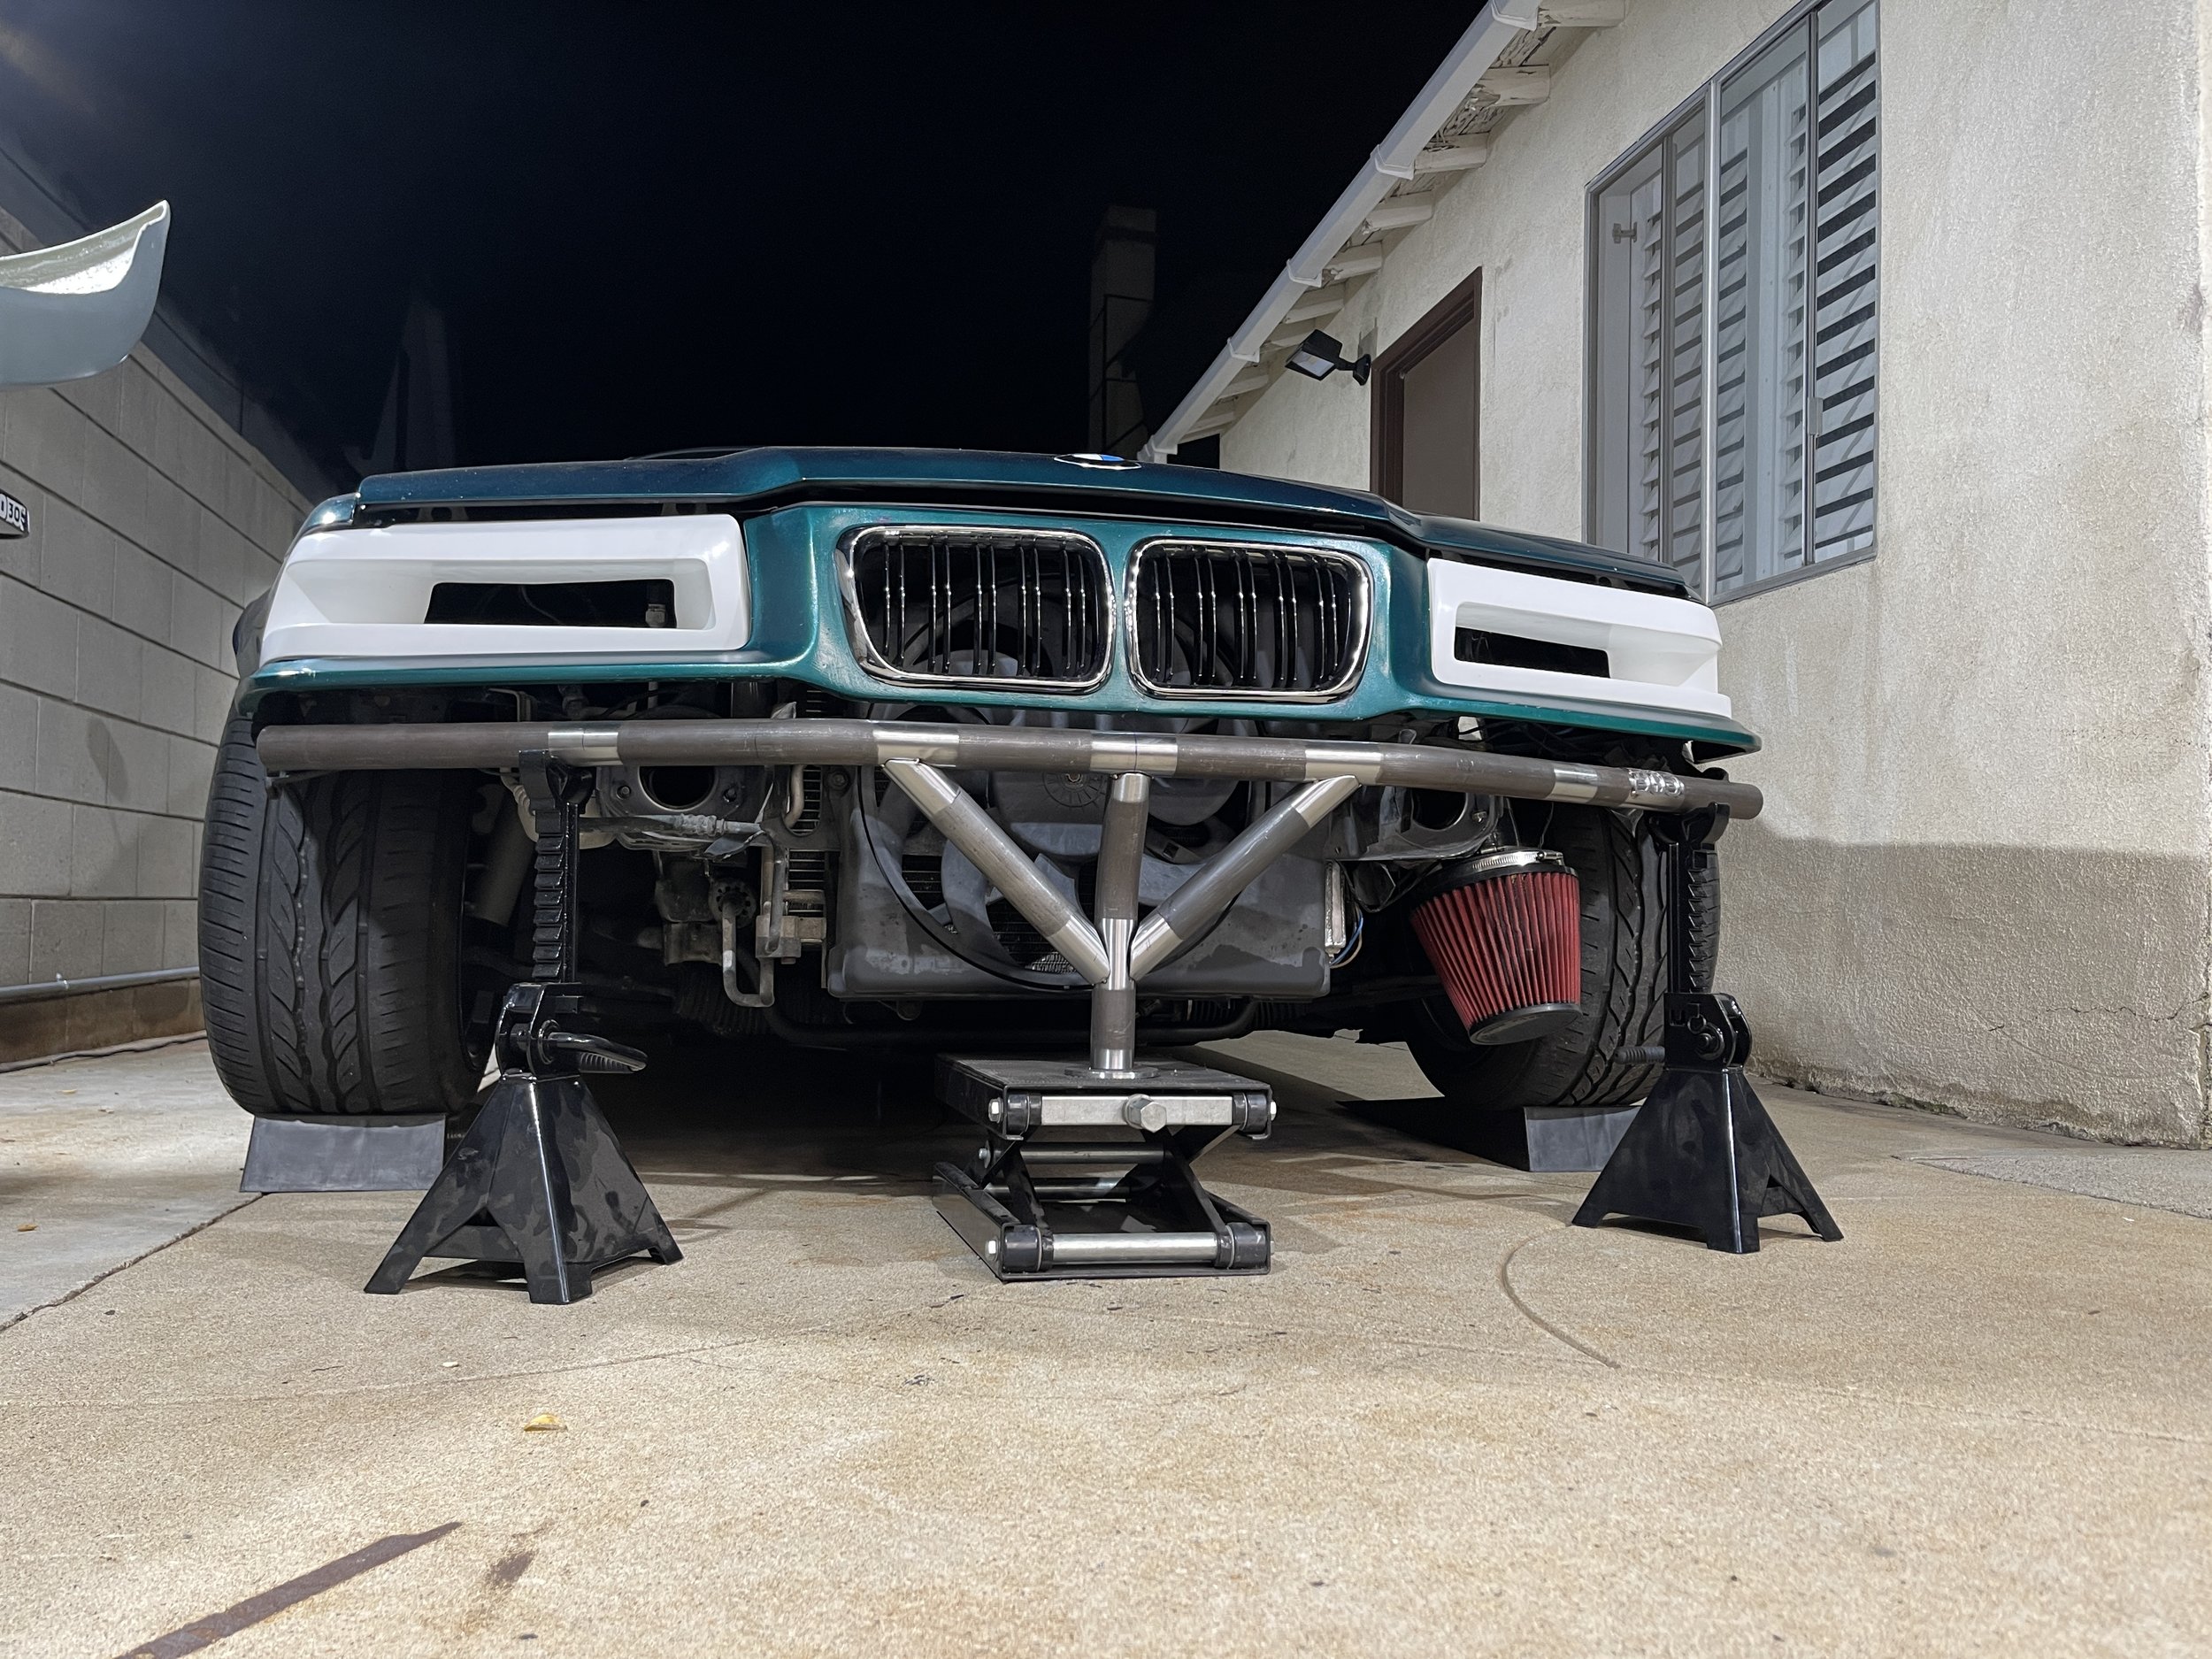
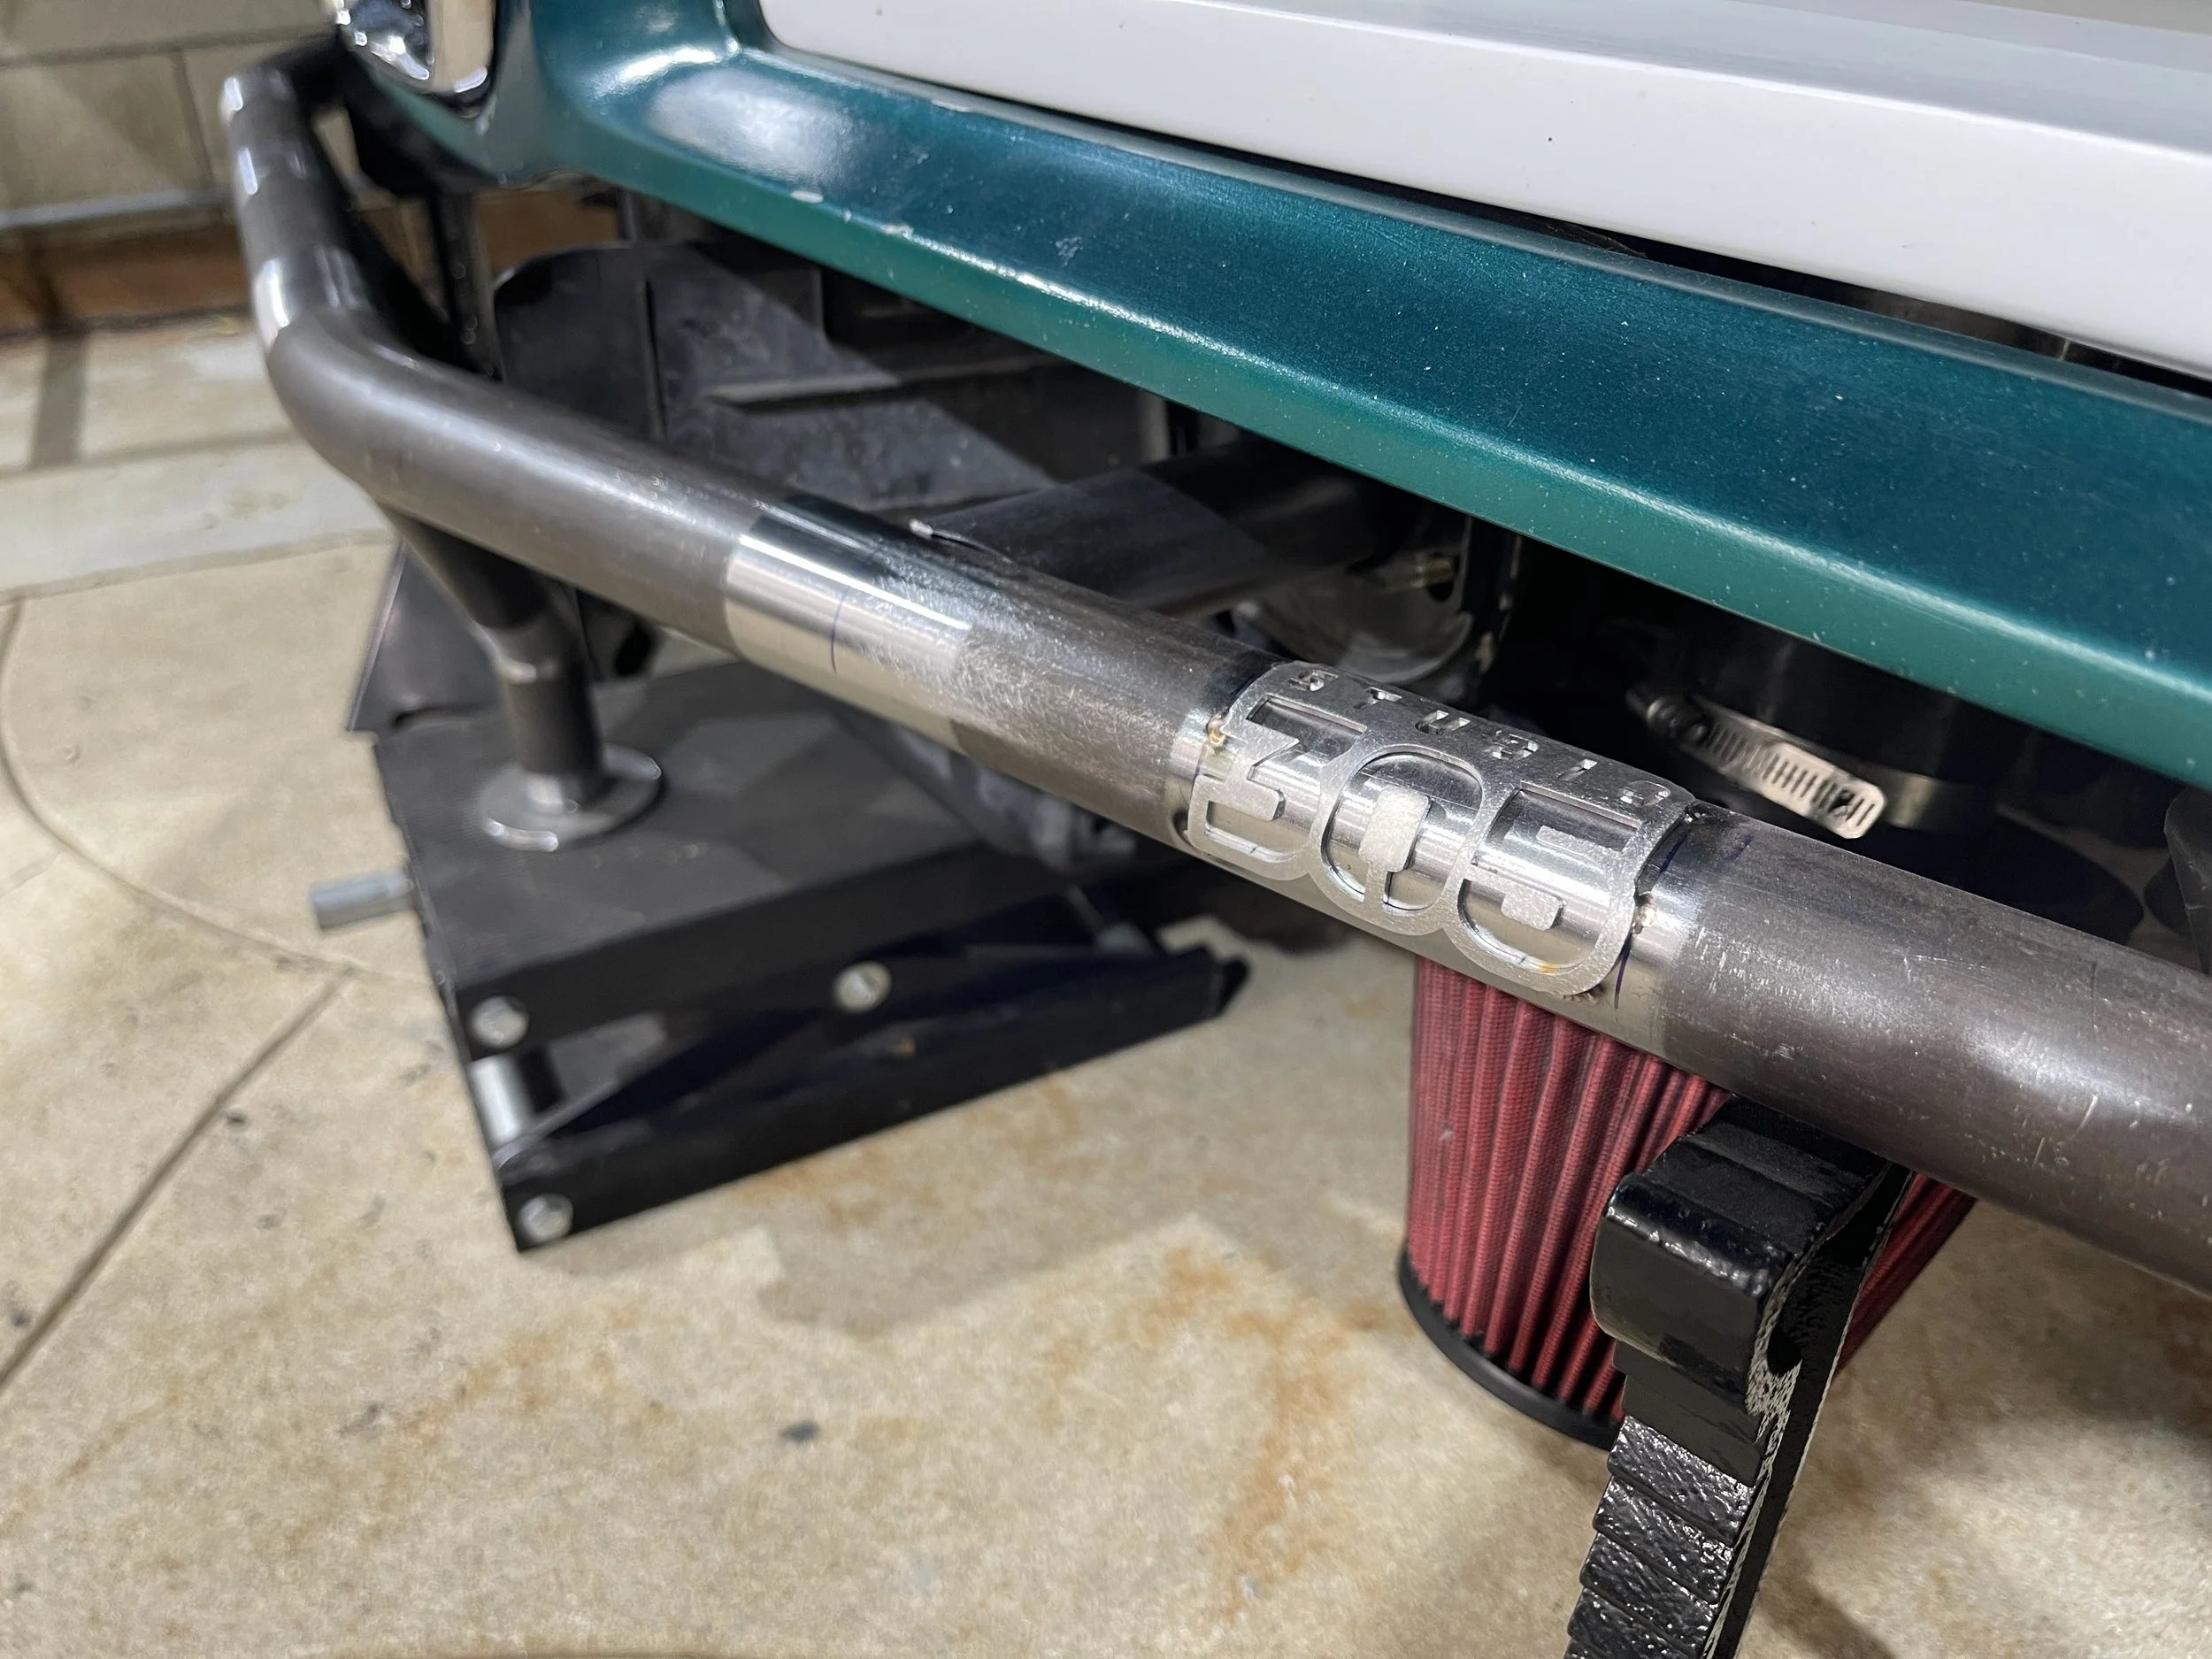
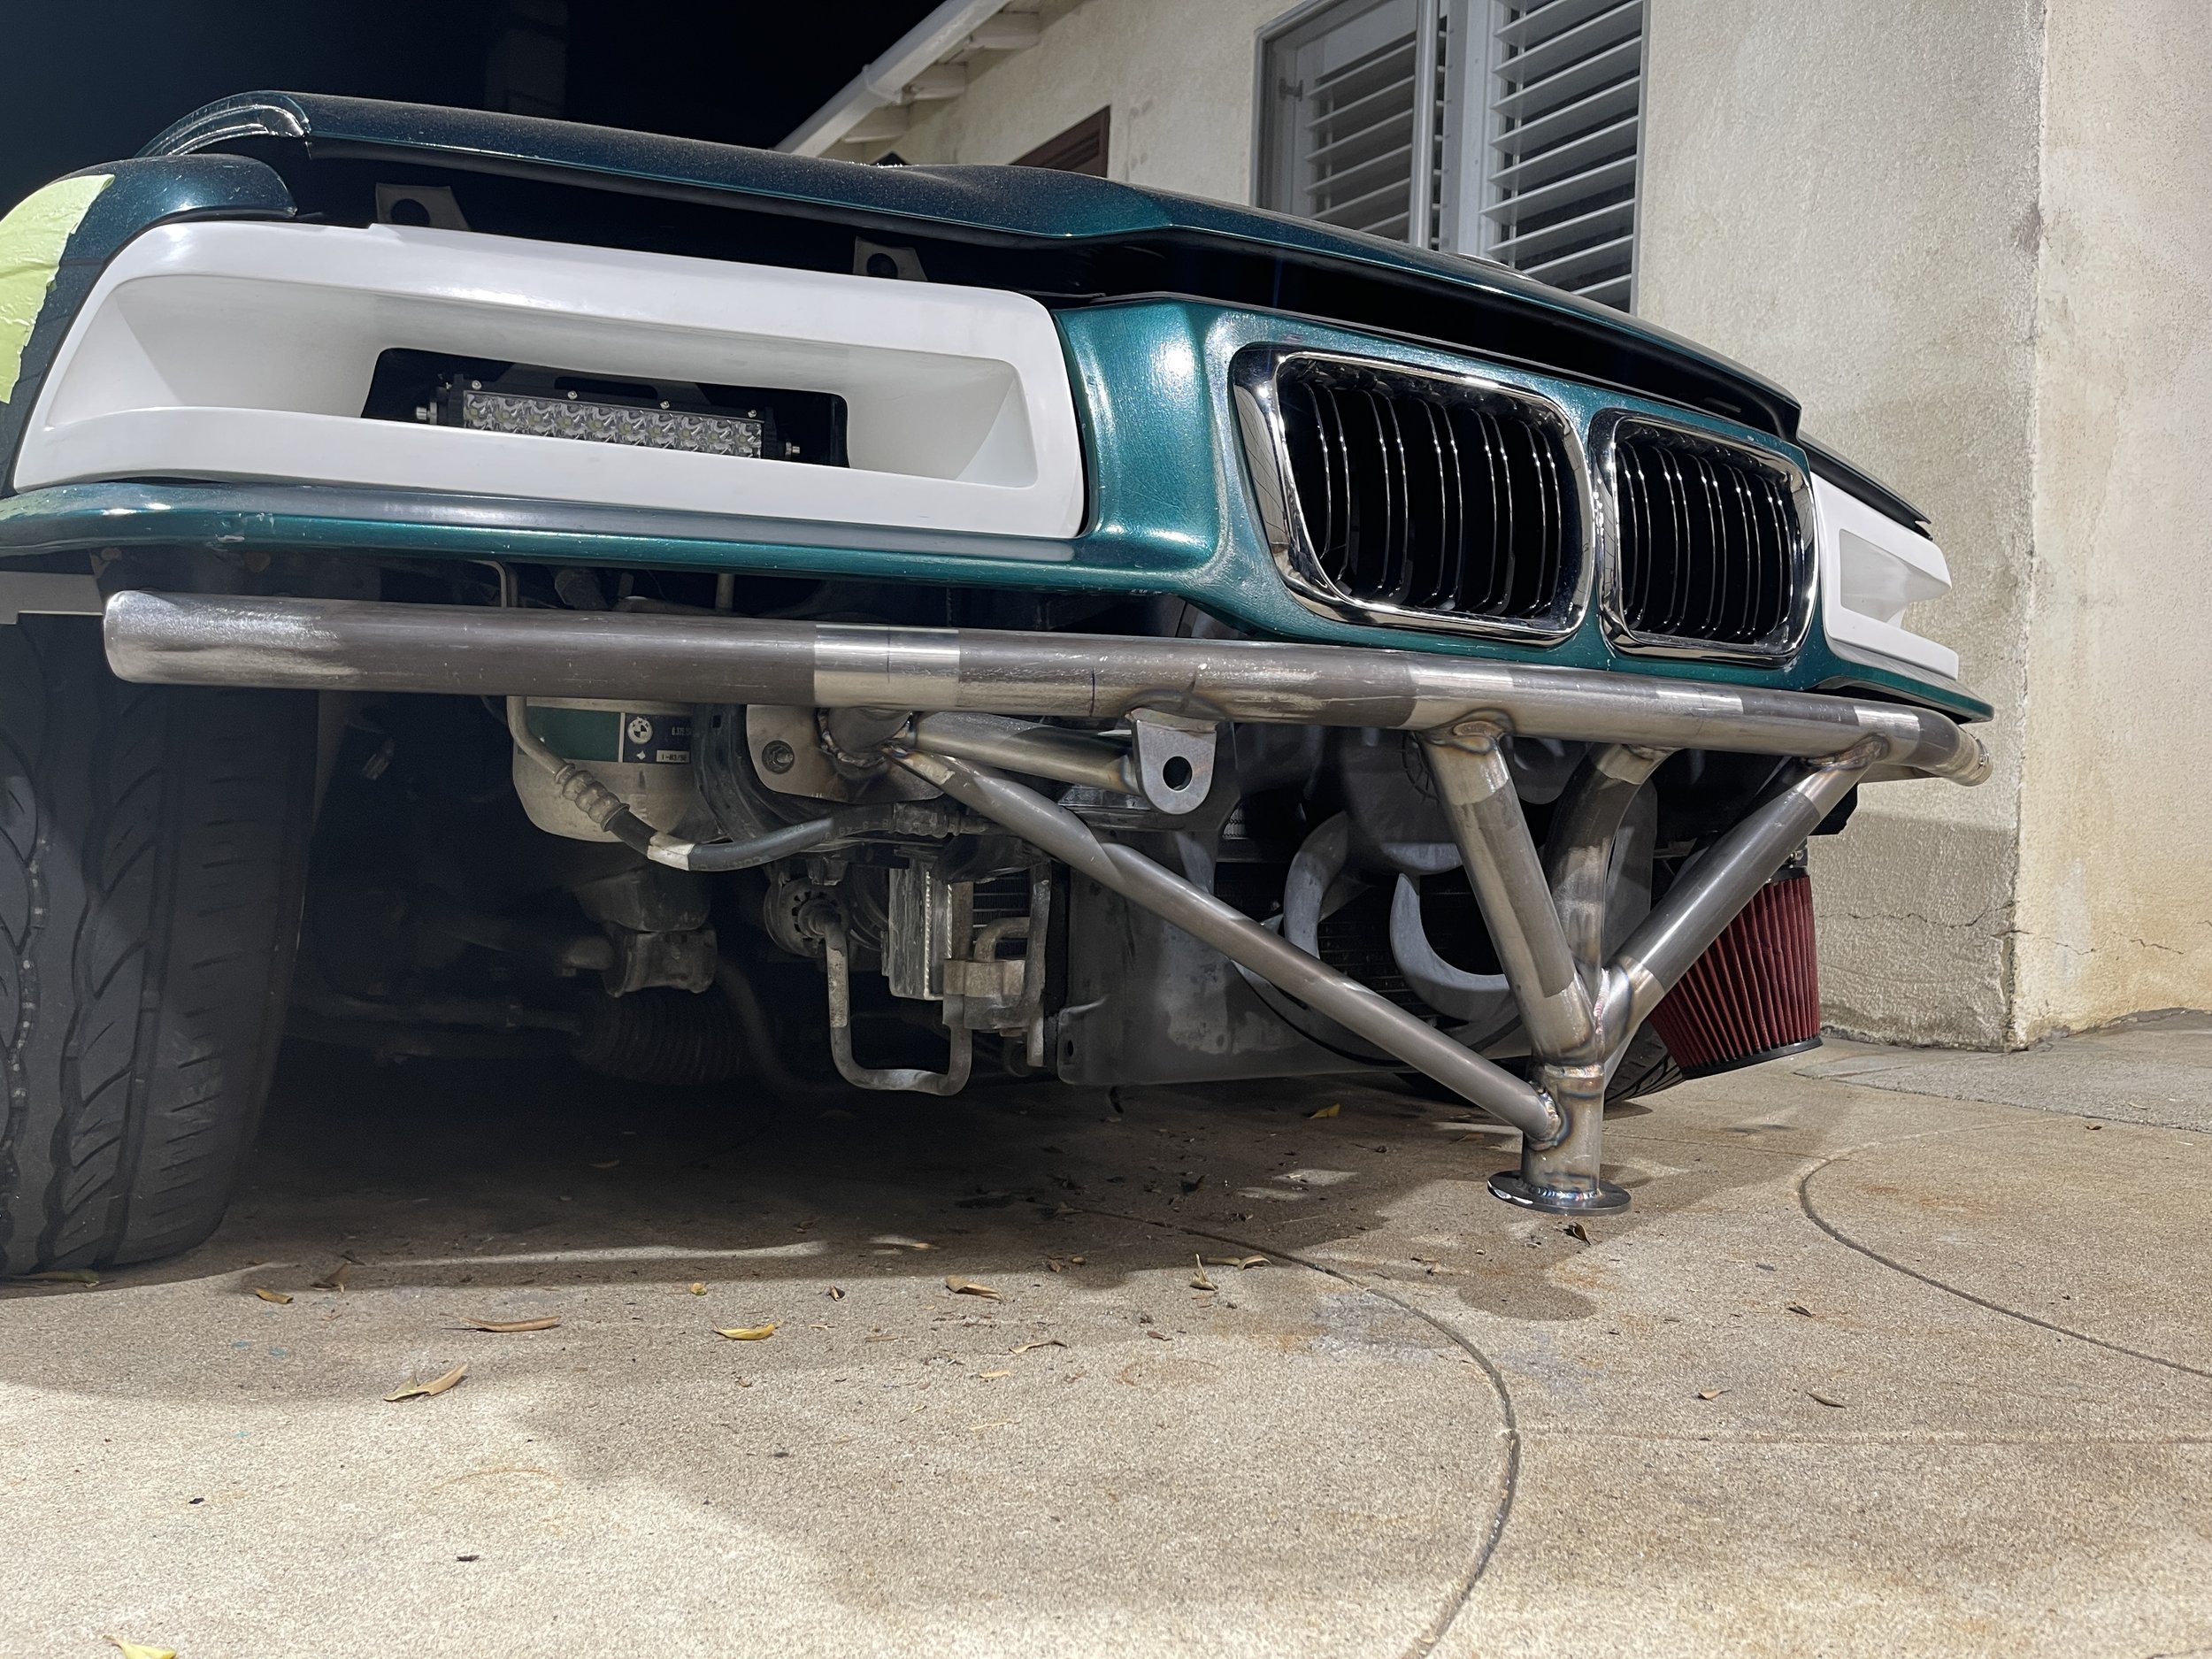
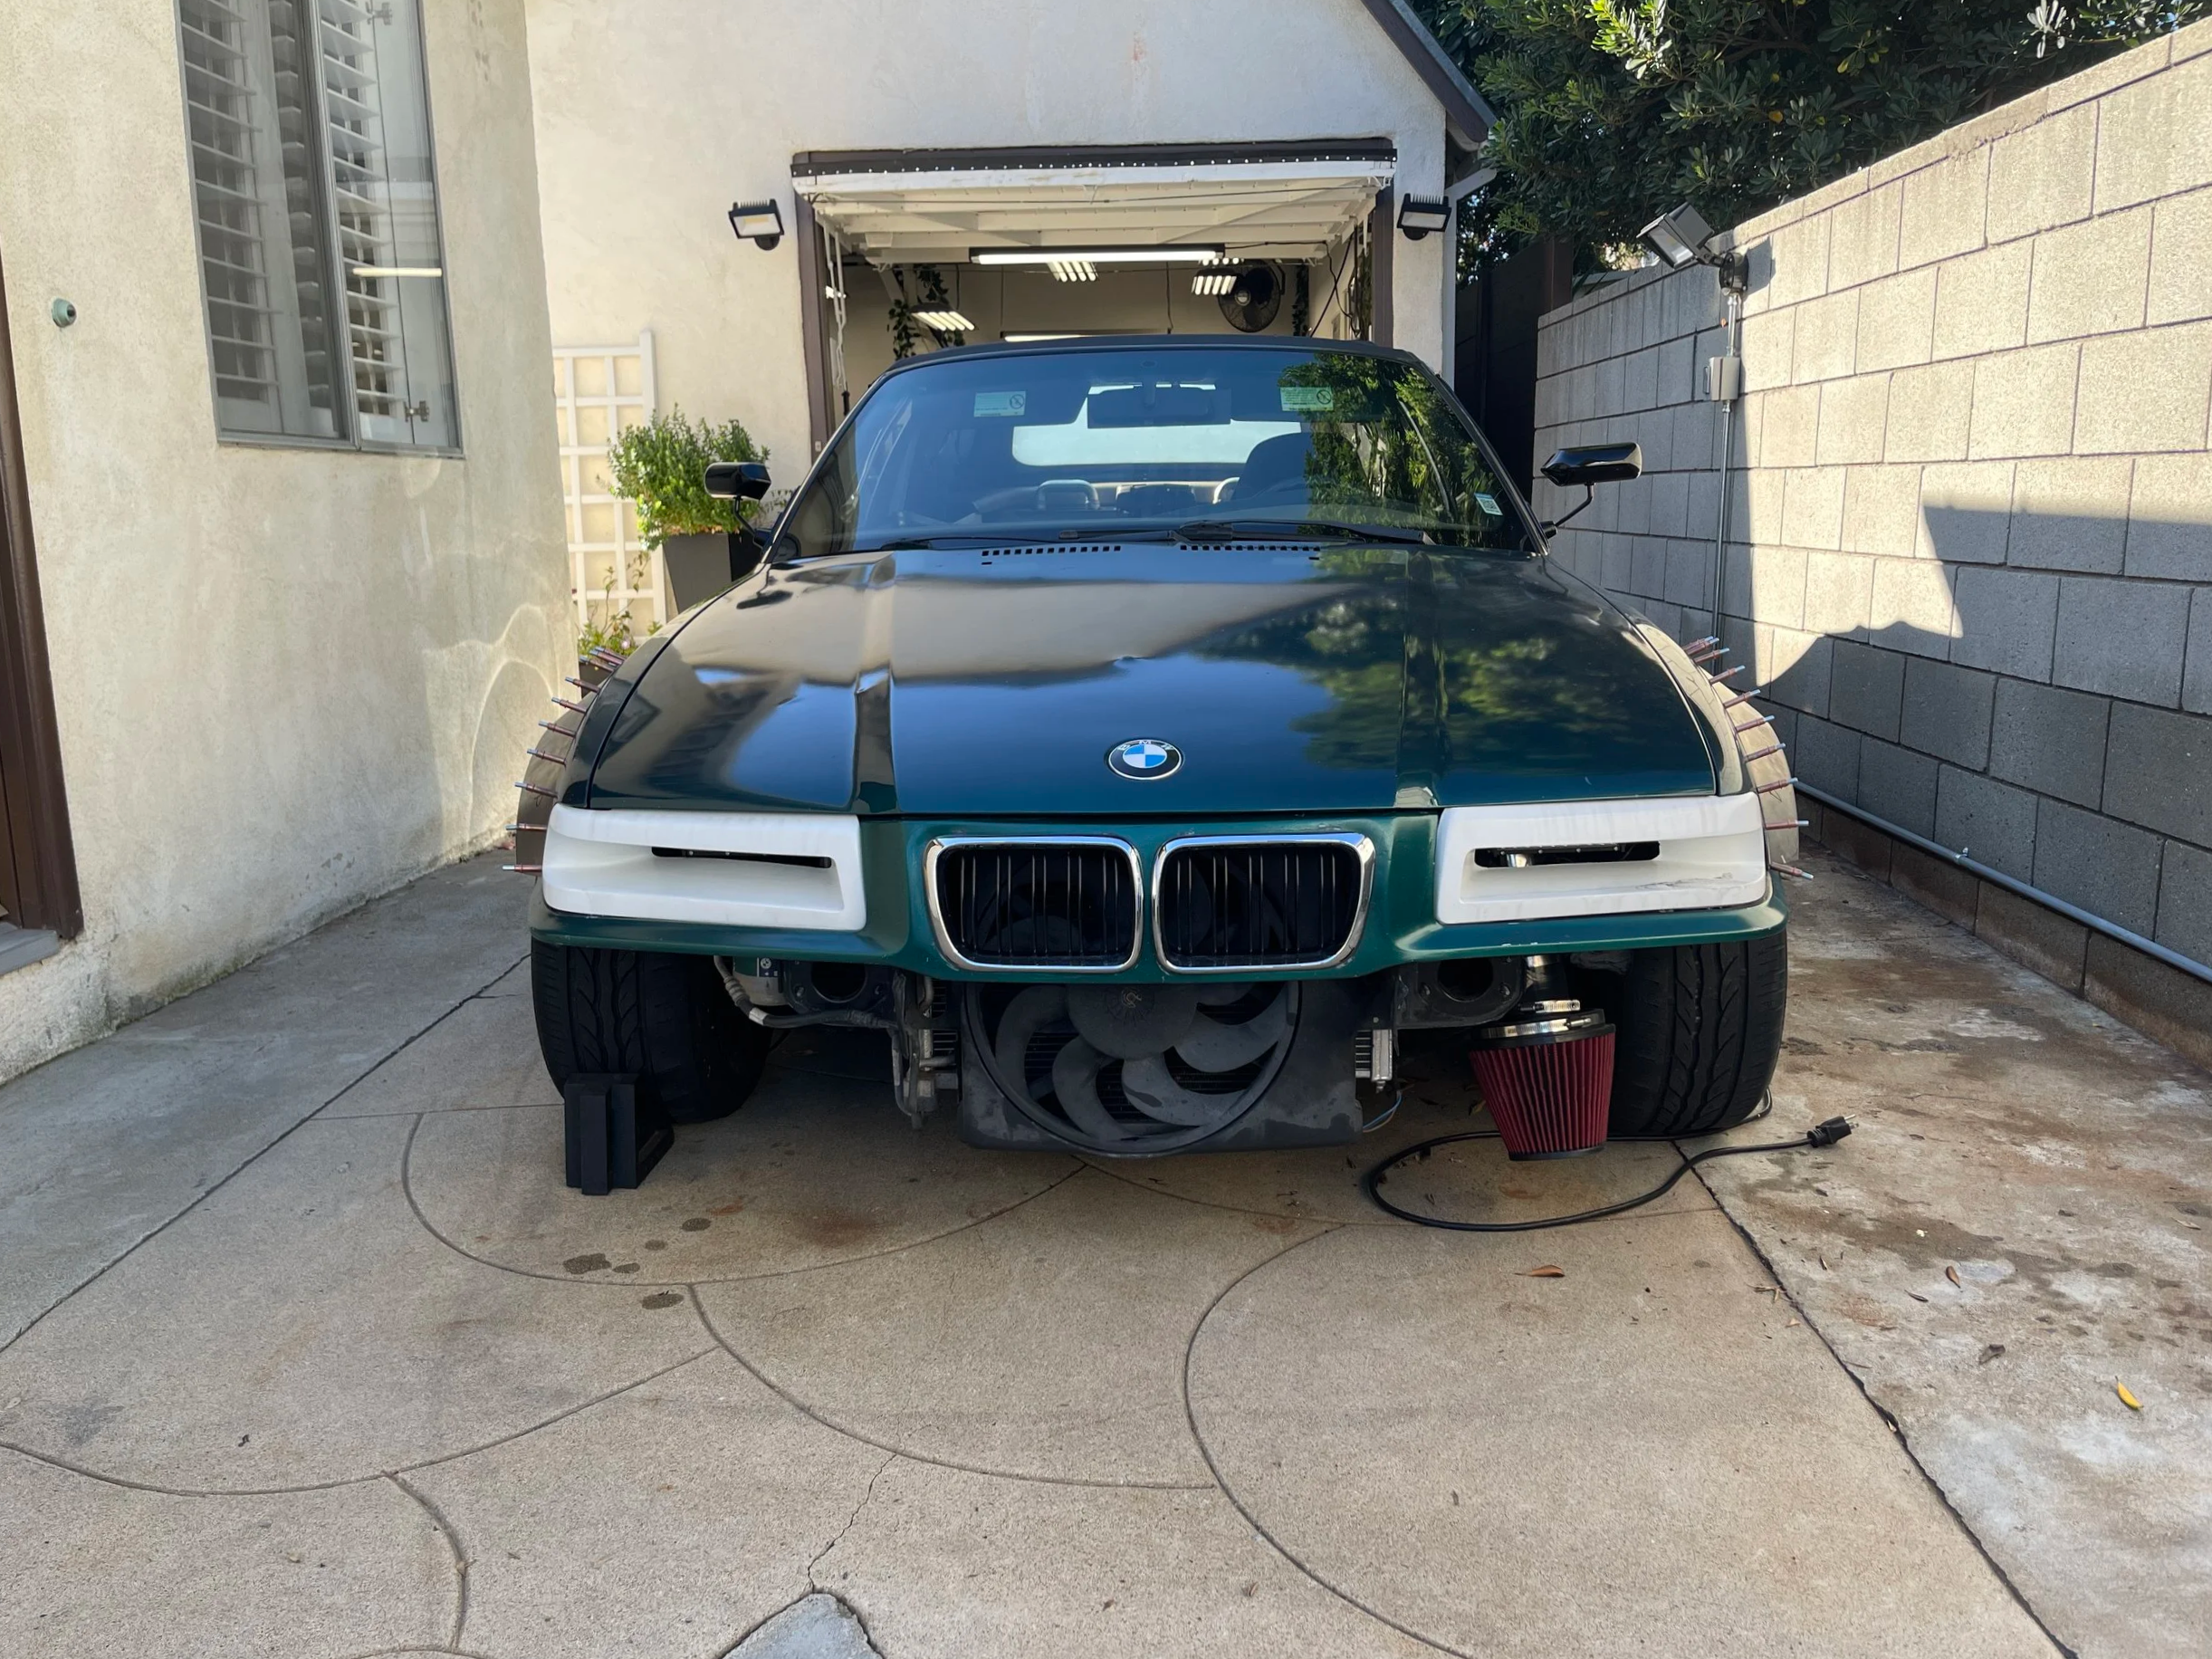
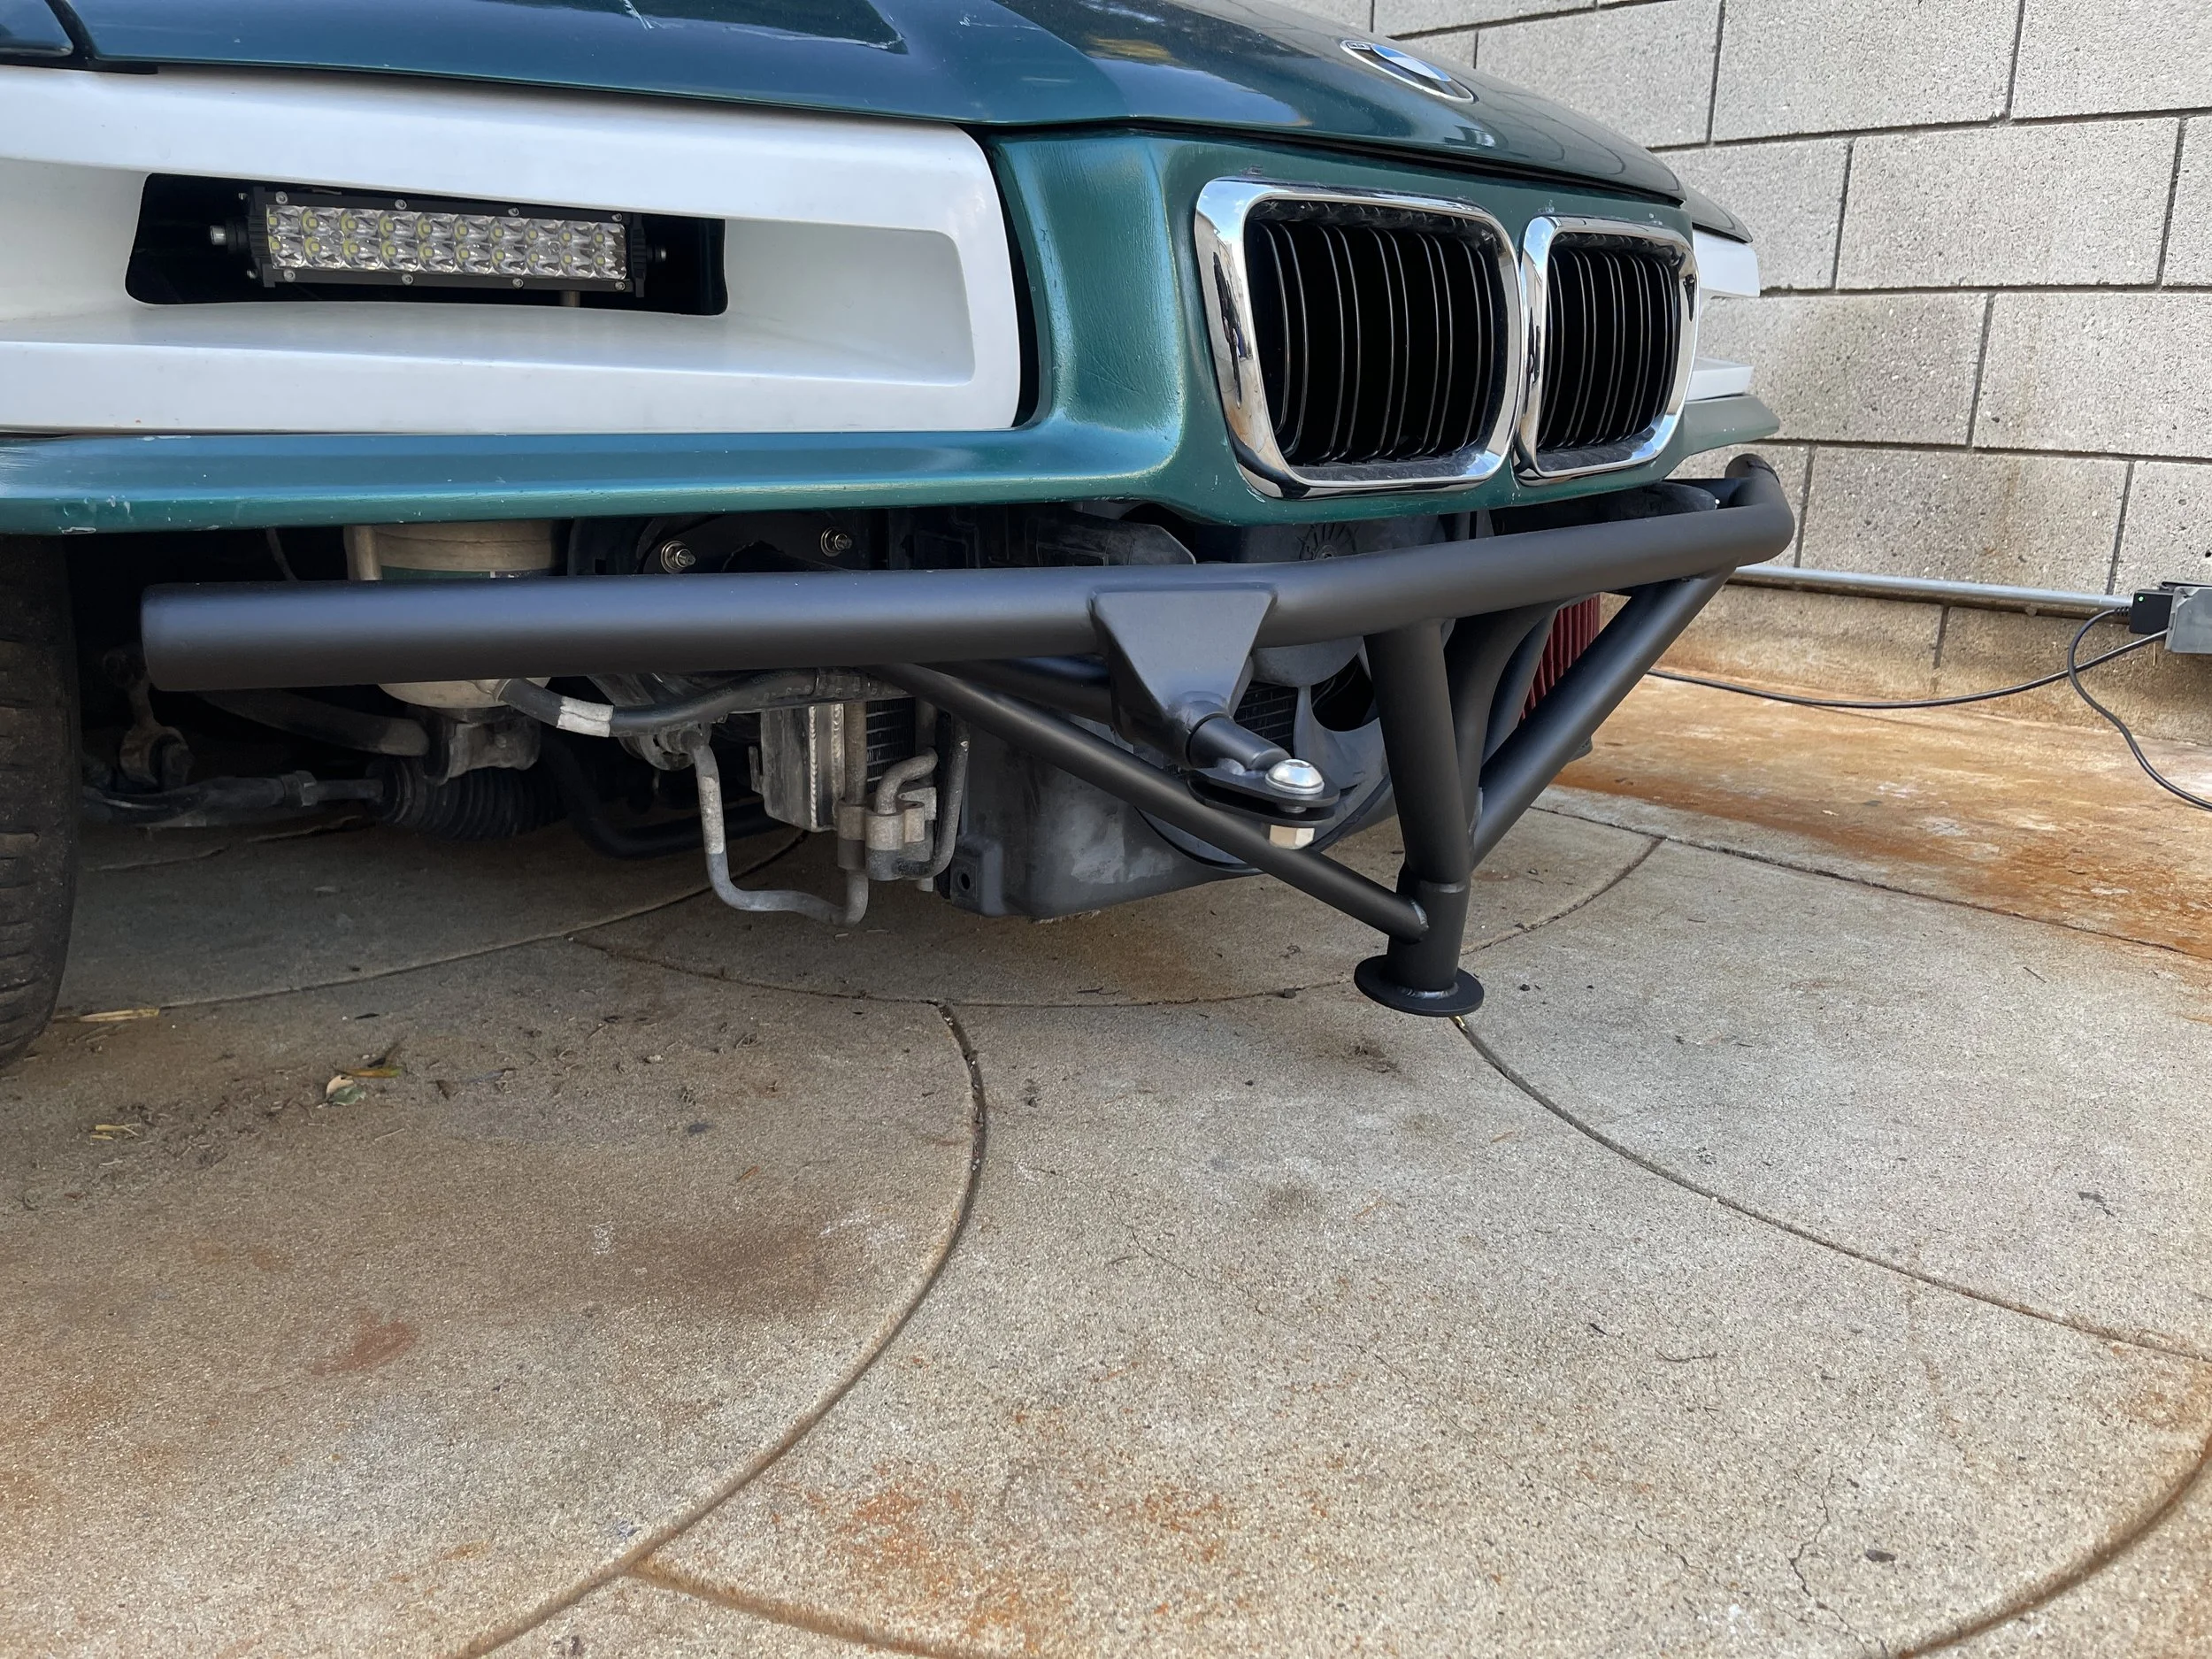
I built out the front bash bar with integrated jack point. There will be mounting provisions to hold the front bumper - mounted with quik-latches, as well as a tow point that serves as a license plate mount when not in use.
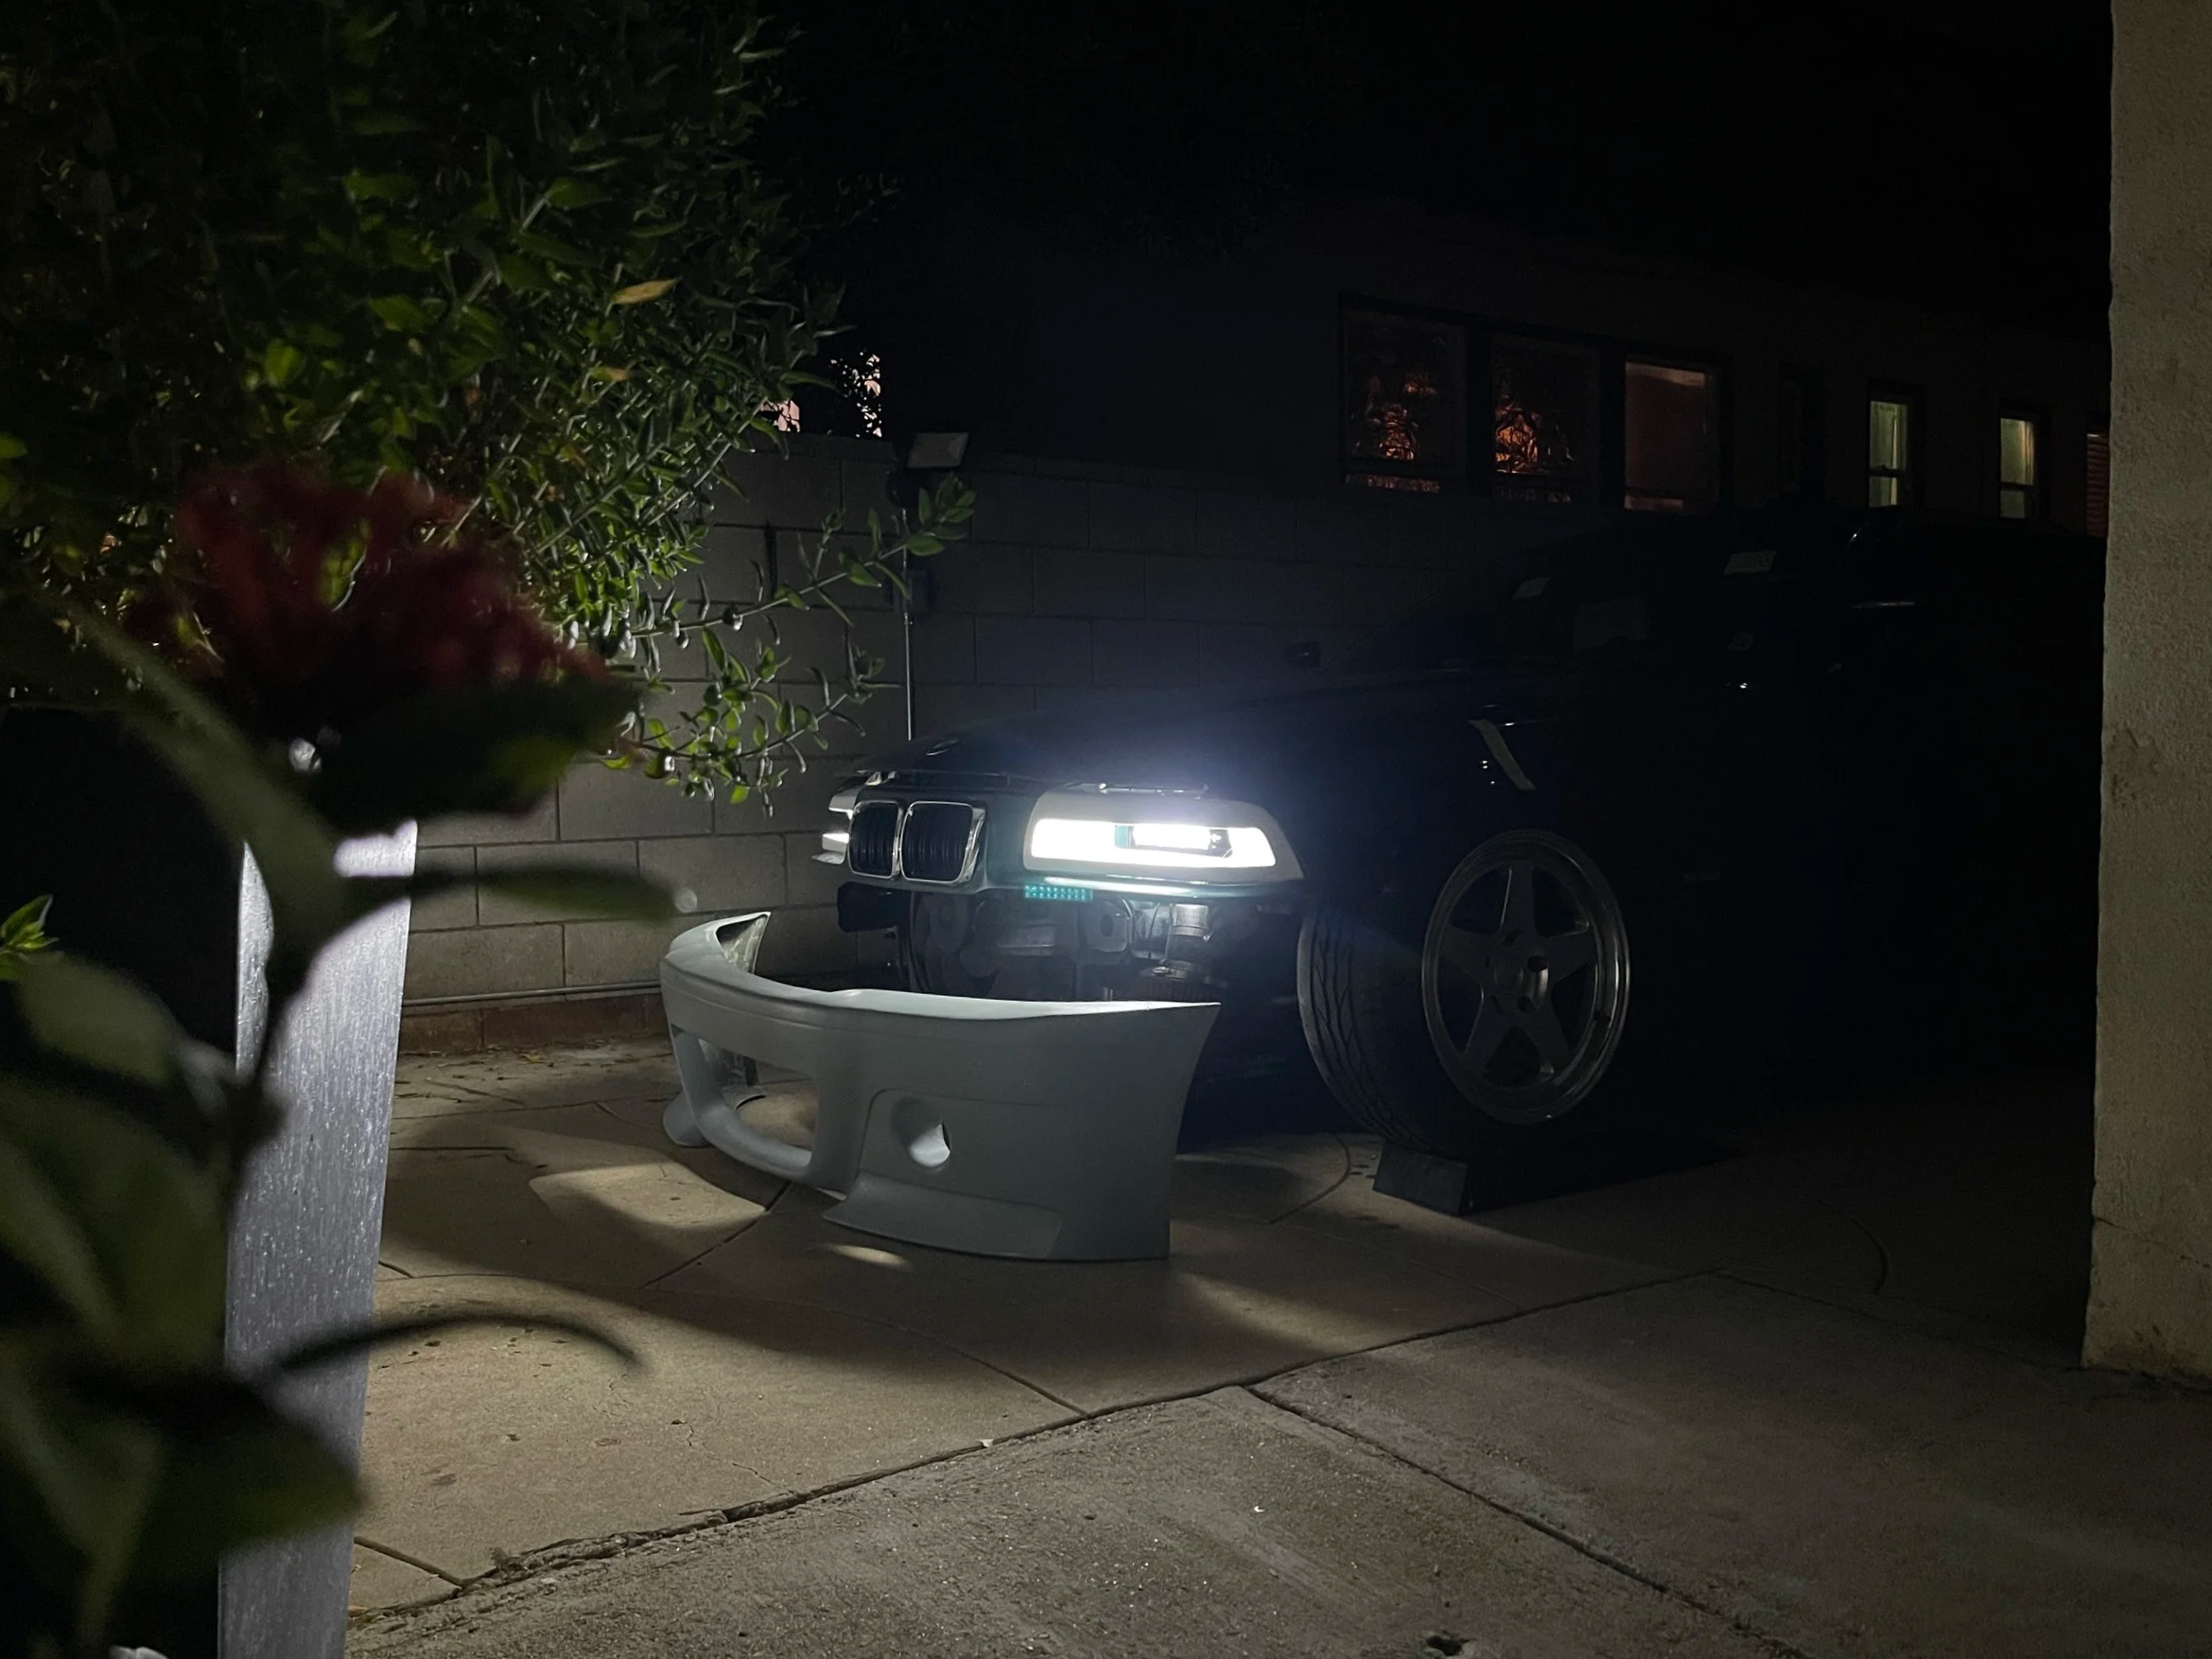
Mounted underneath the OEM core support are brackets I designed and built to hang LED light bars that were supplied. They sit just behind the headlight bezel and ‘float’, centered within the opening.

The front bash bar is bolted up here with the front bumper marked and cut, it mounts with ease centered up front.

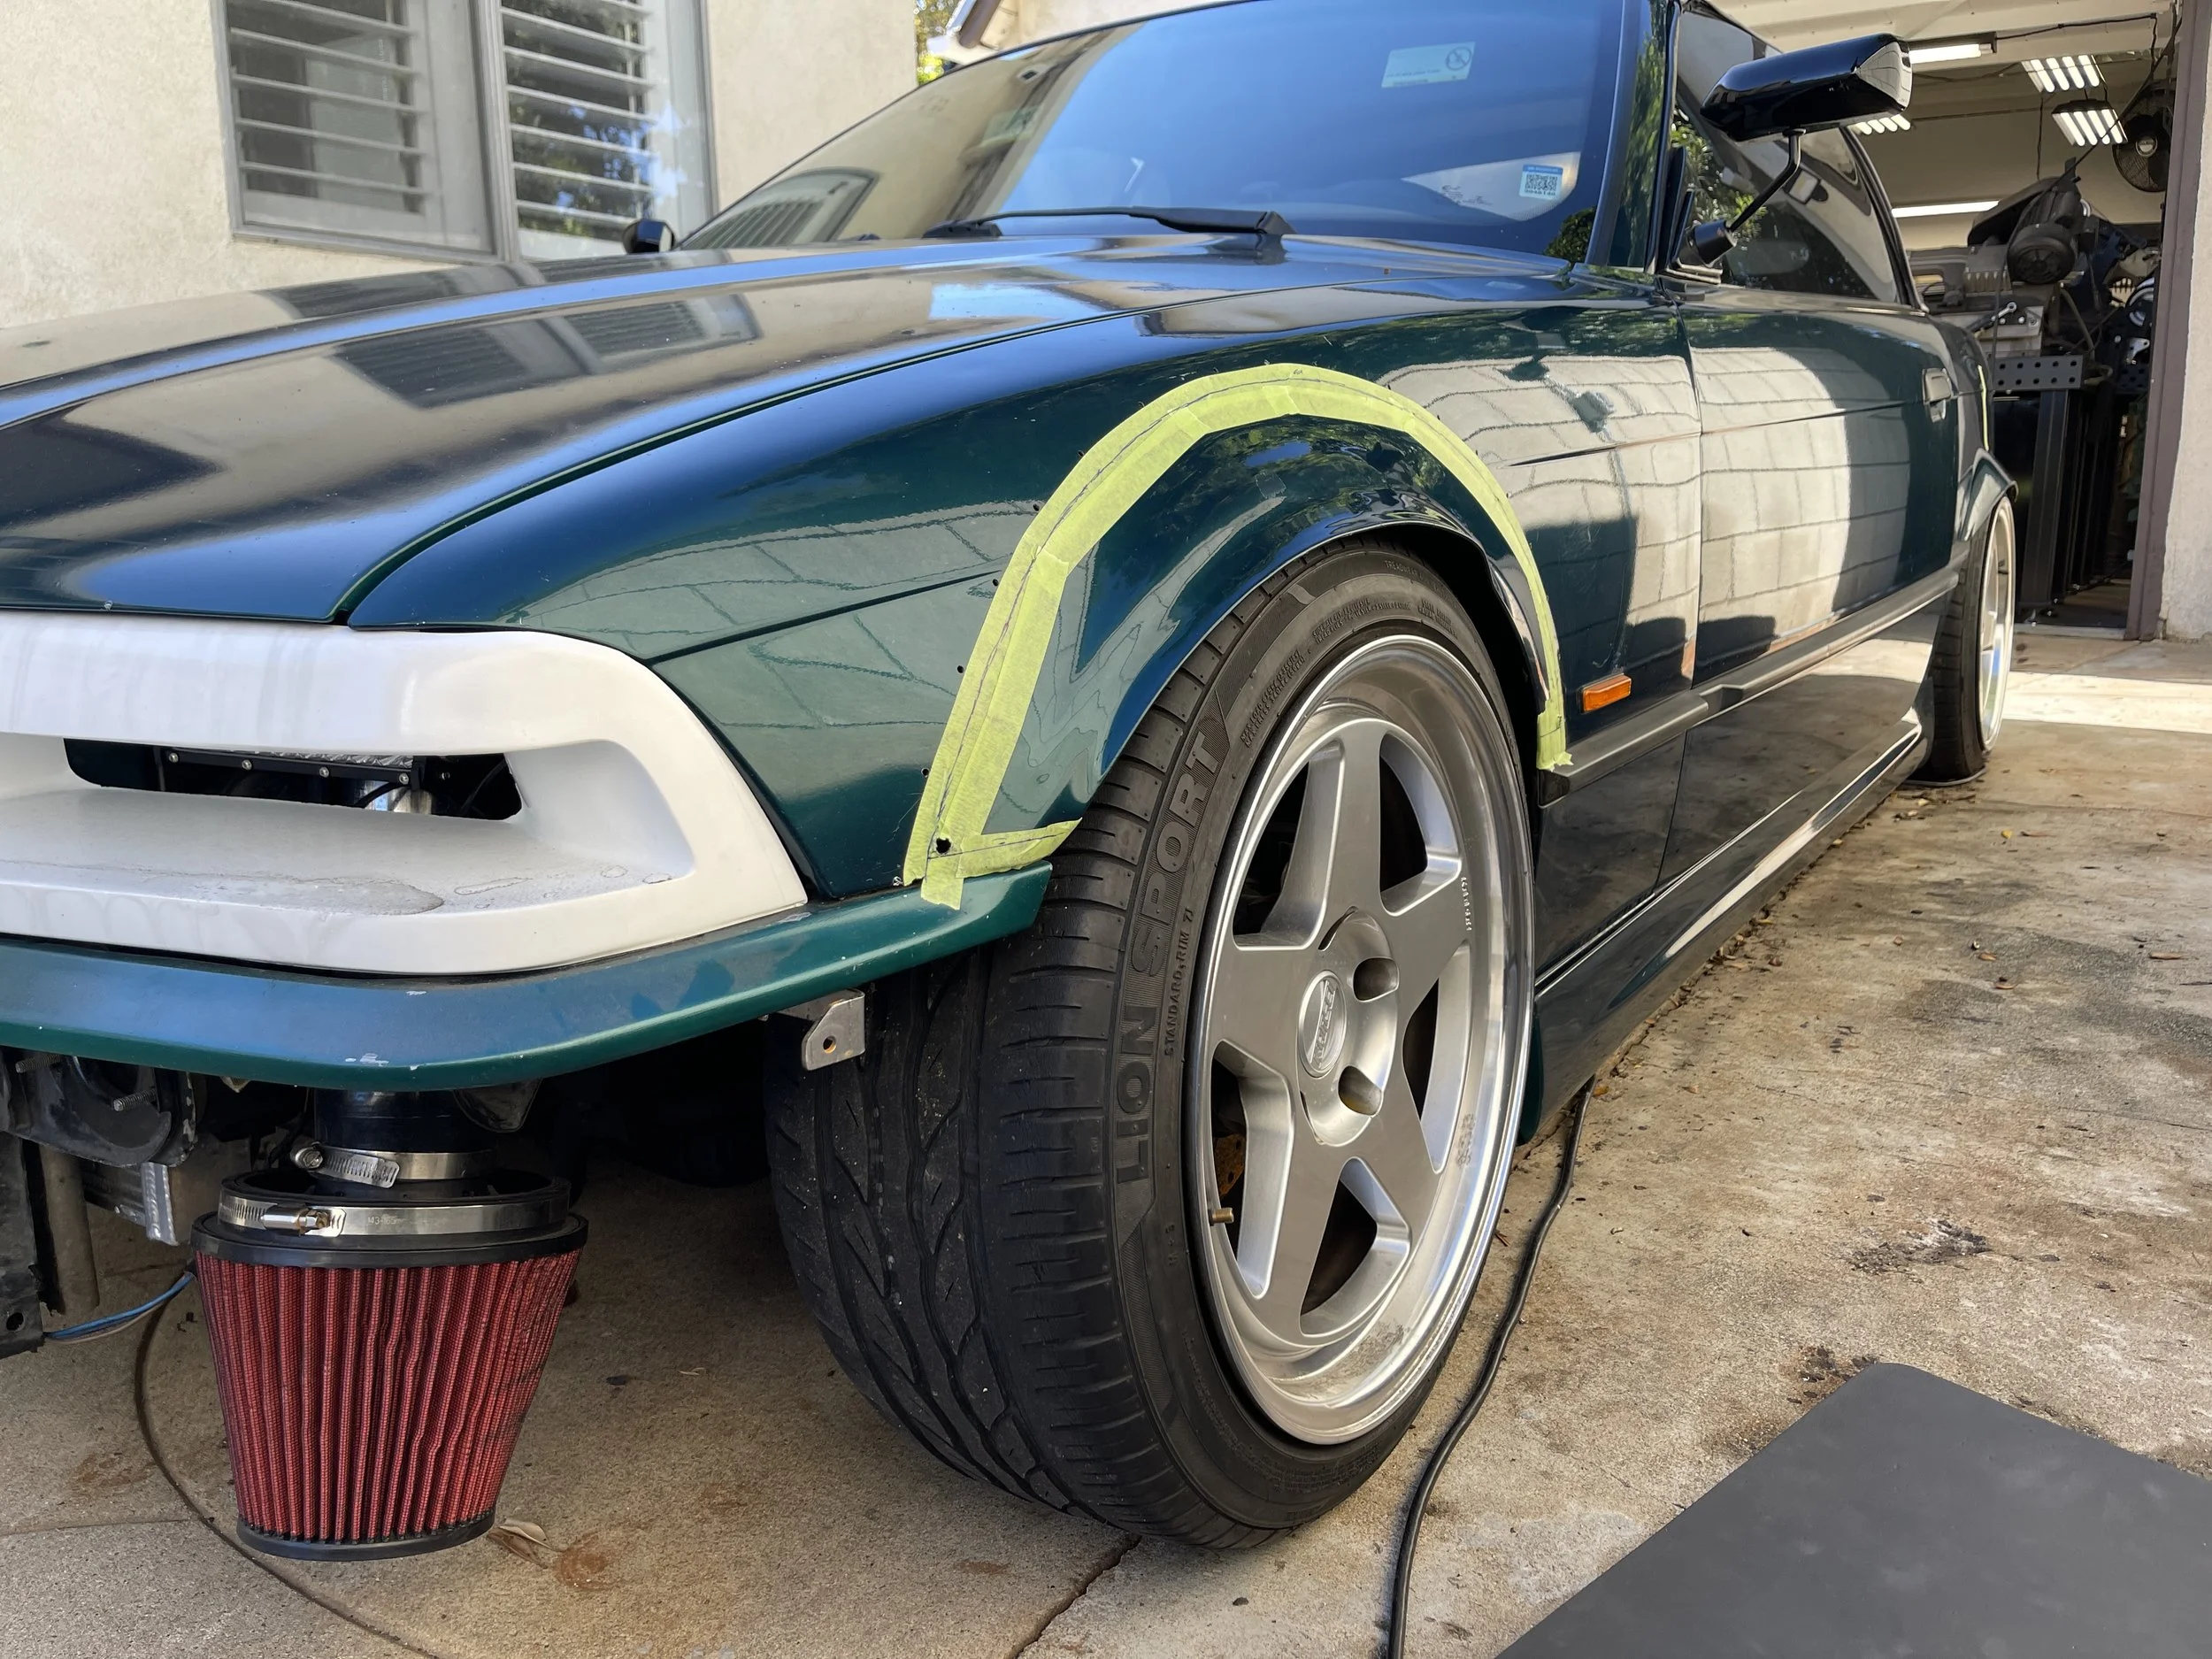
Now beings the process of fitting the new fenders around each corner. I started off by first leveling out the car, squaring everything up and mounting each fender with clecos. Trimming away at the fat, I ended up with an opened up wheel arch that would soon be covered by the new fenders.
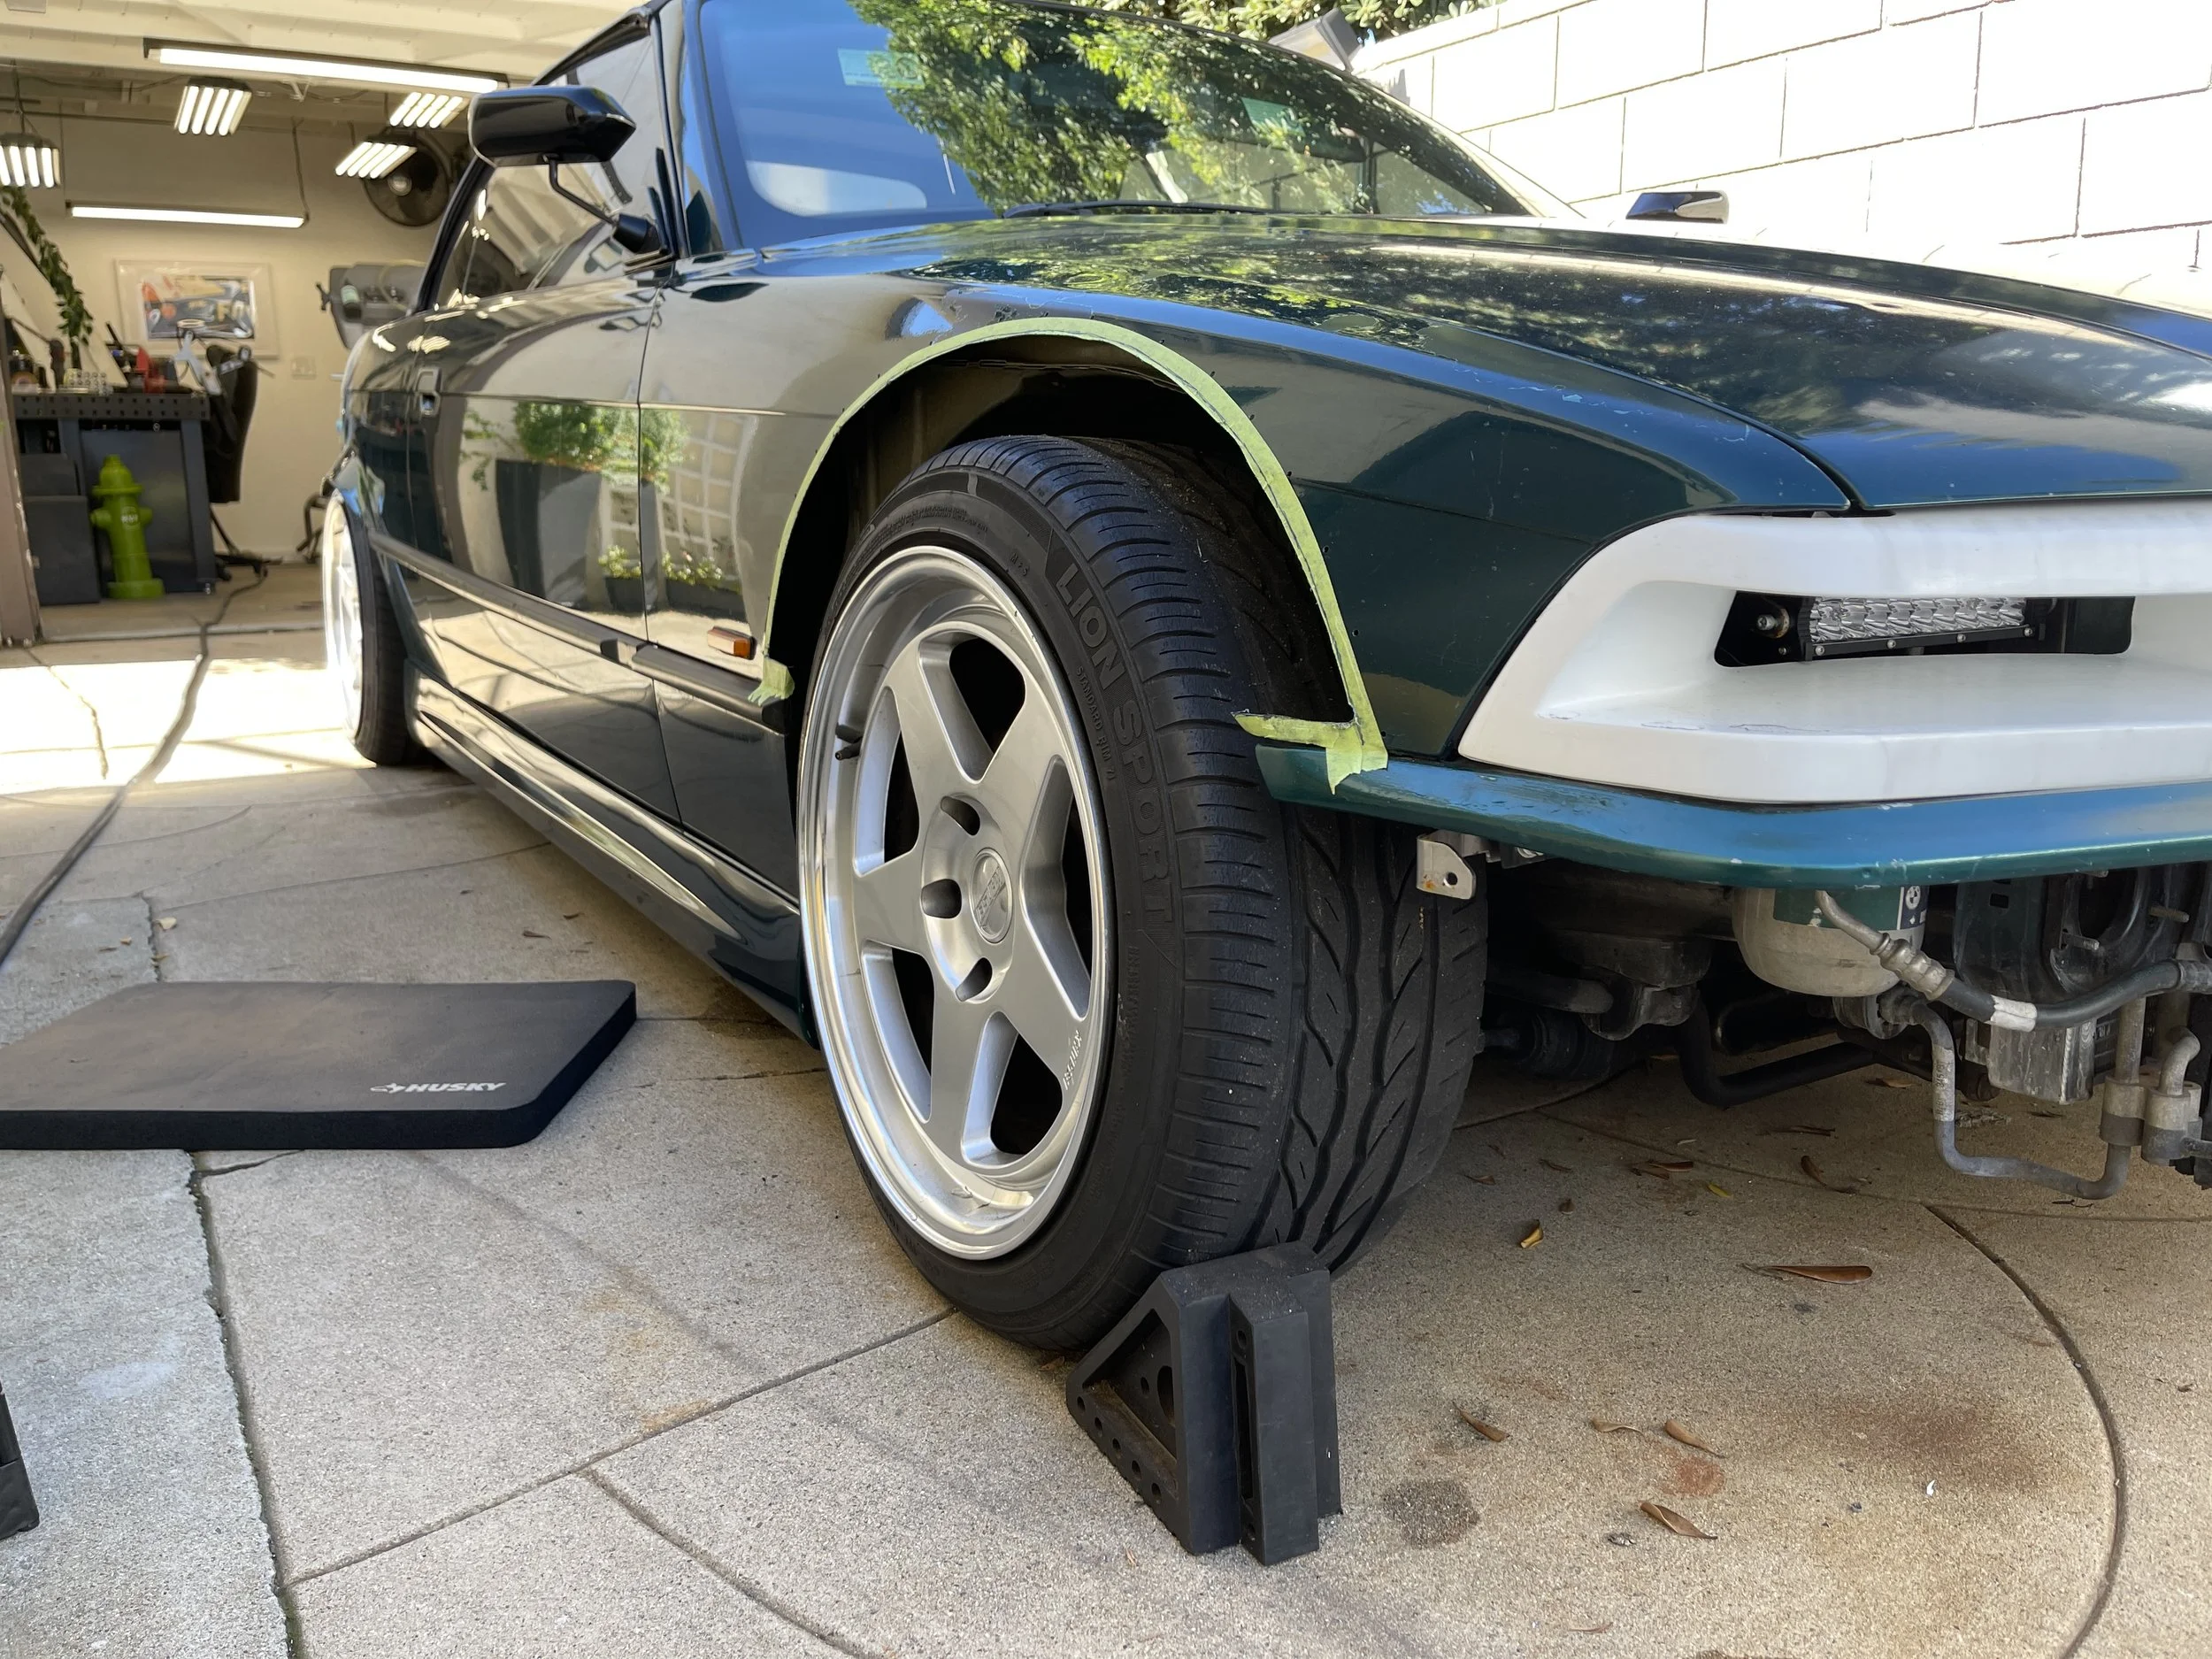
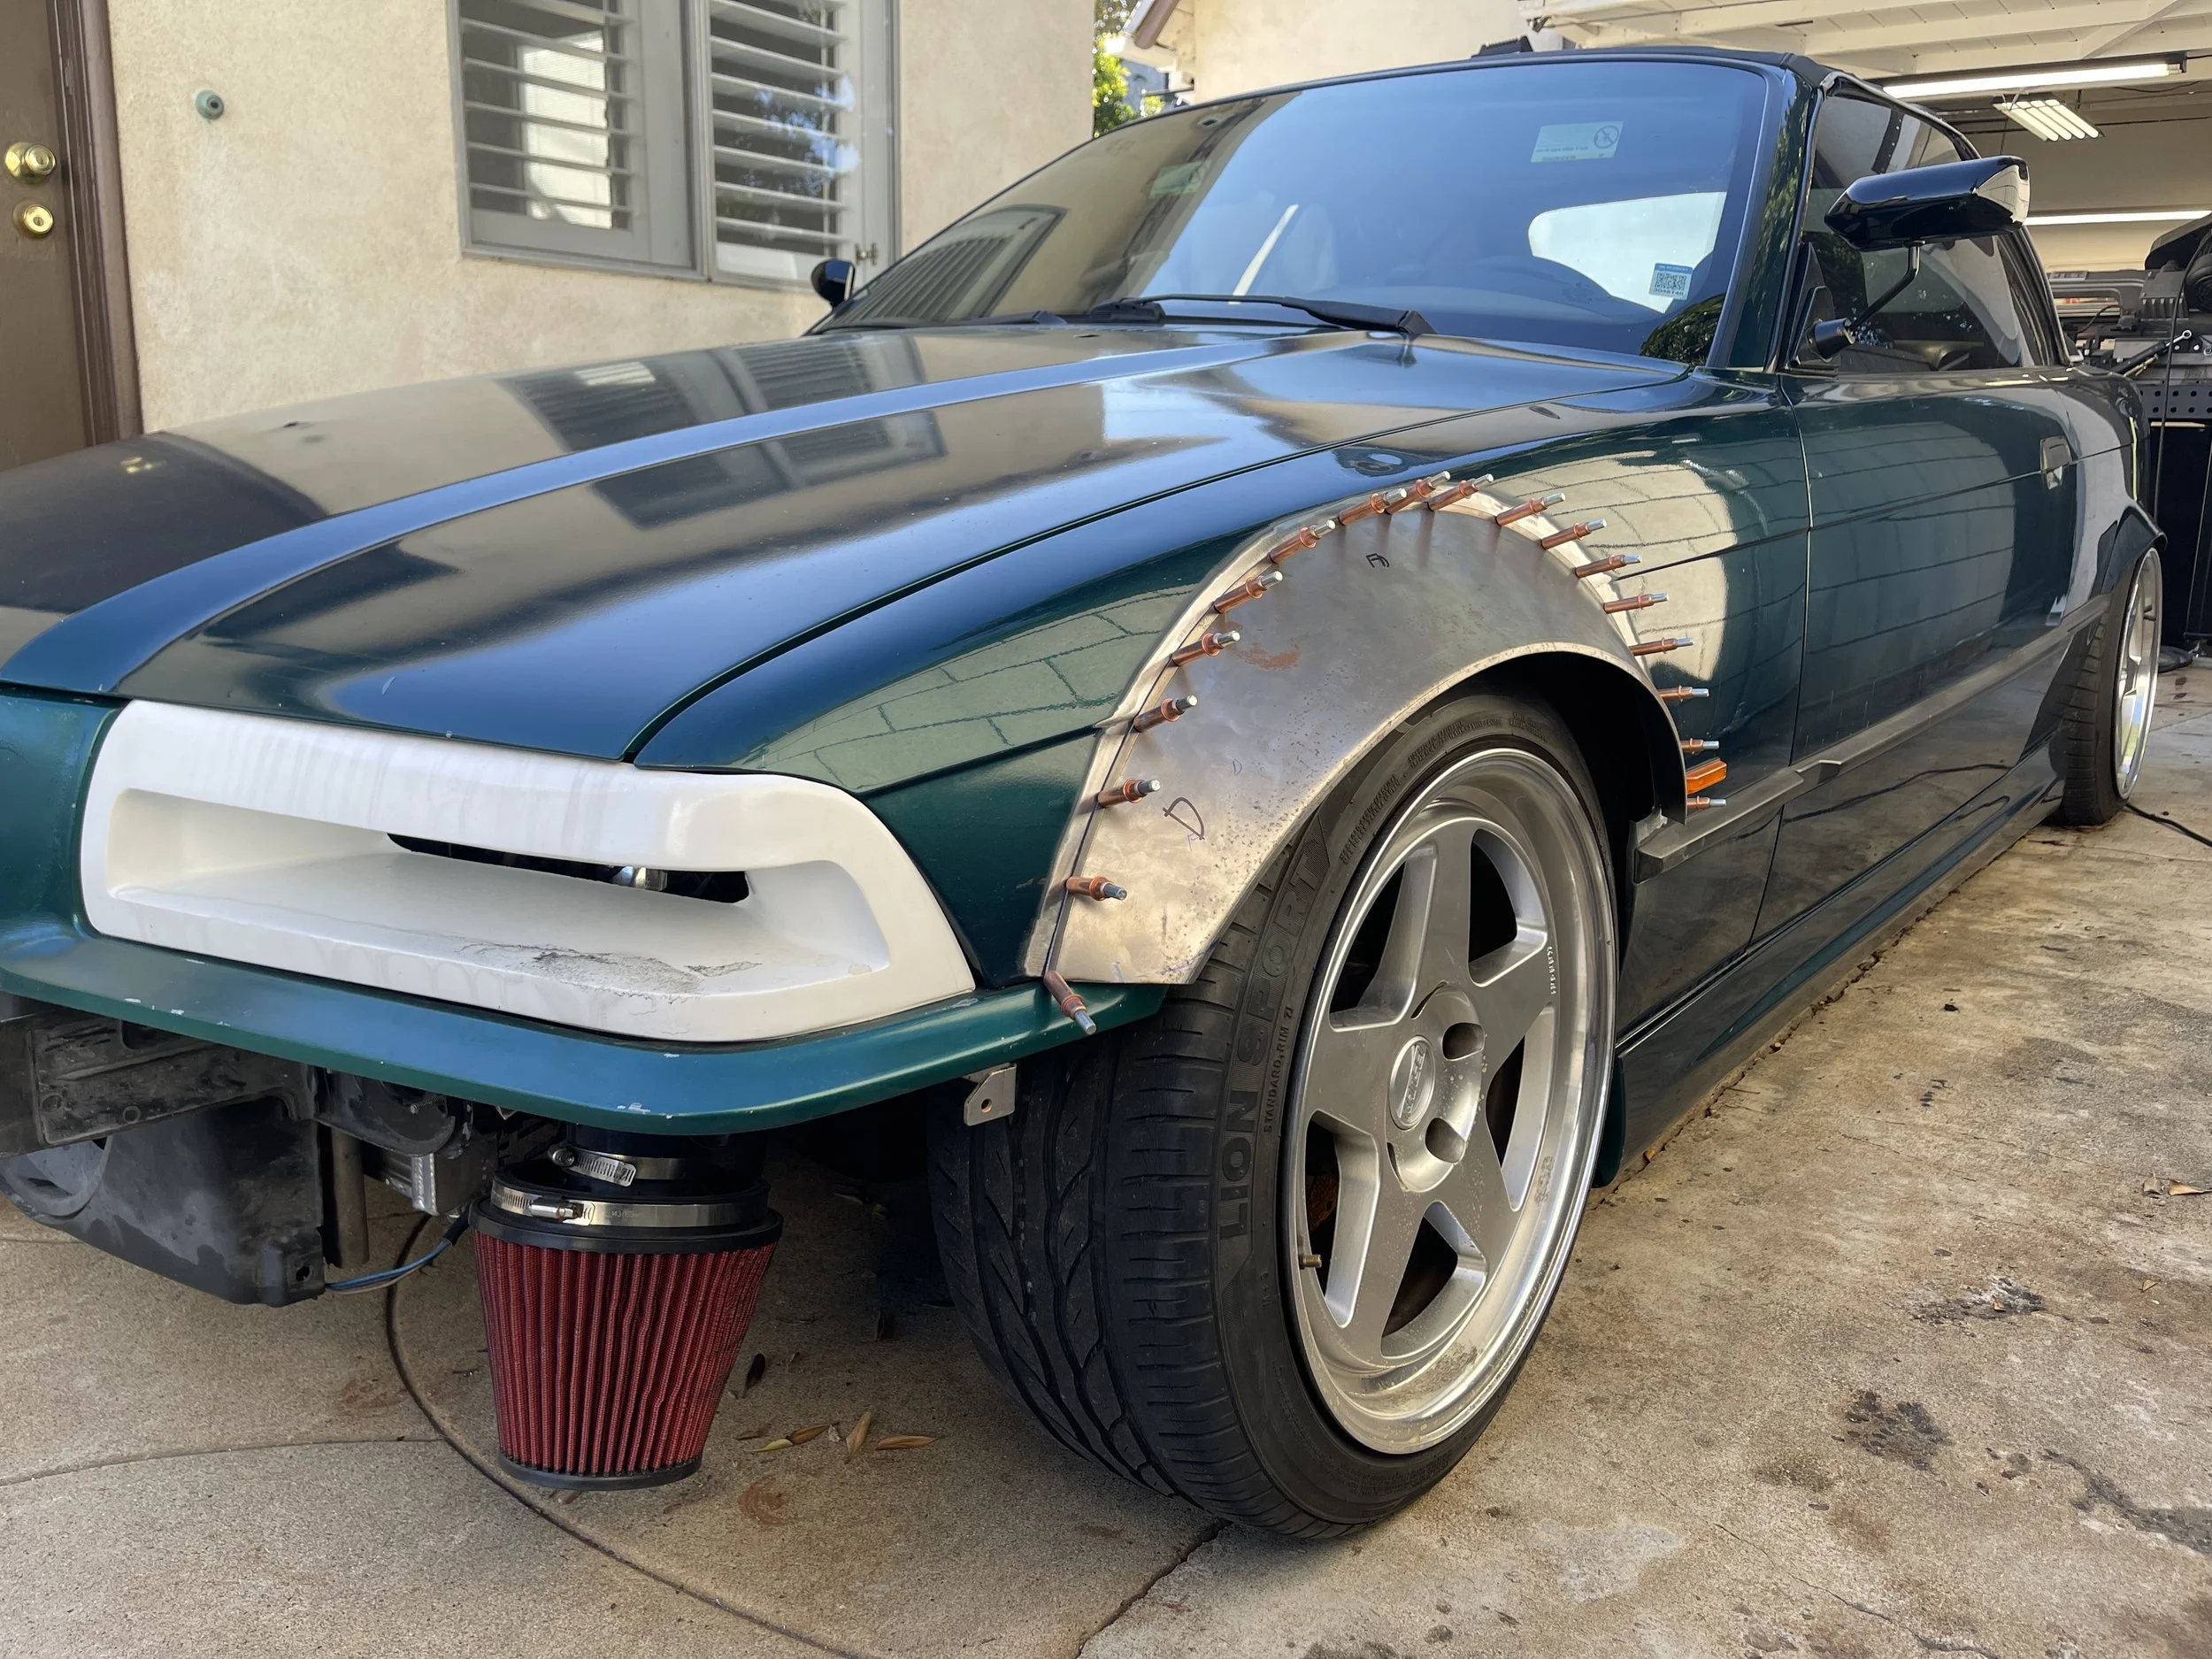
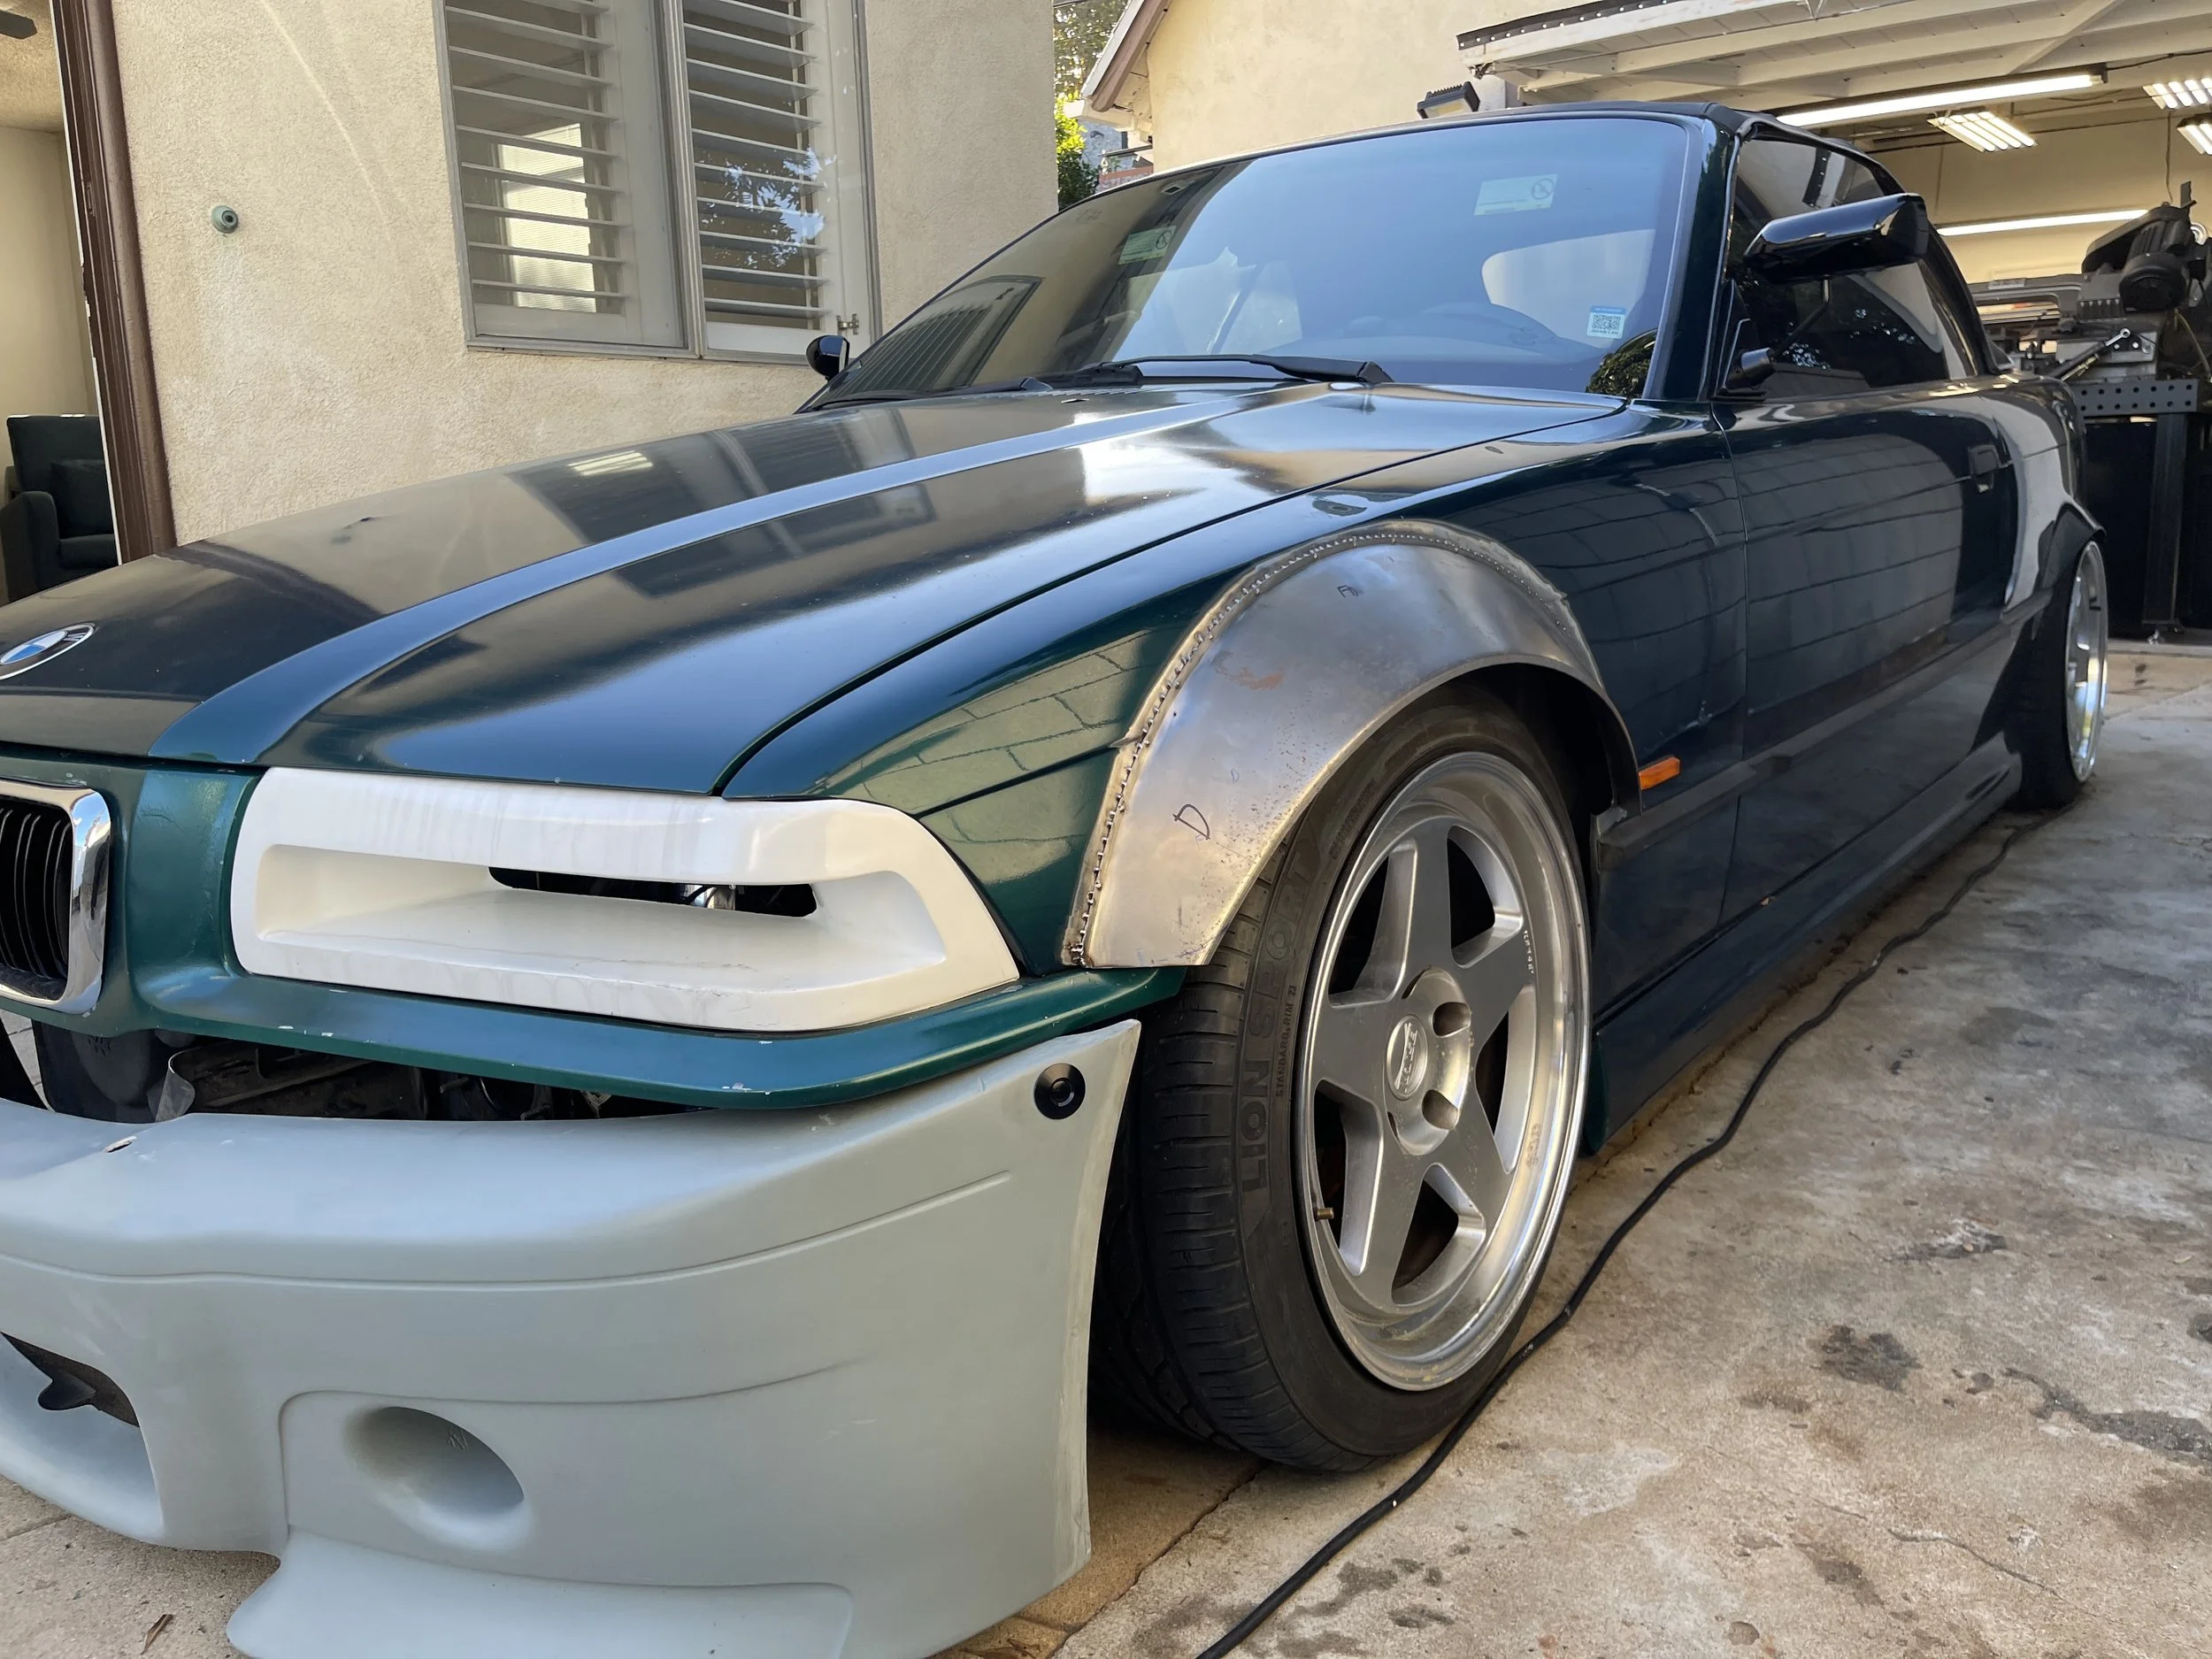
With the fenders cleco’d on, I could methodically remove each one, replacing them with a small tack weld. Hammering and dolling, cooling with air and a wet rag along the way. The idea was to keep warping down to a minimum(which worked), and reduce additional body work later on.

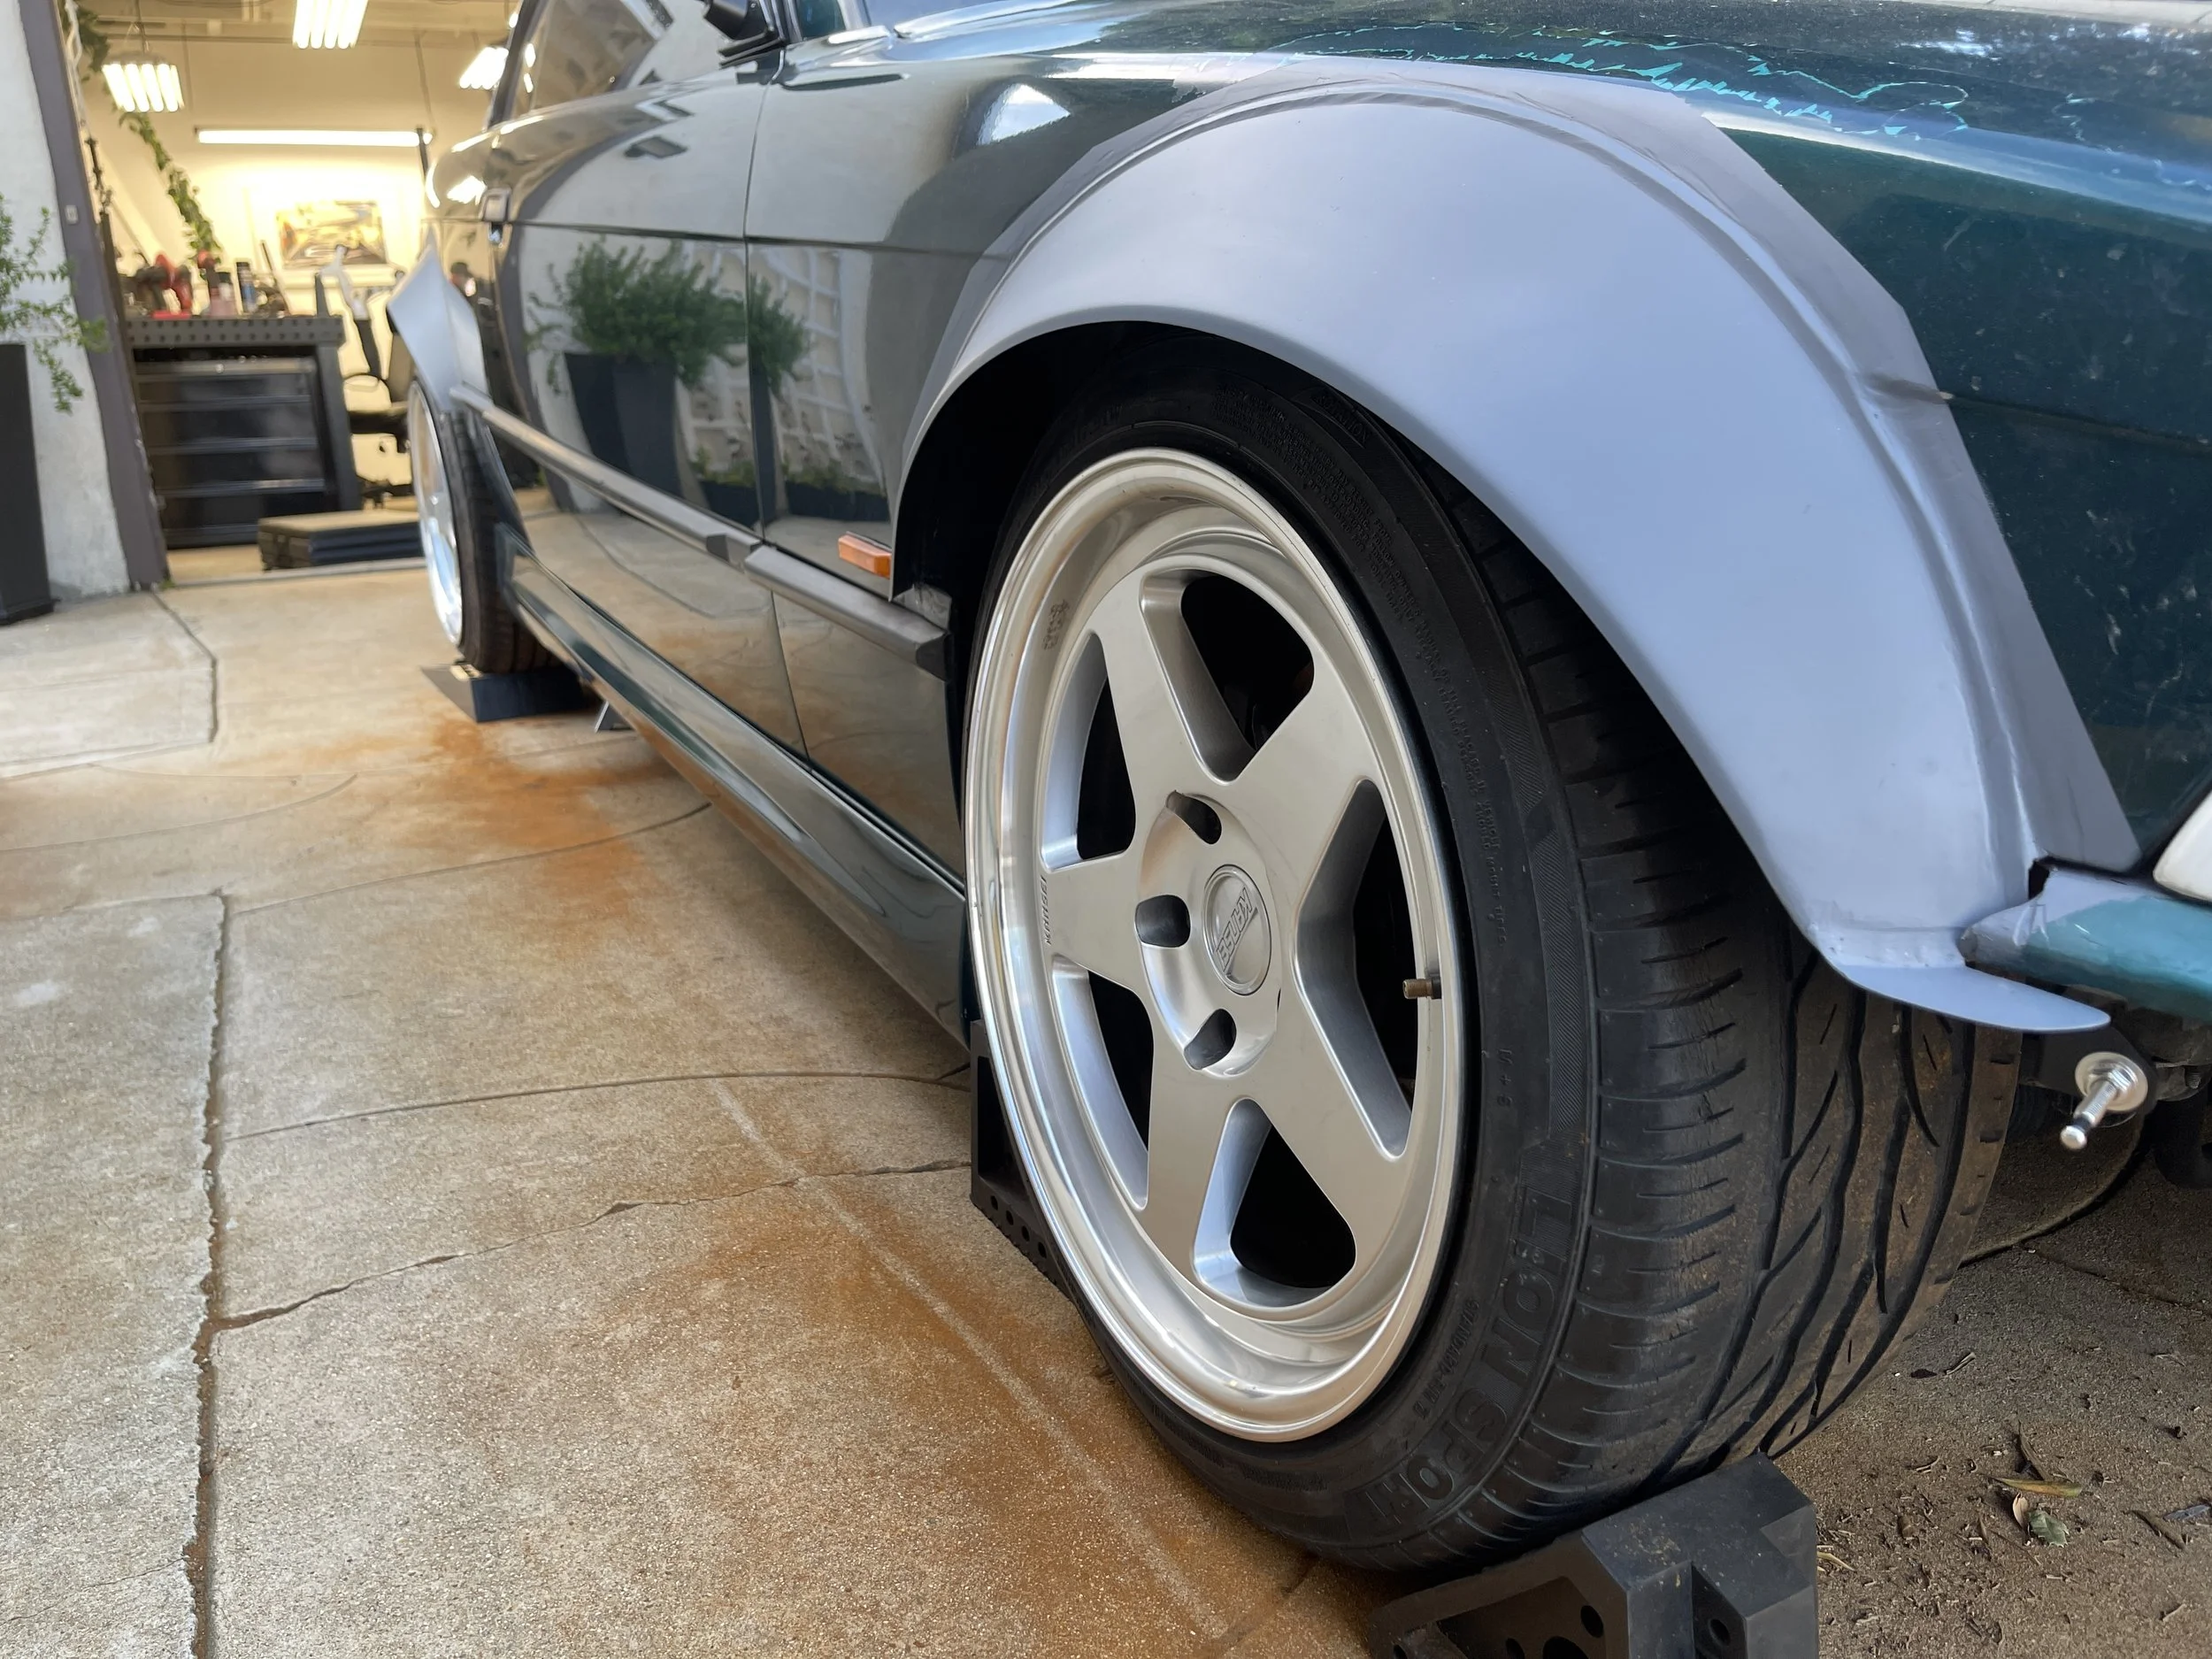
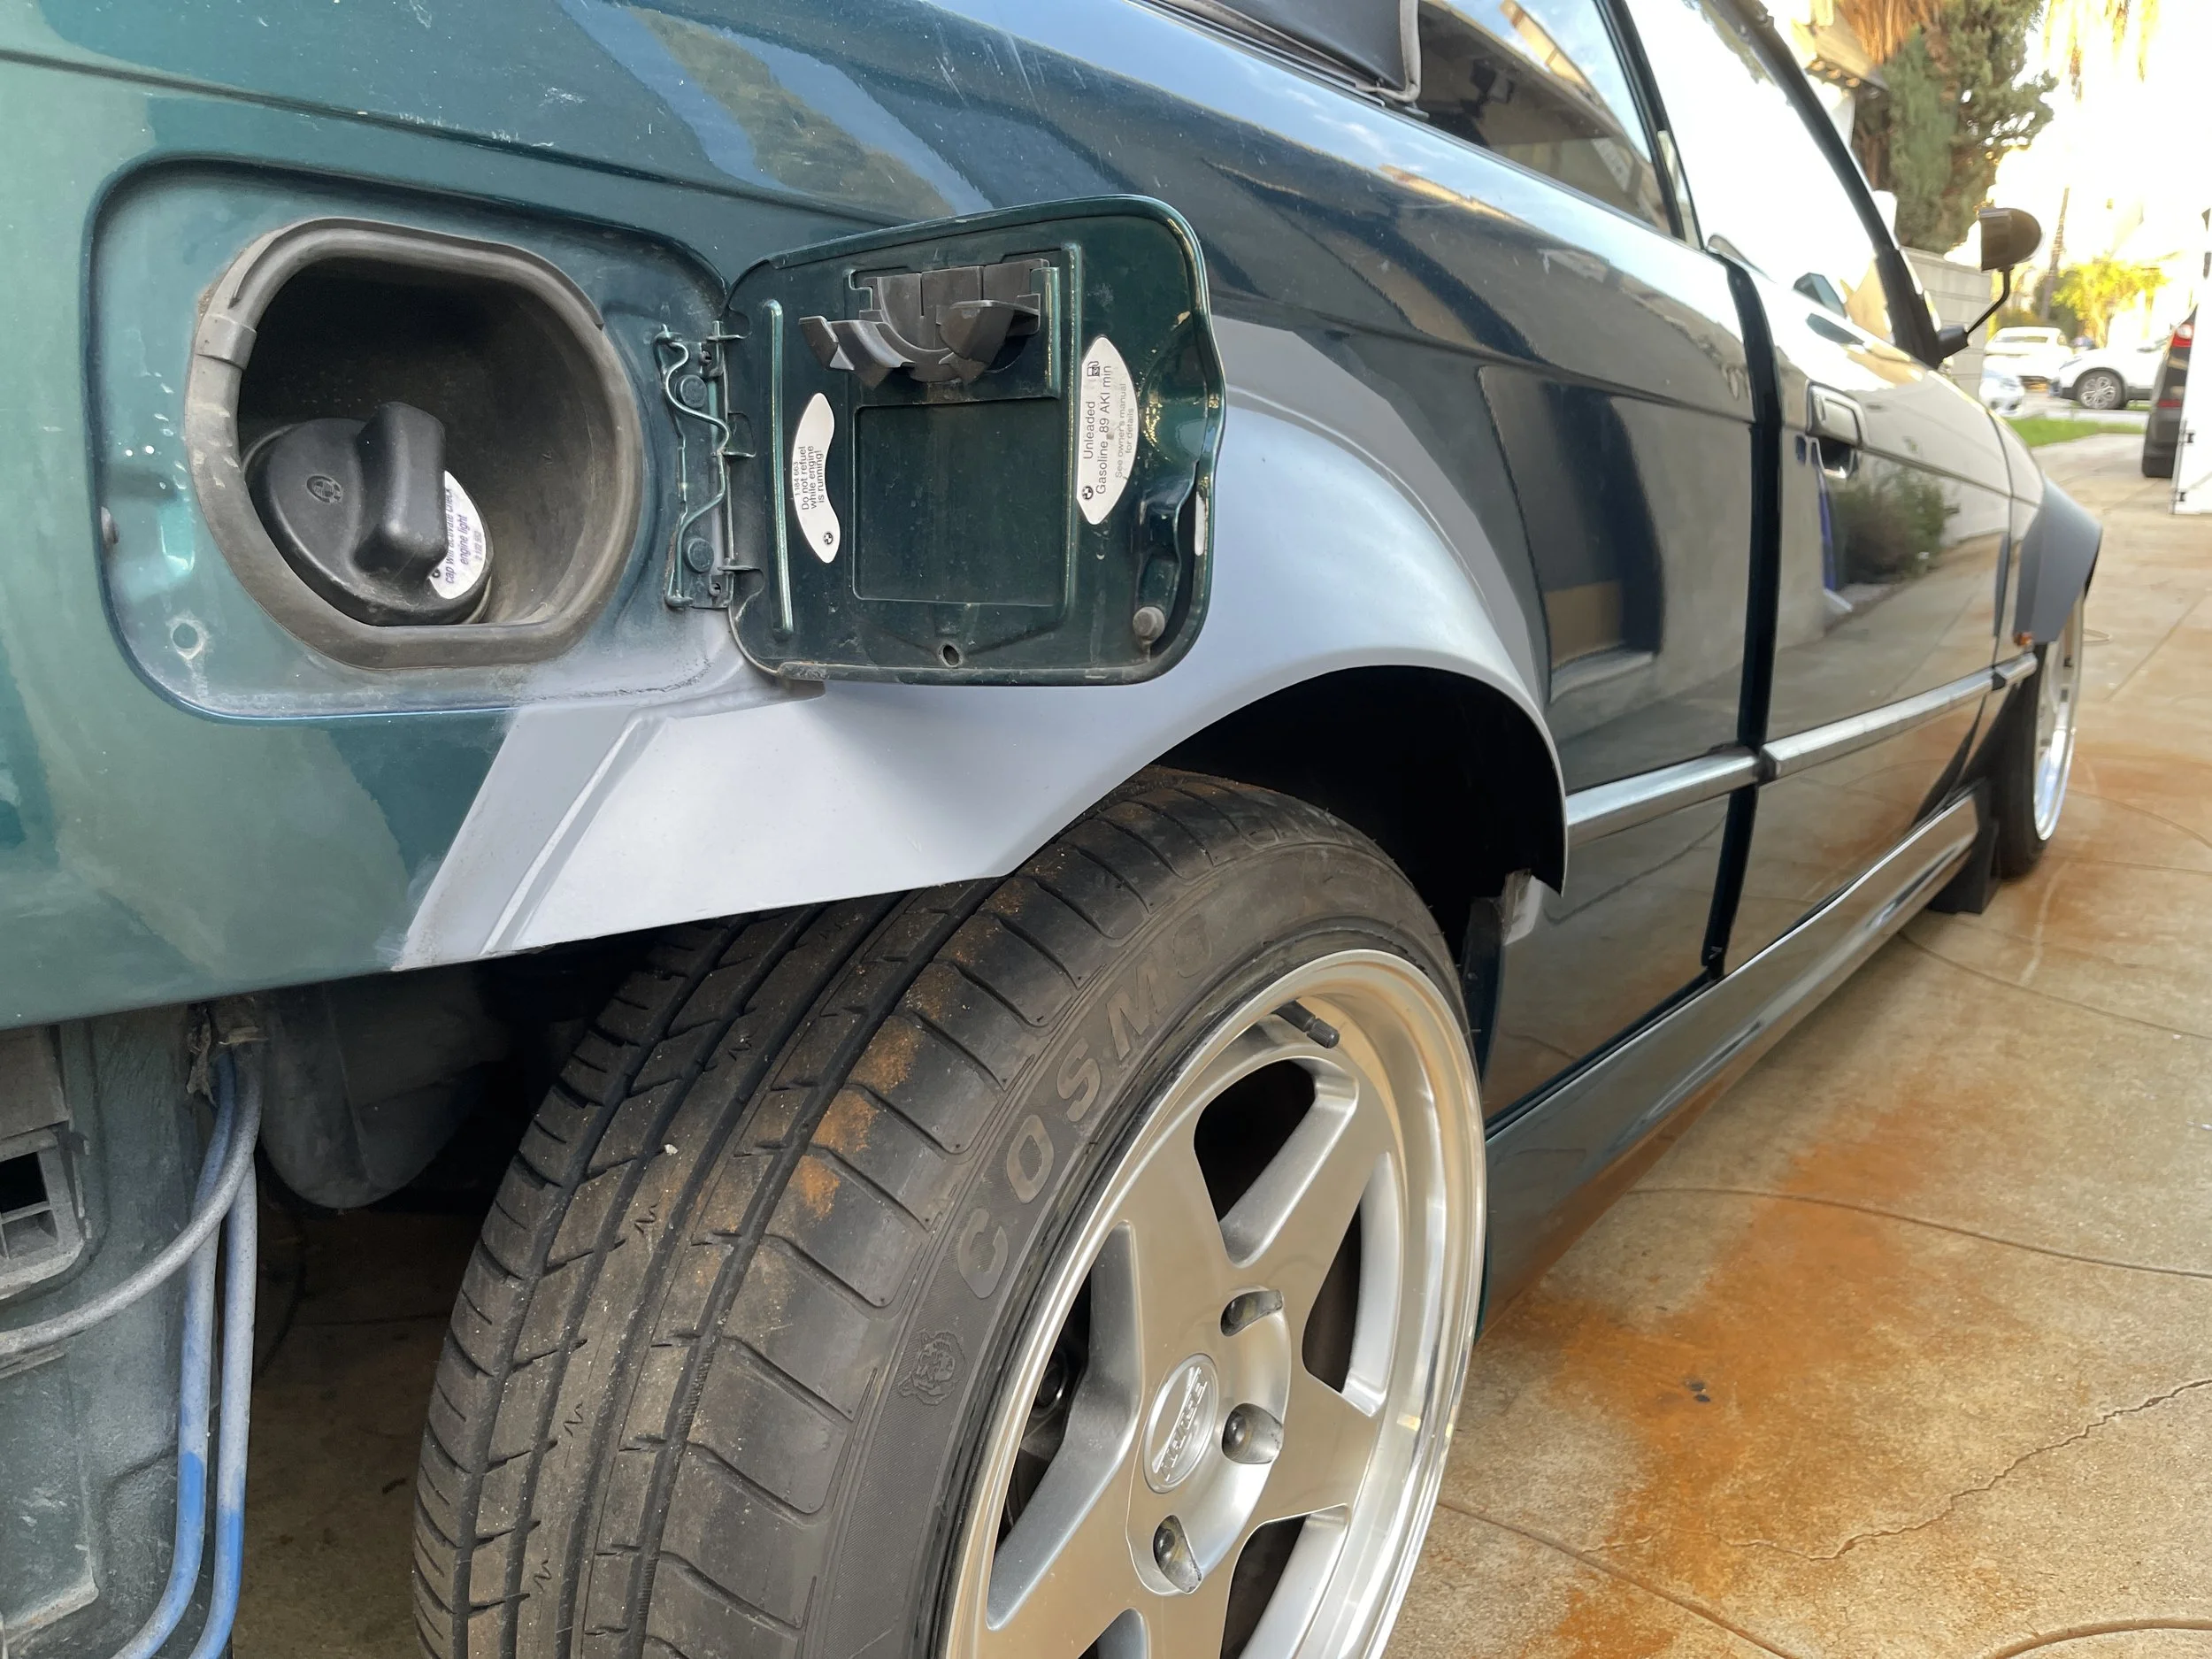
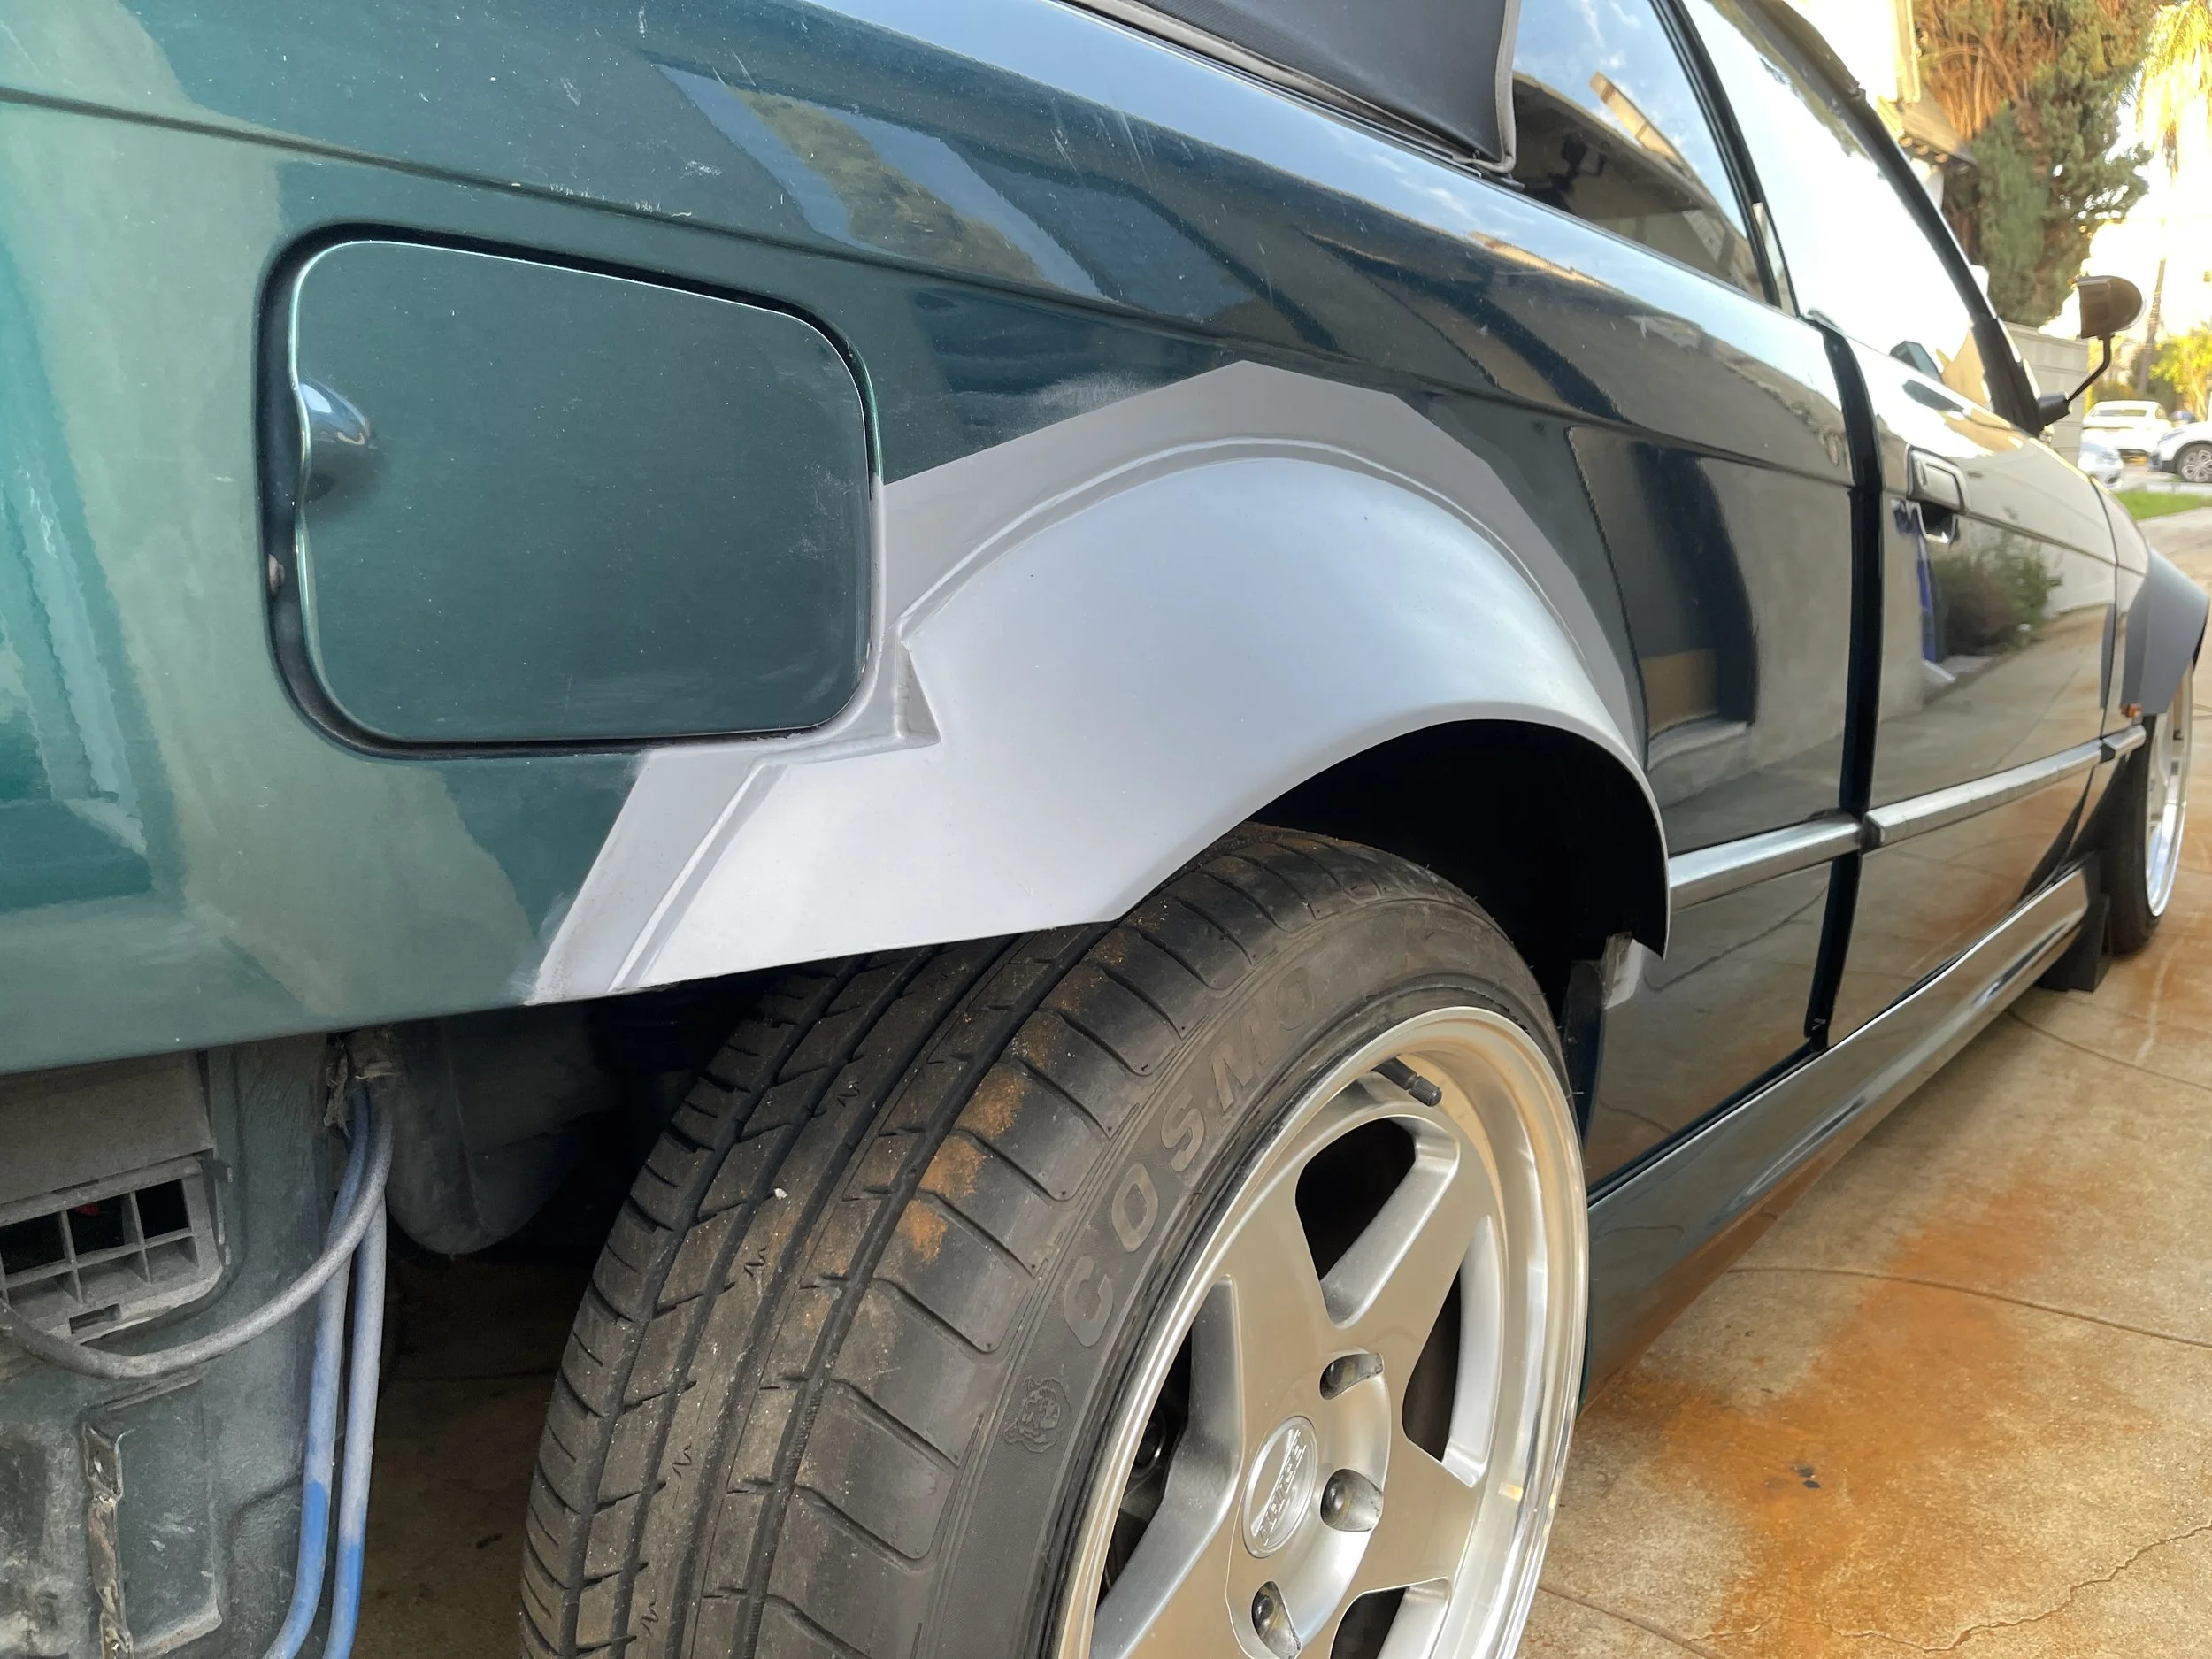
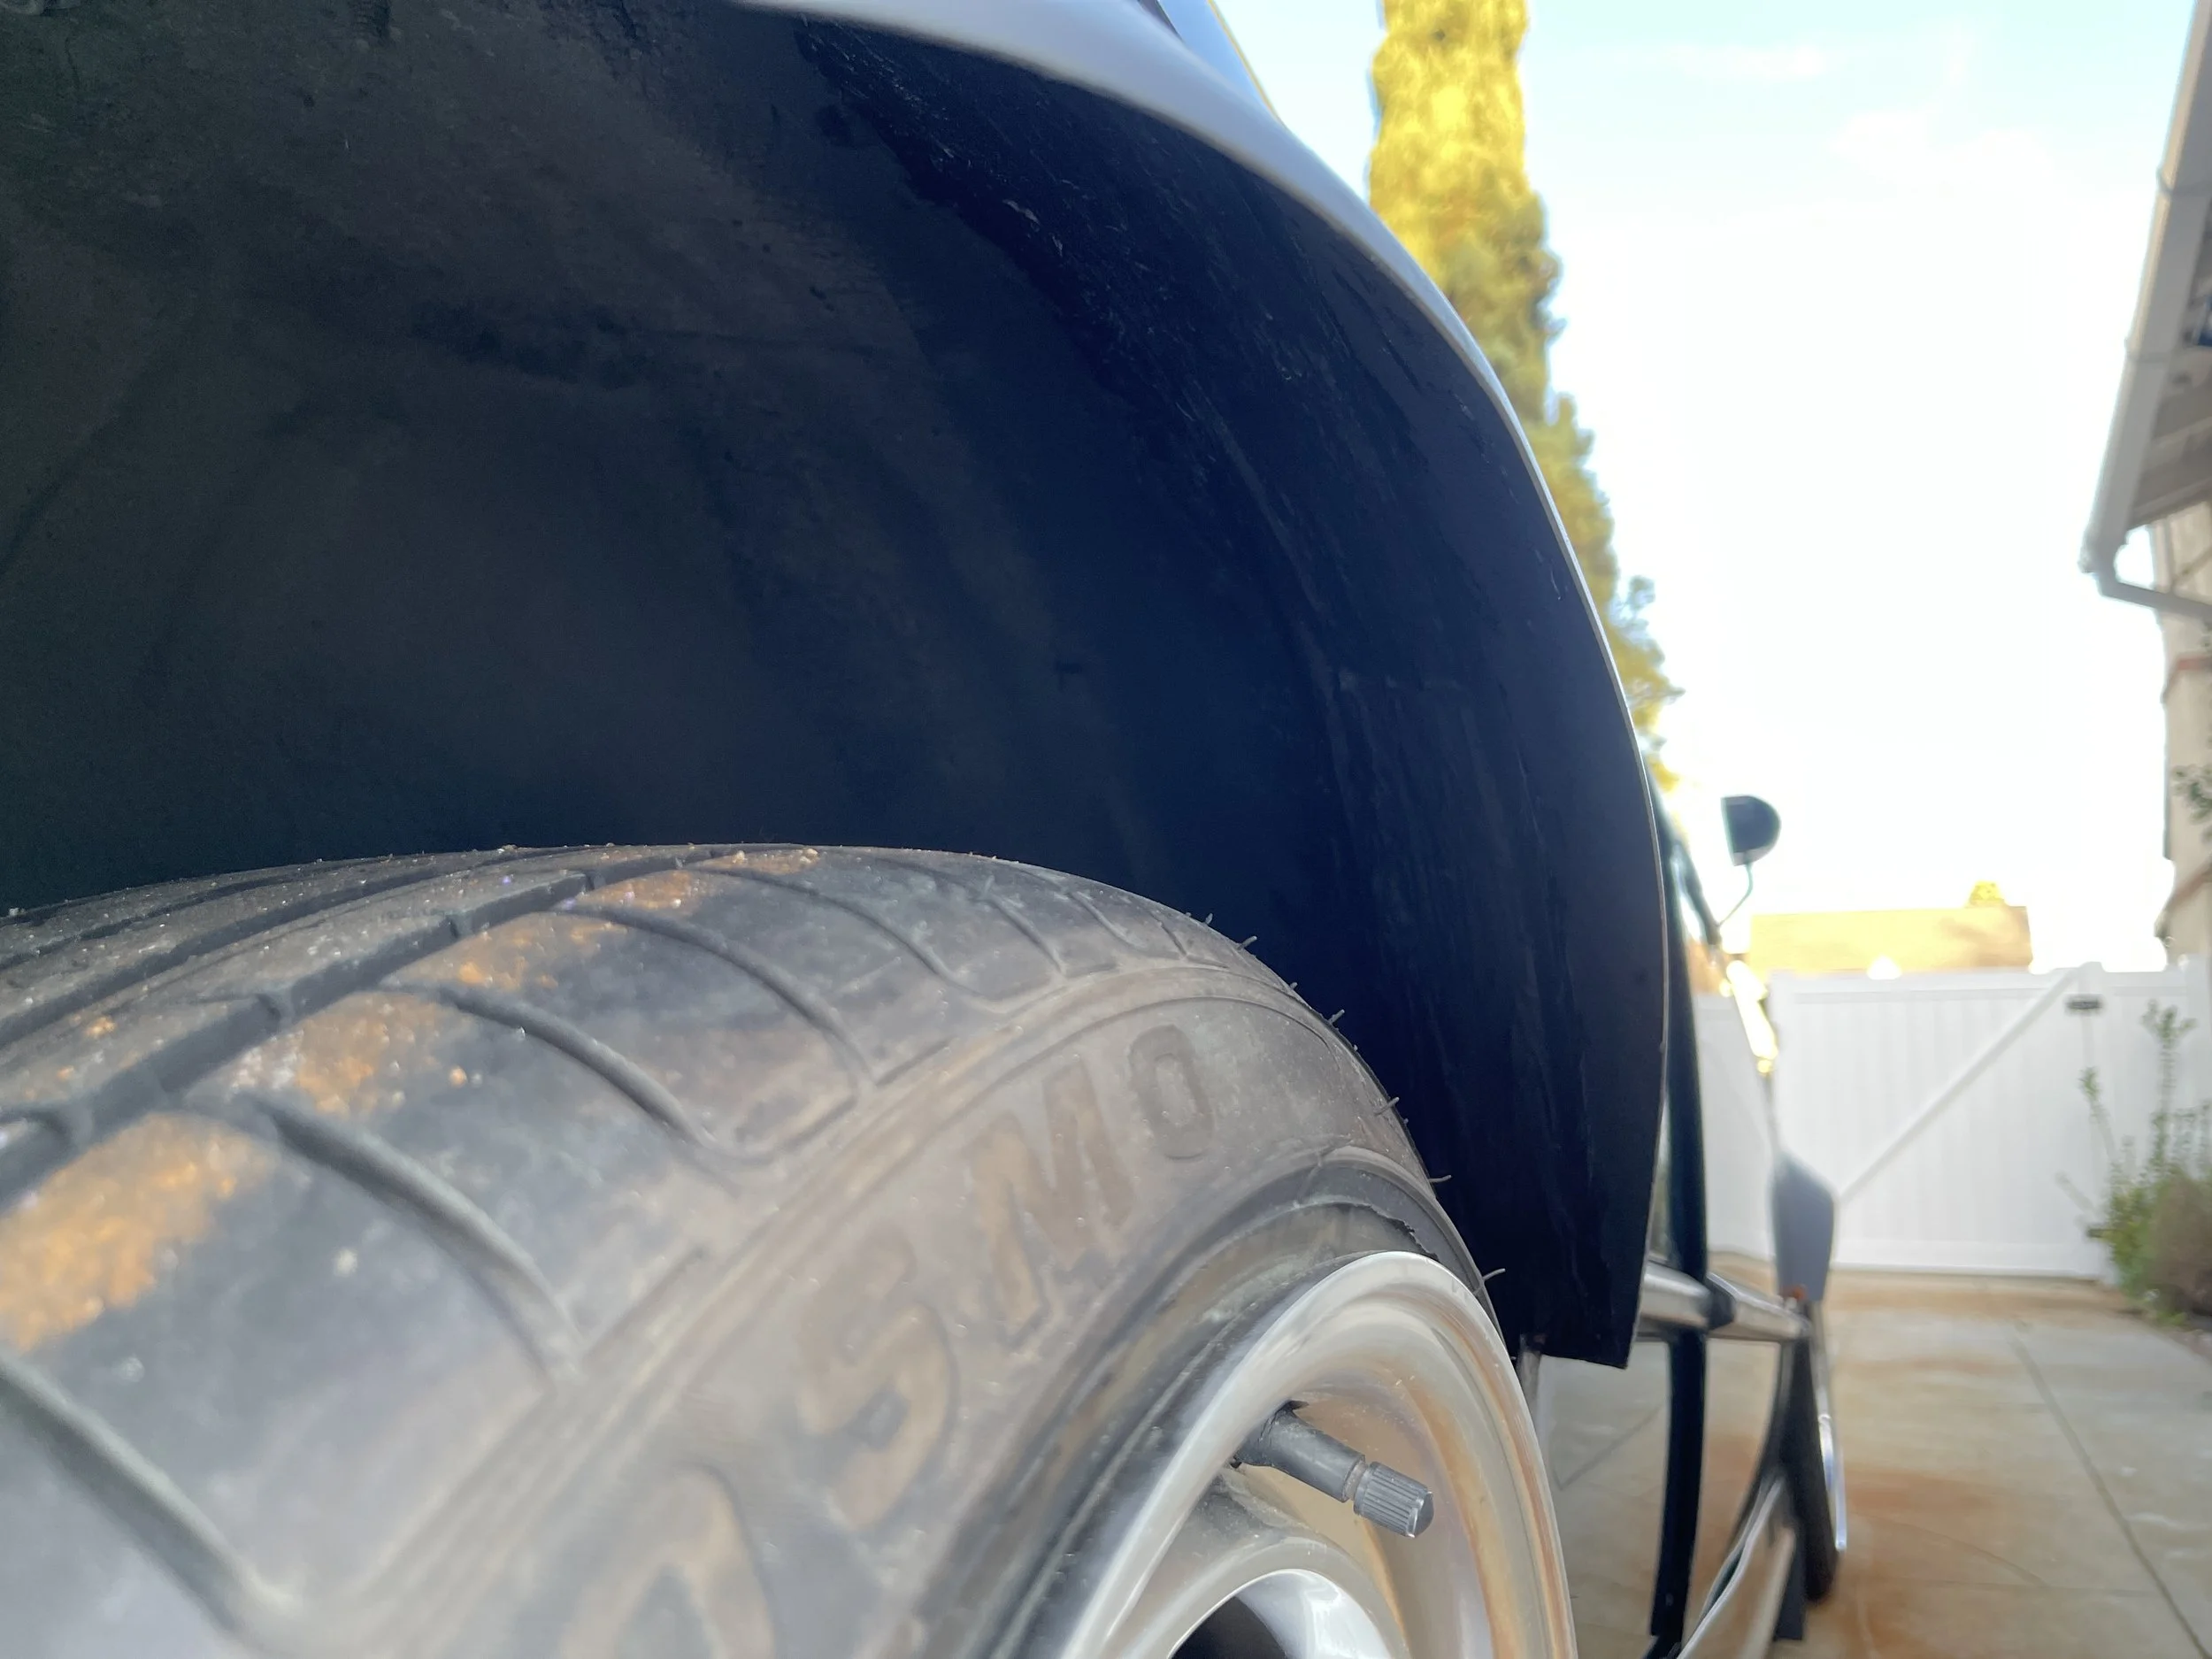
On the inside(underside) of each fender, I created an arched panel that runs along the fender and original body(cut) lines. Those were welded out as well and back filled with seam sealer to create a smooth, sturdy transition that would mitigate tire build up and road debris from collecting in any open voids.
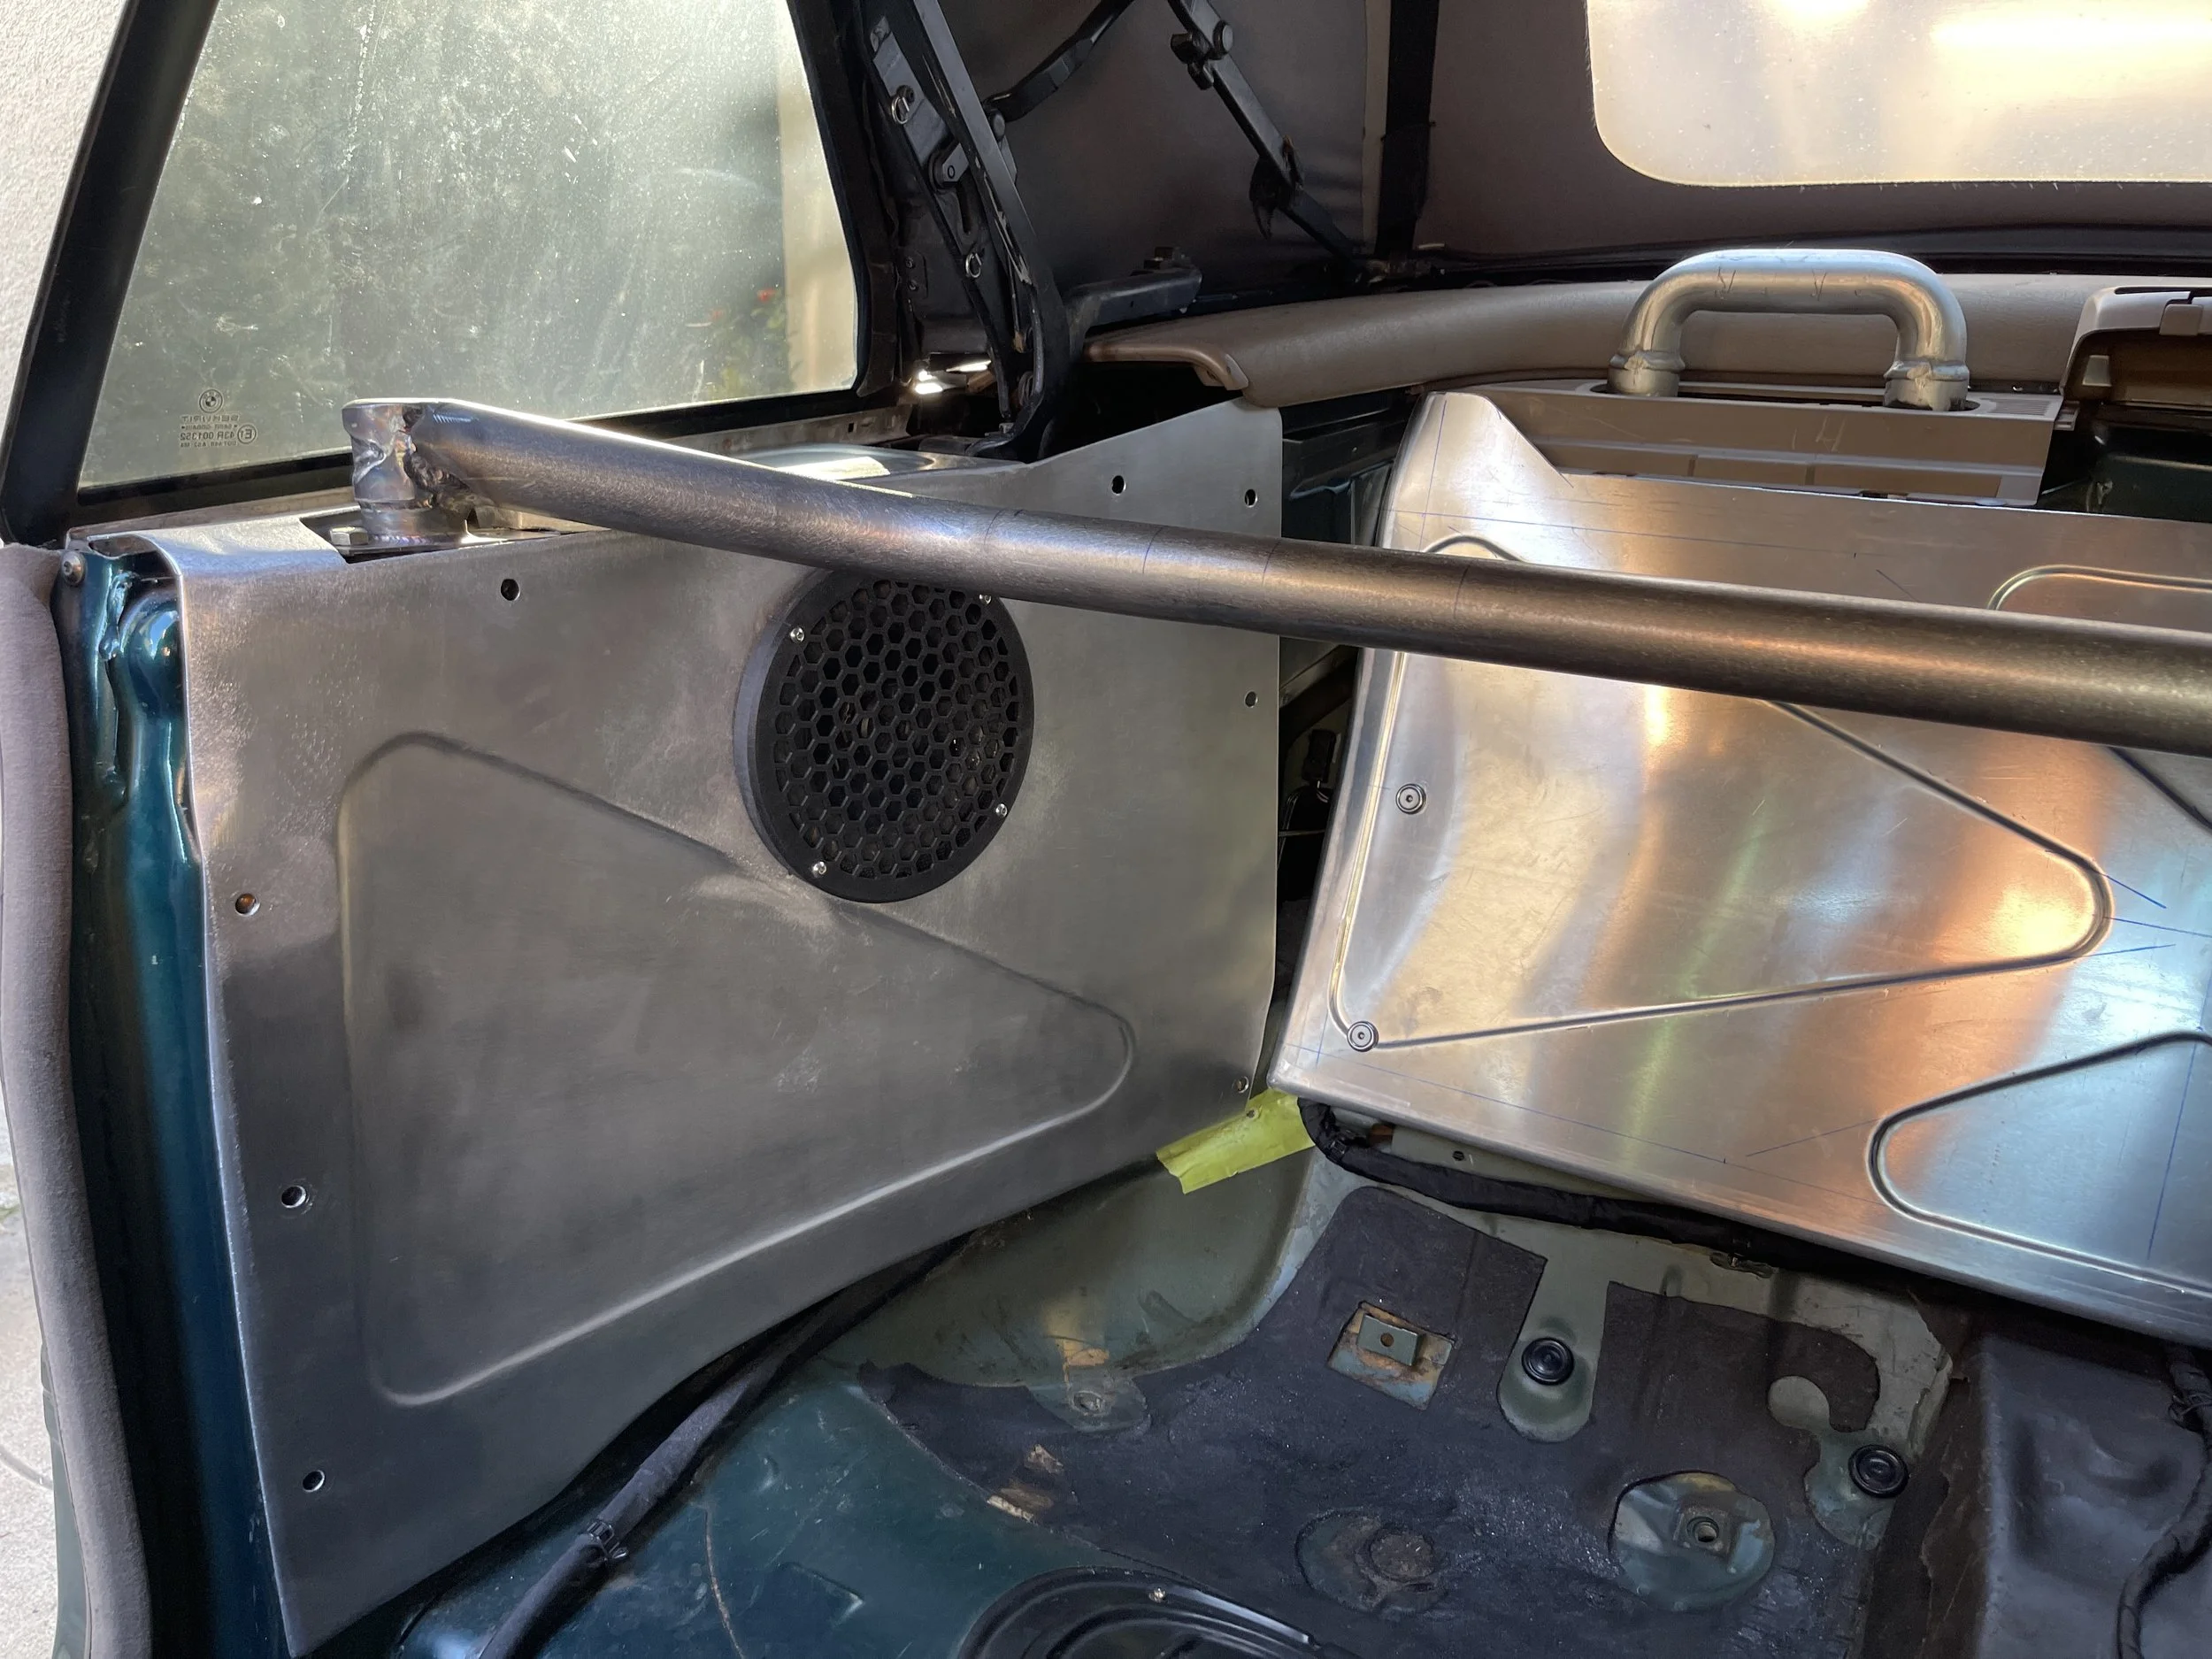
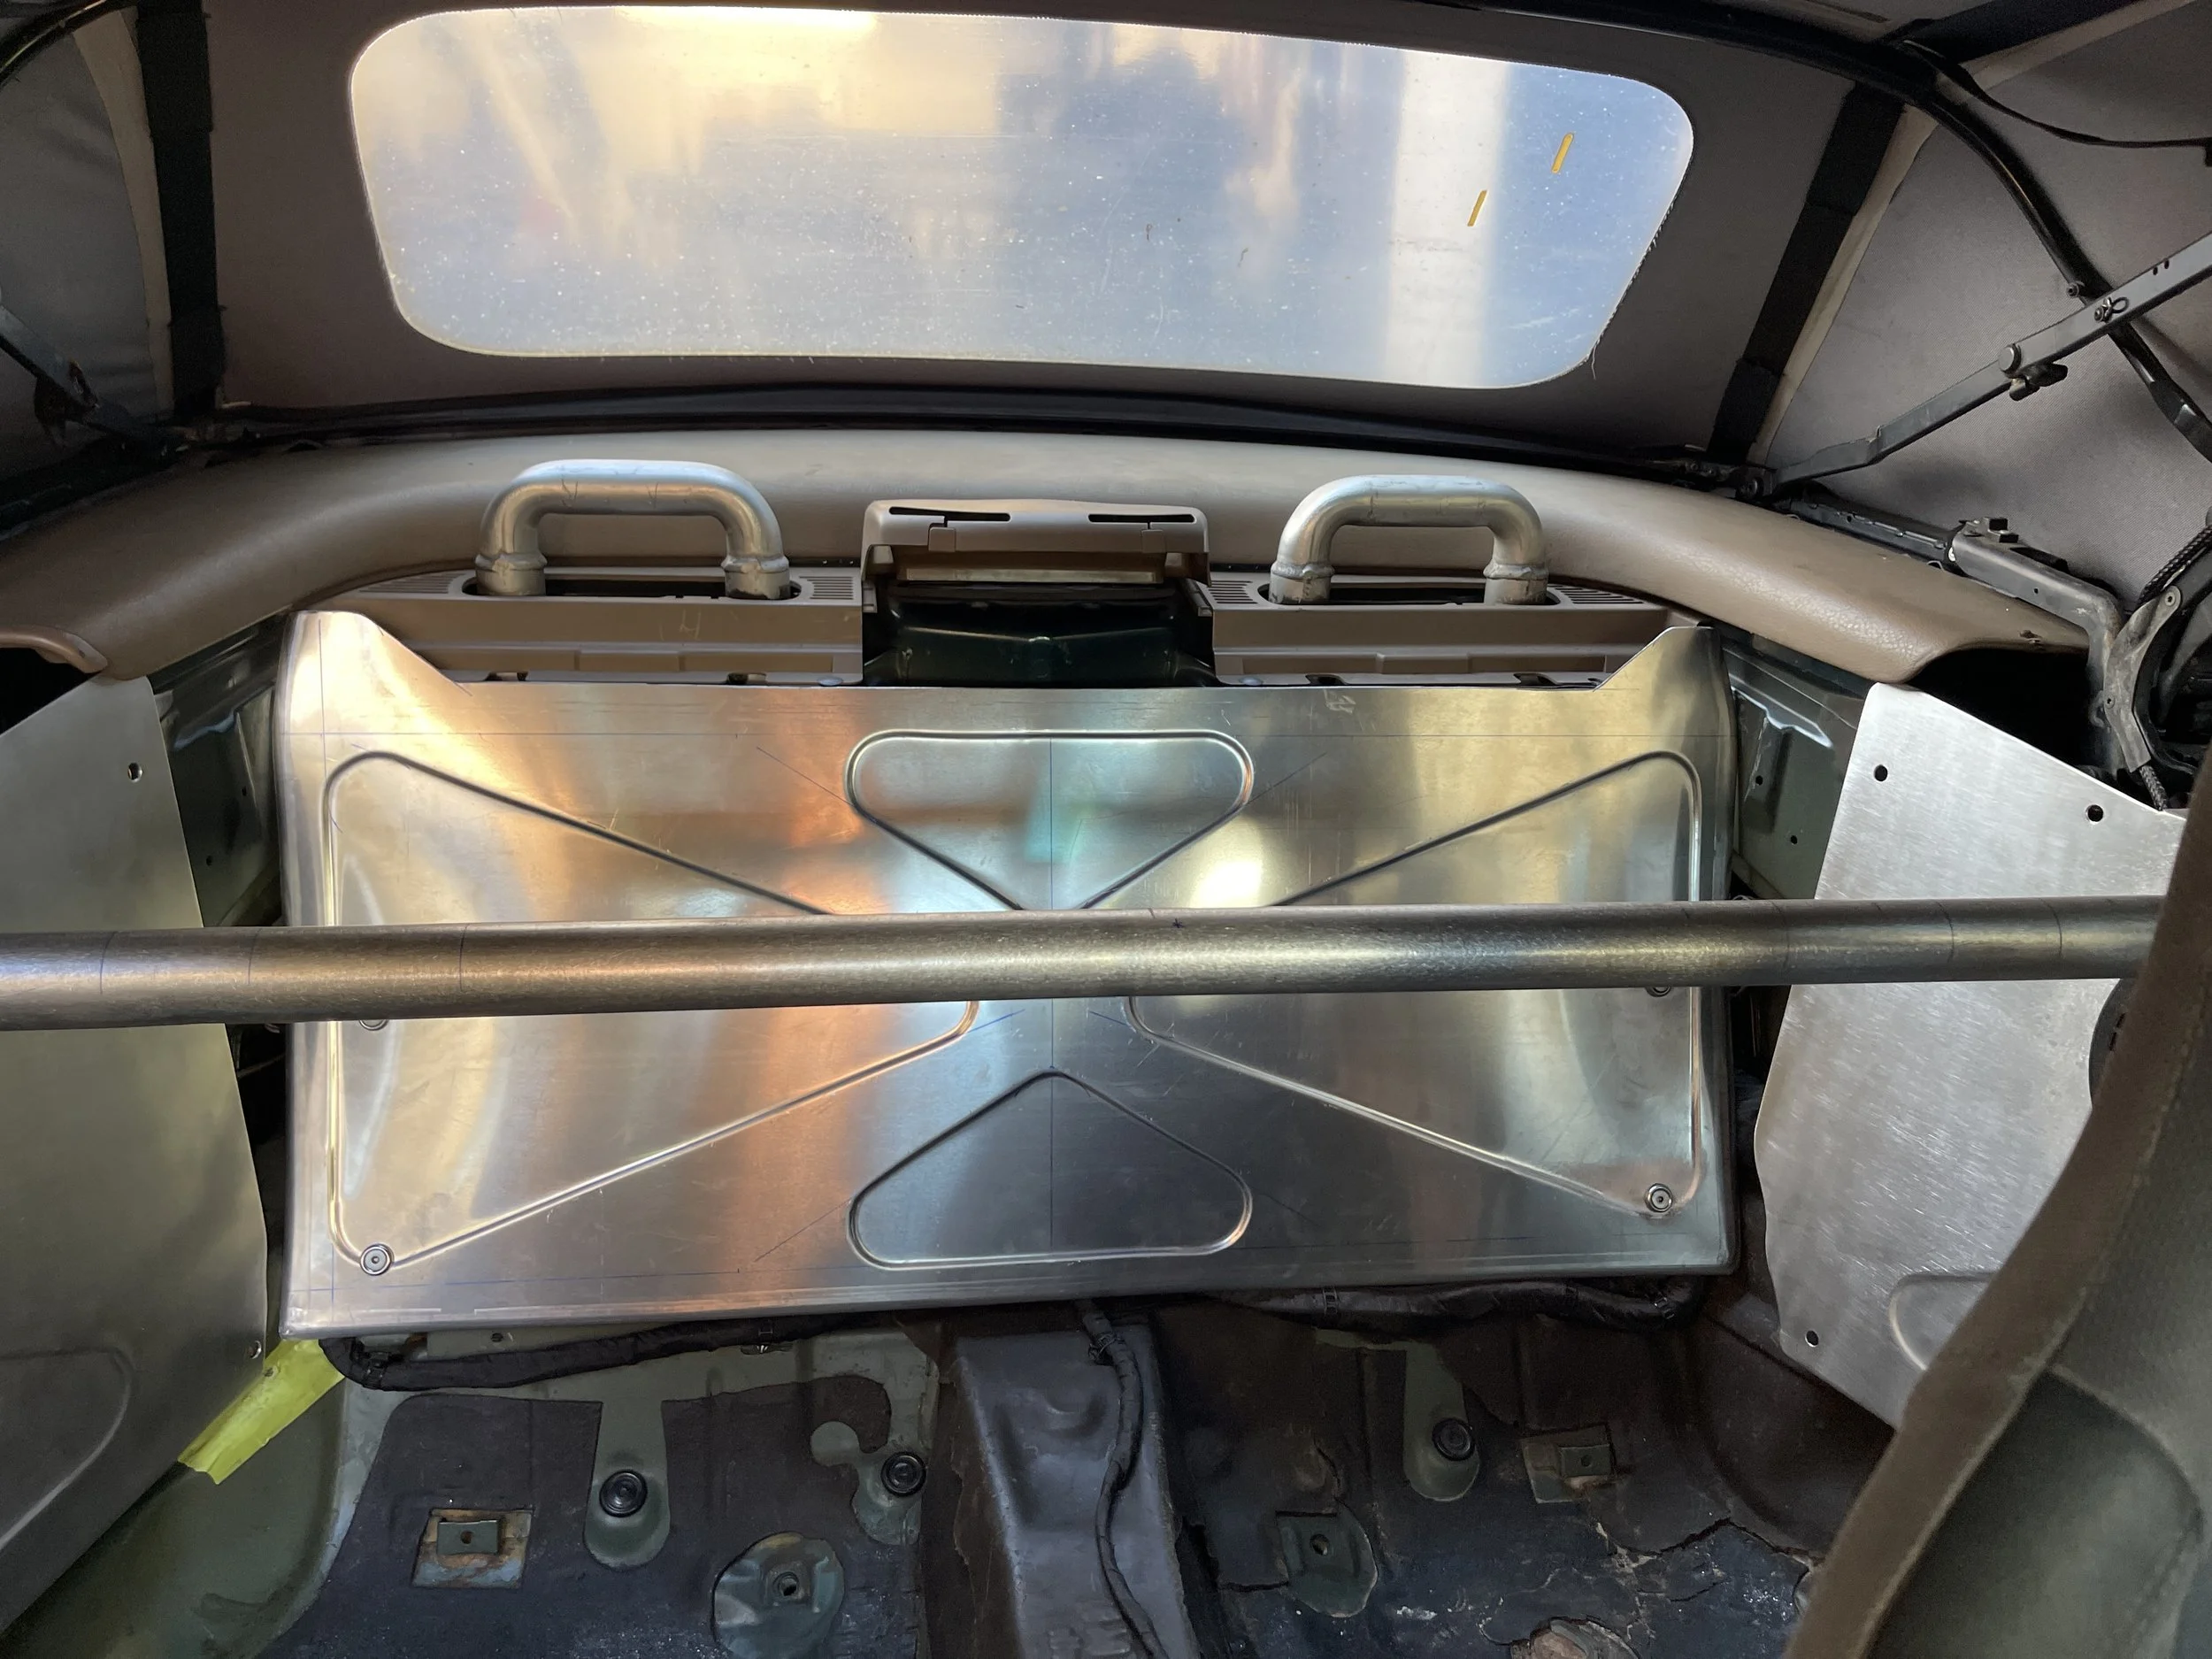
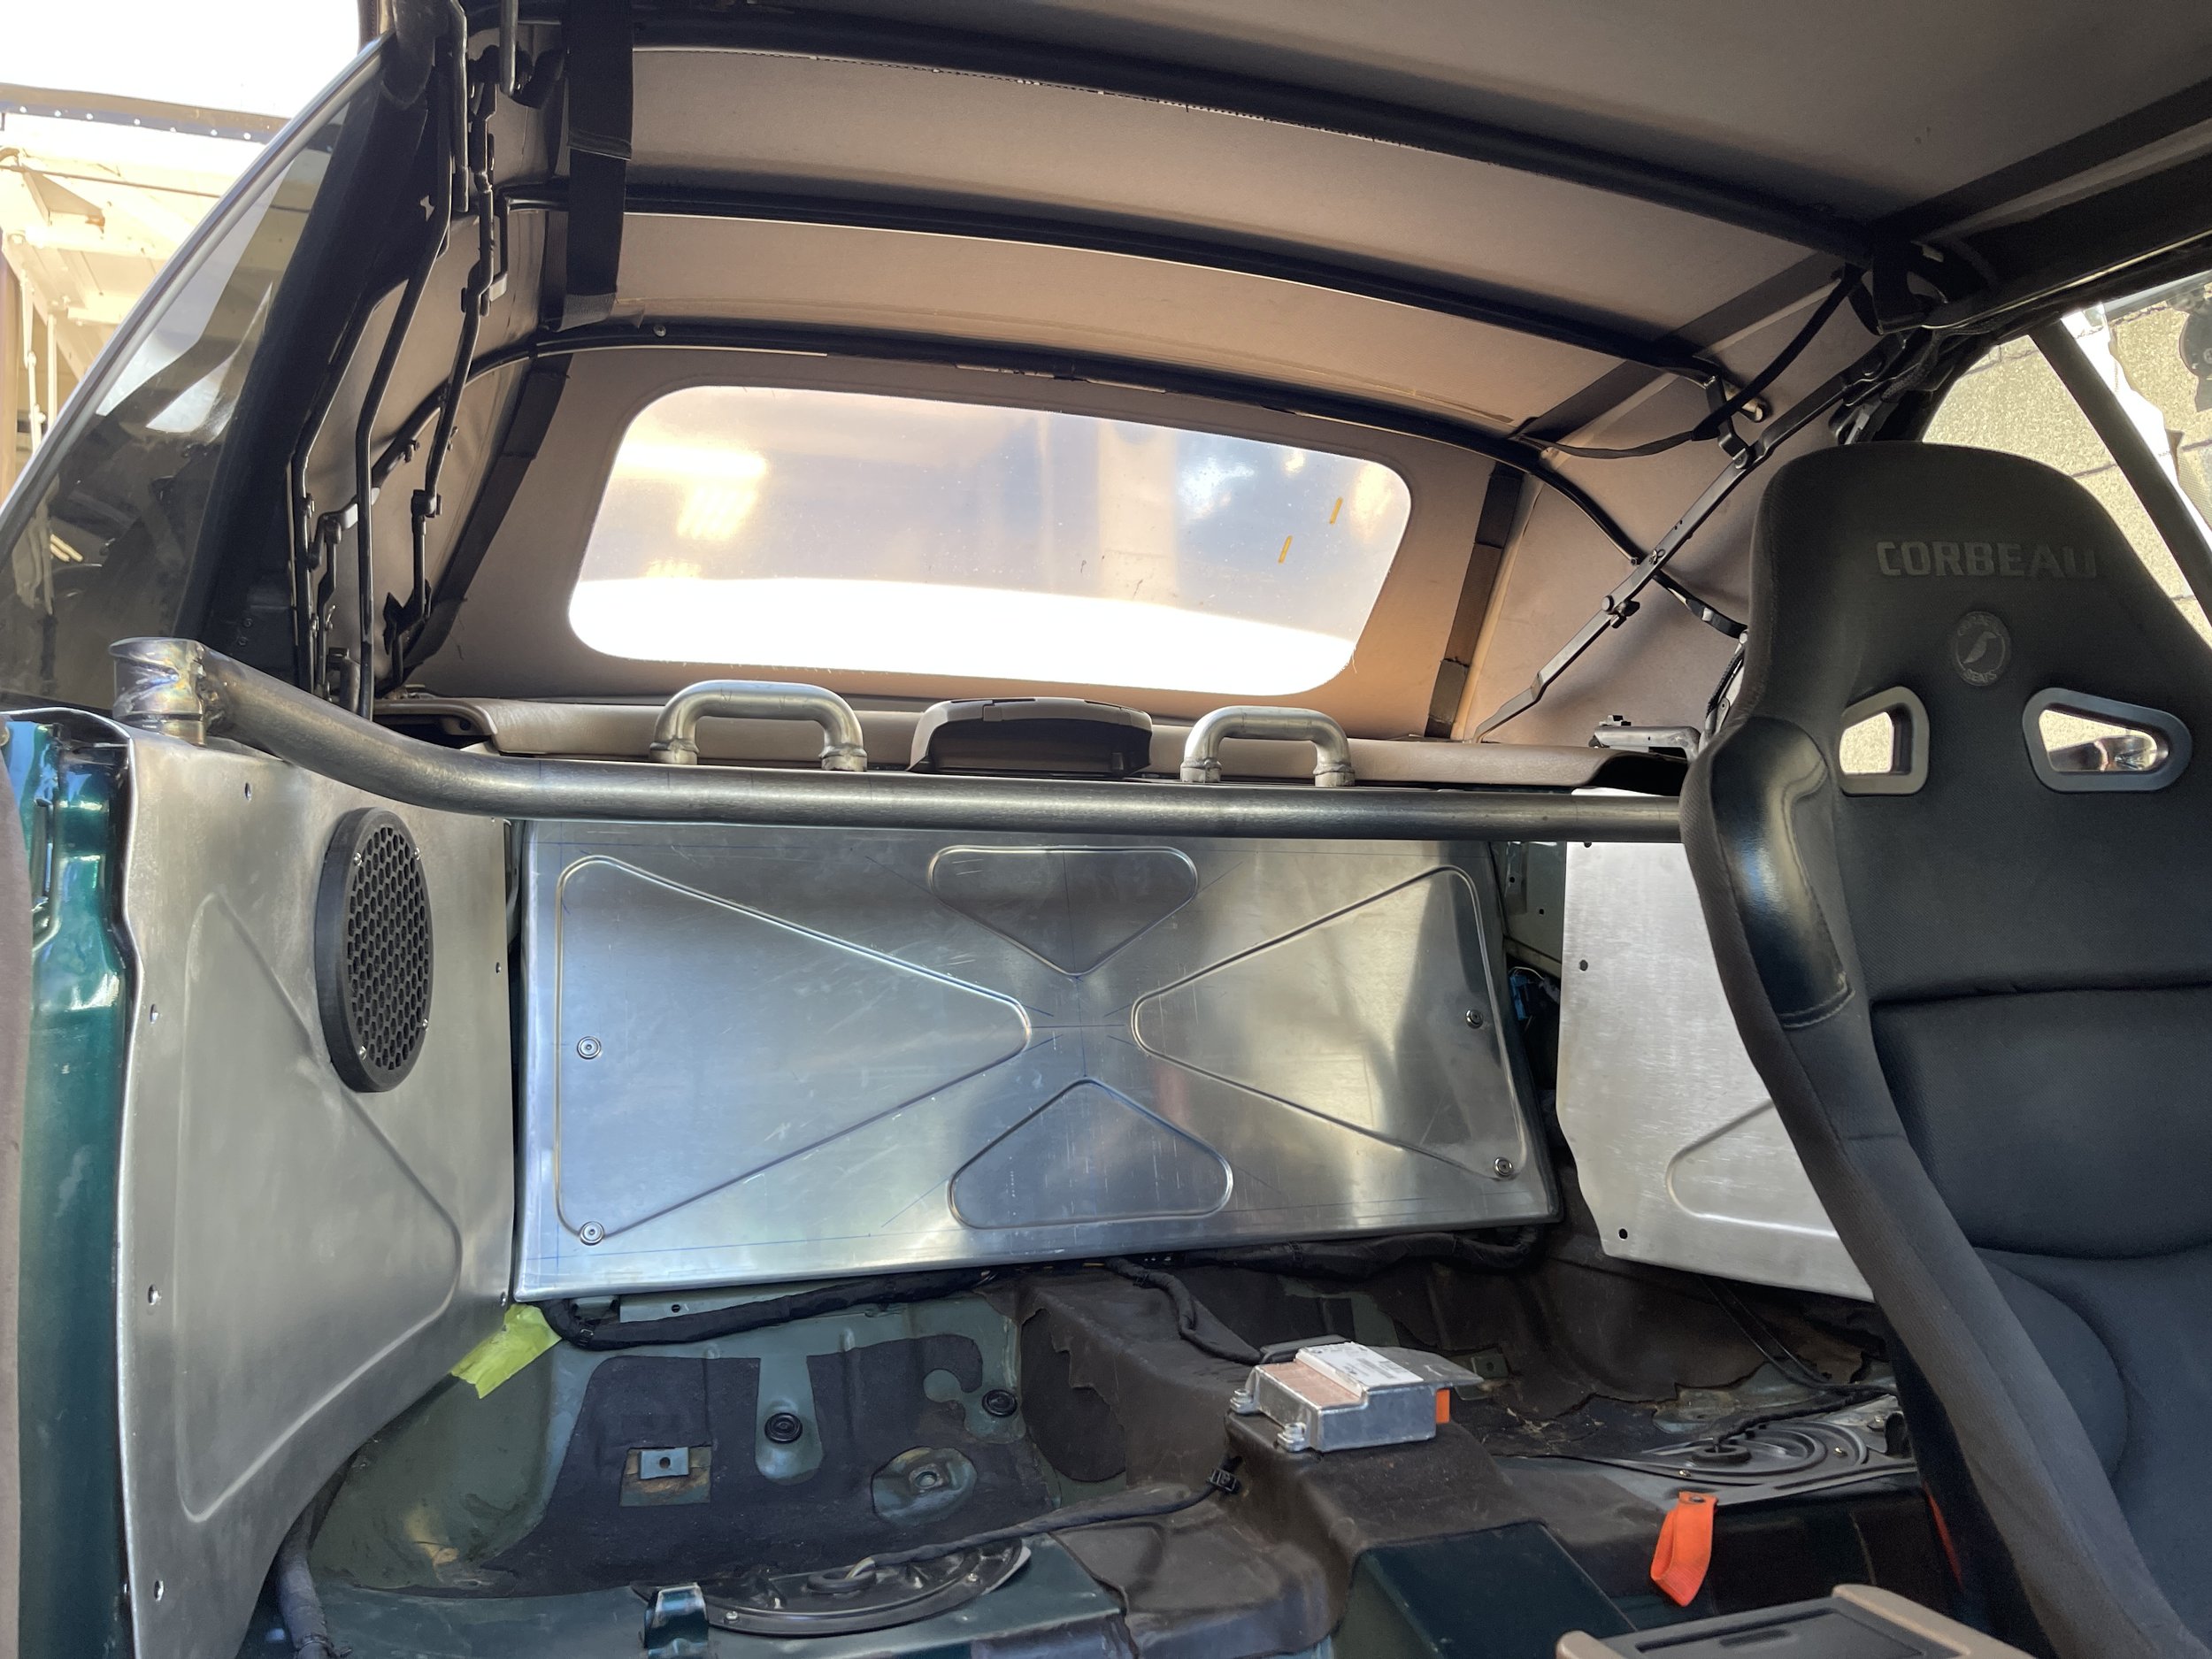
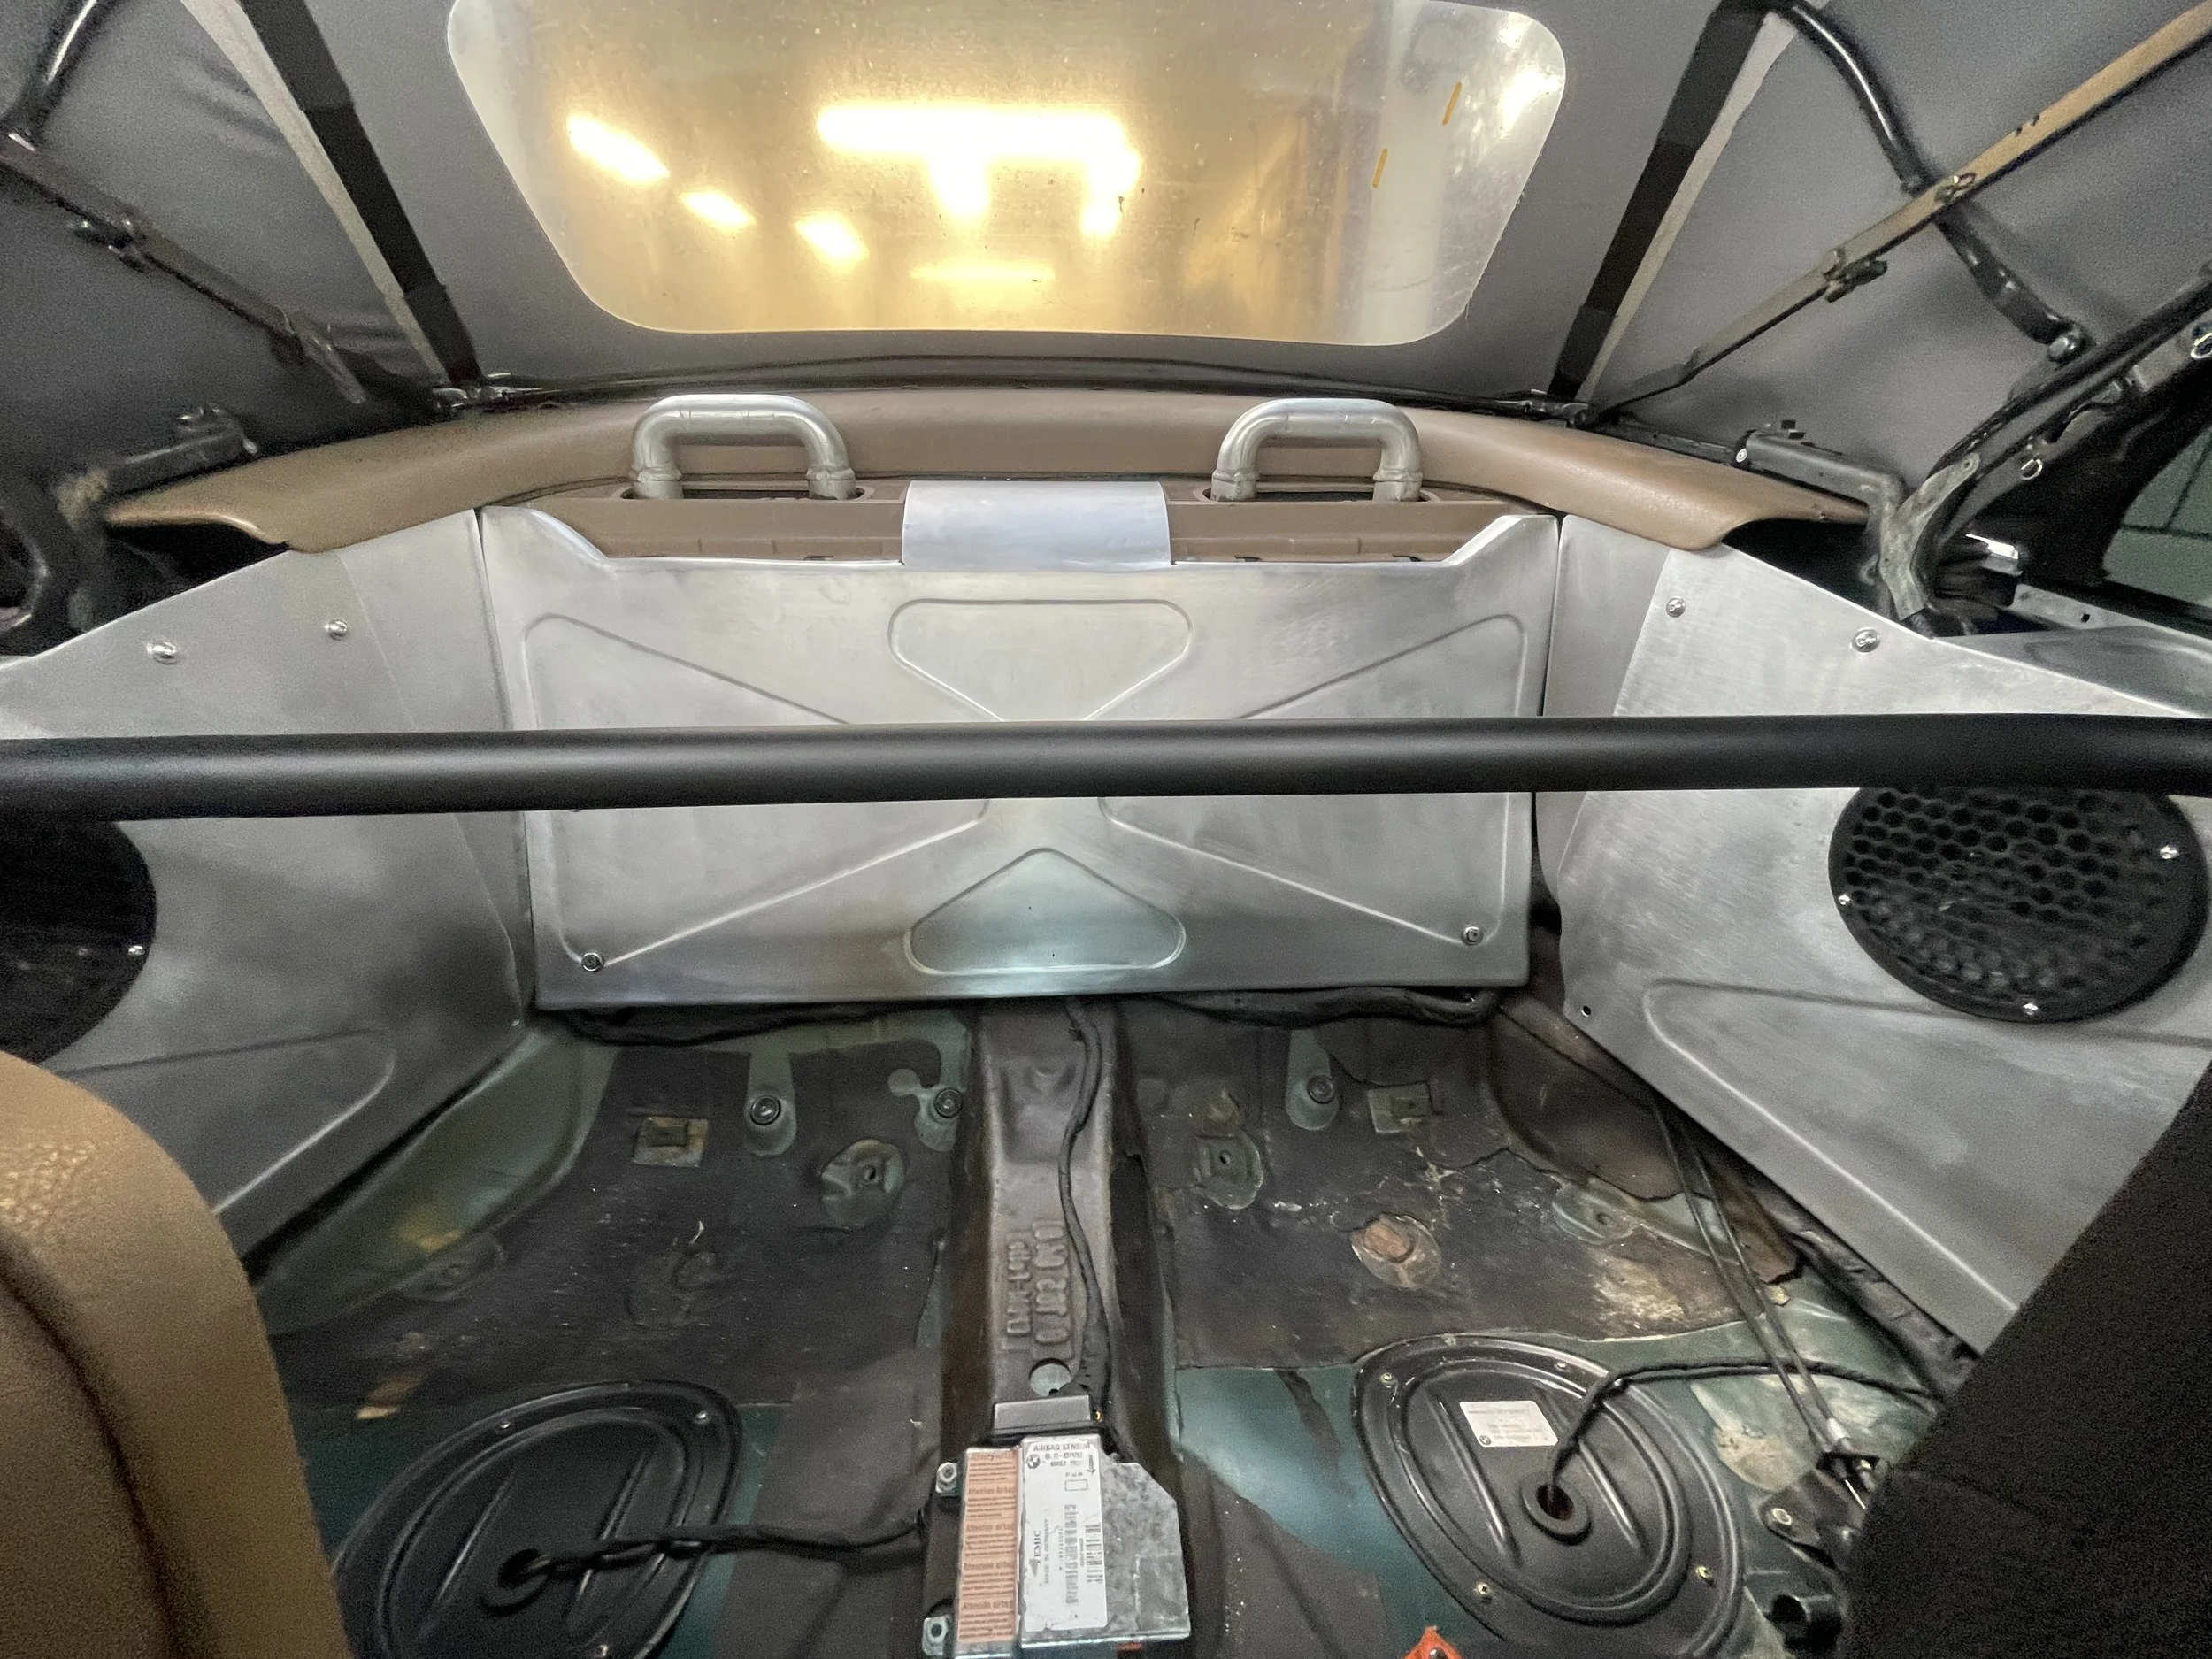
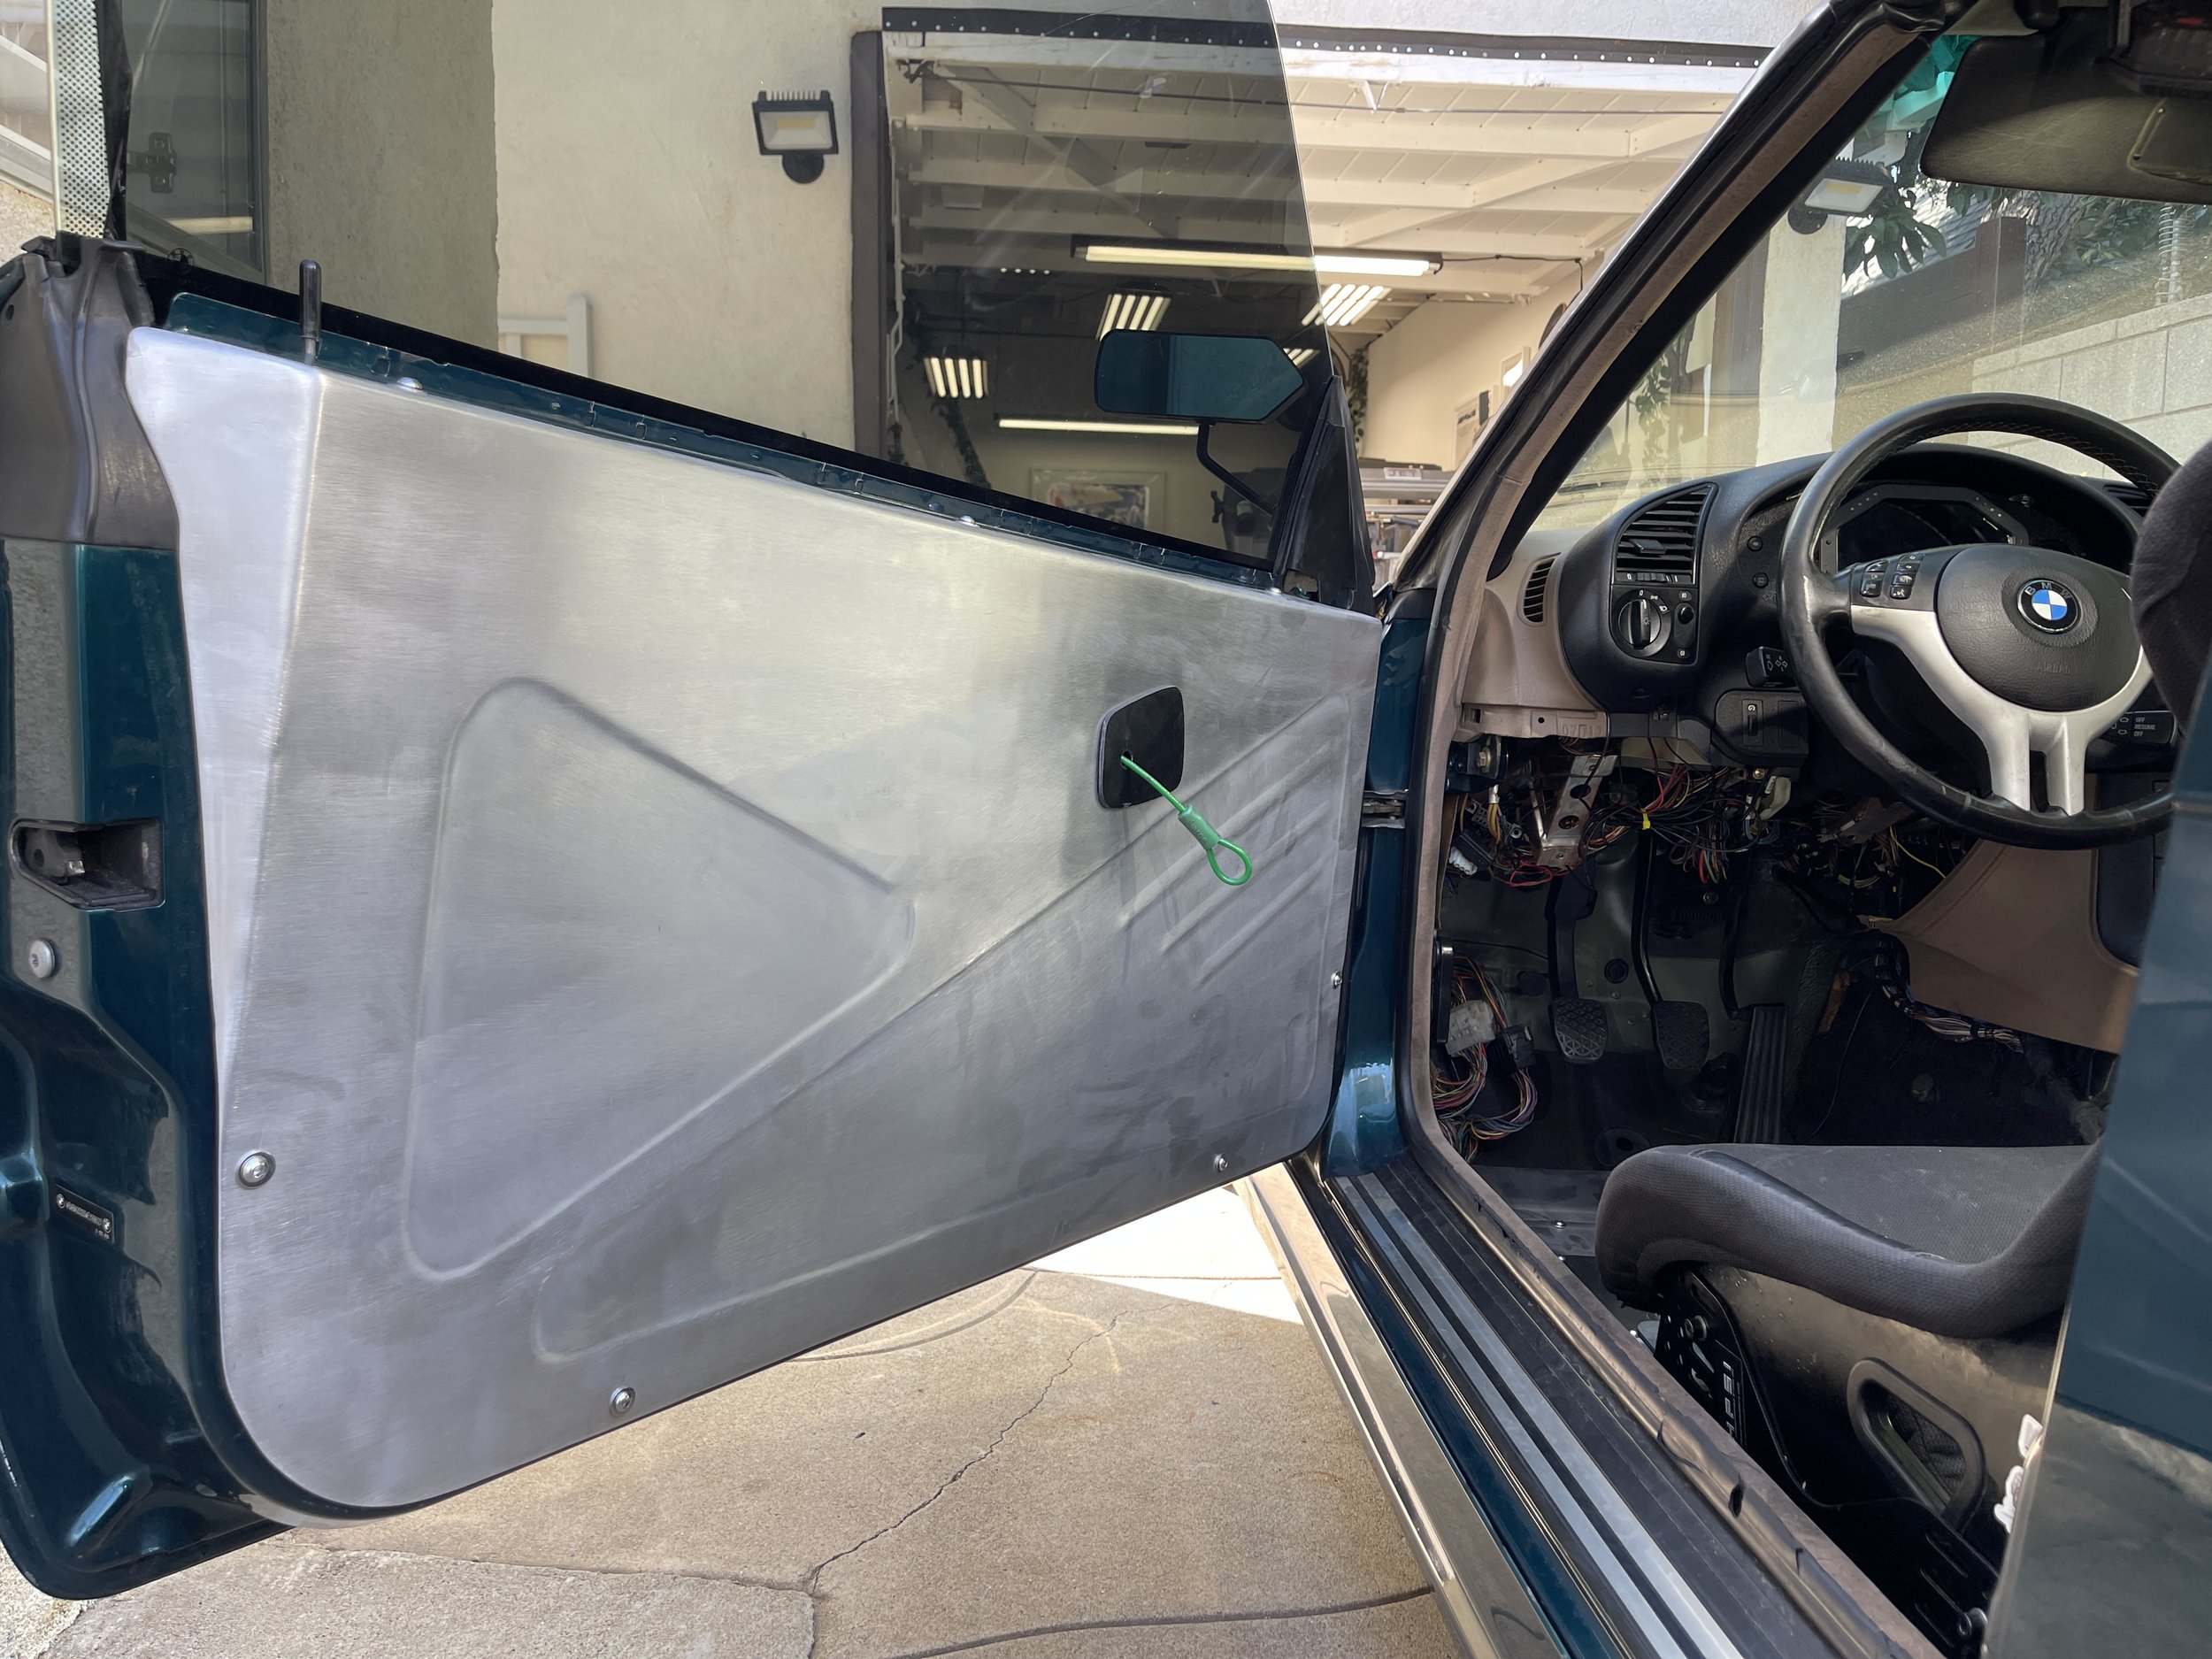
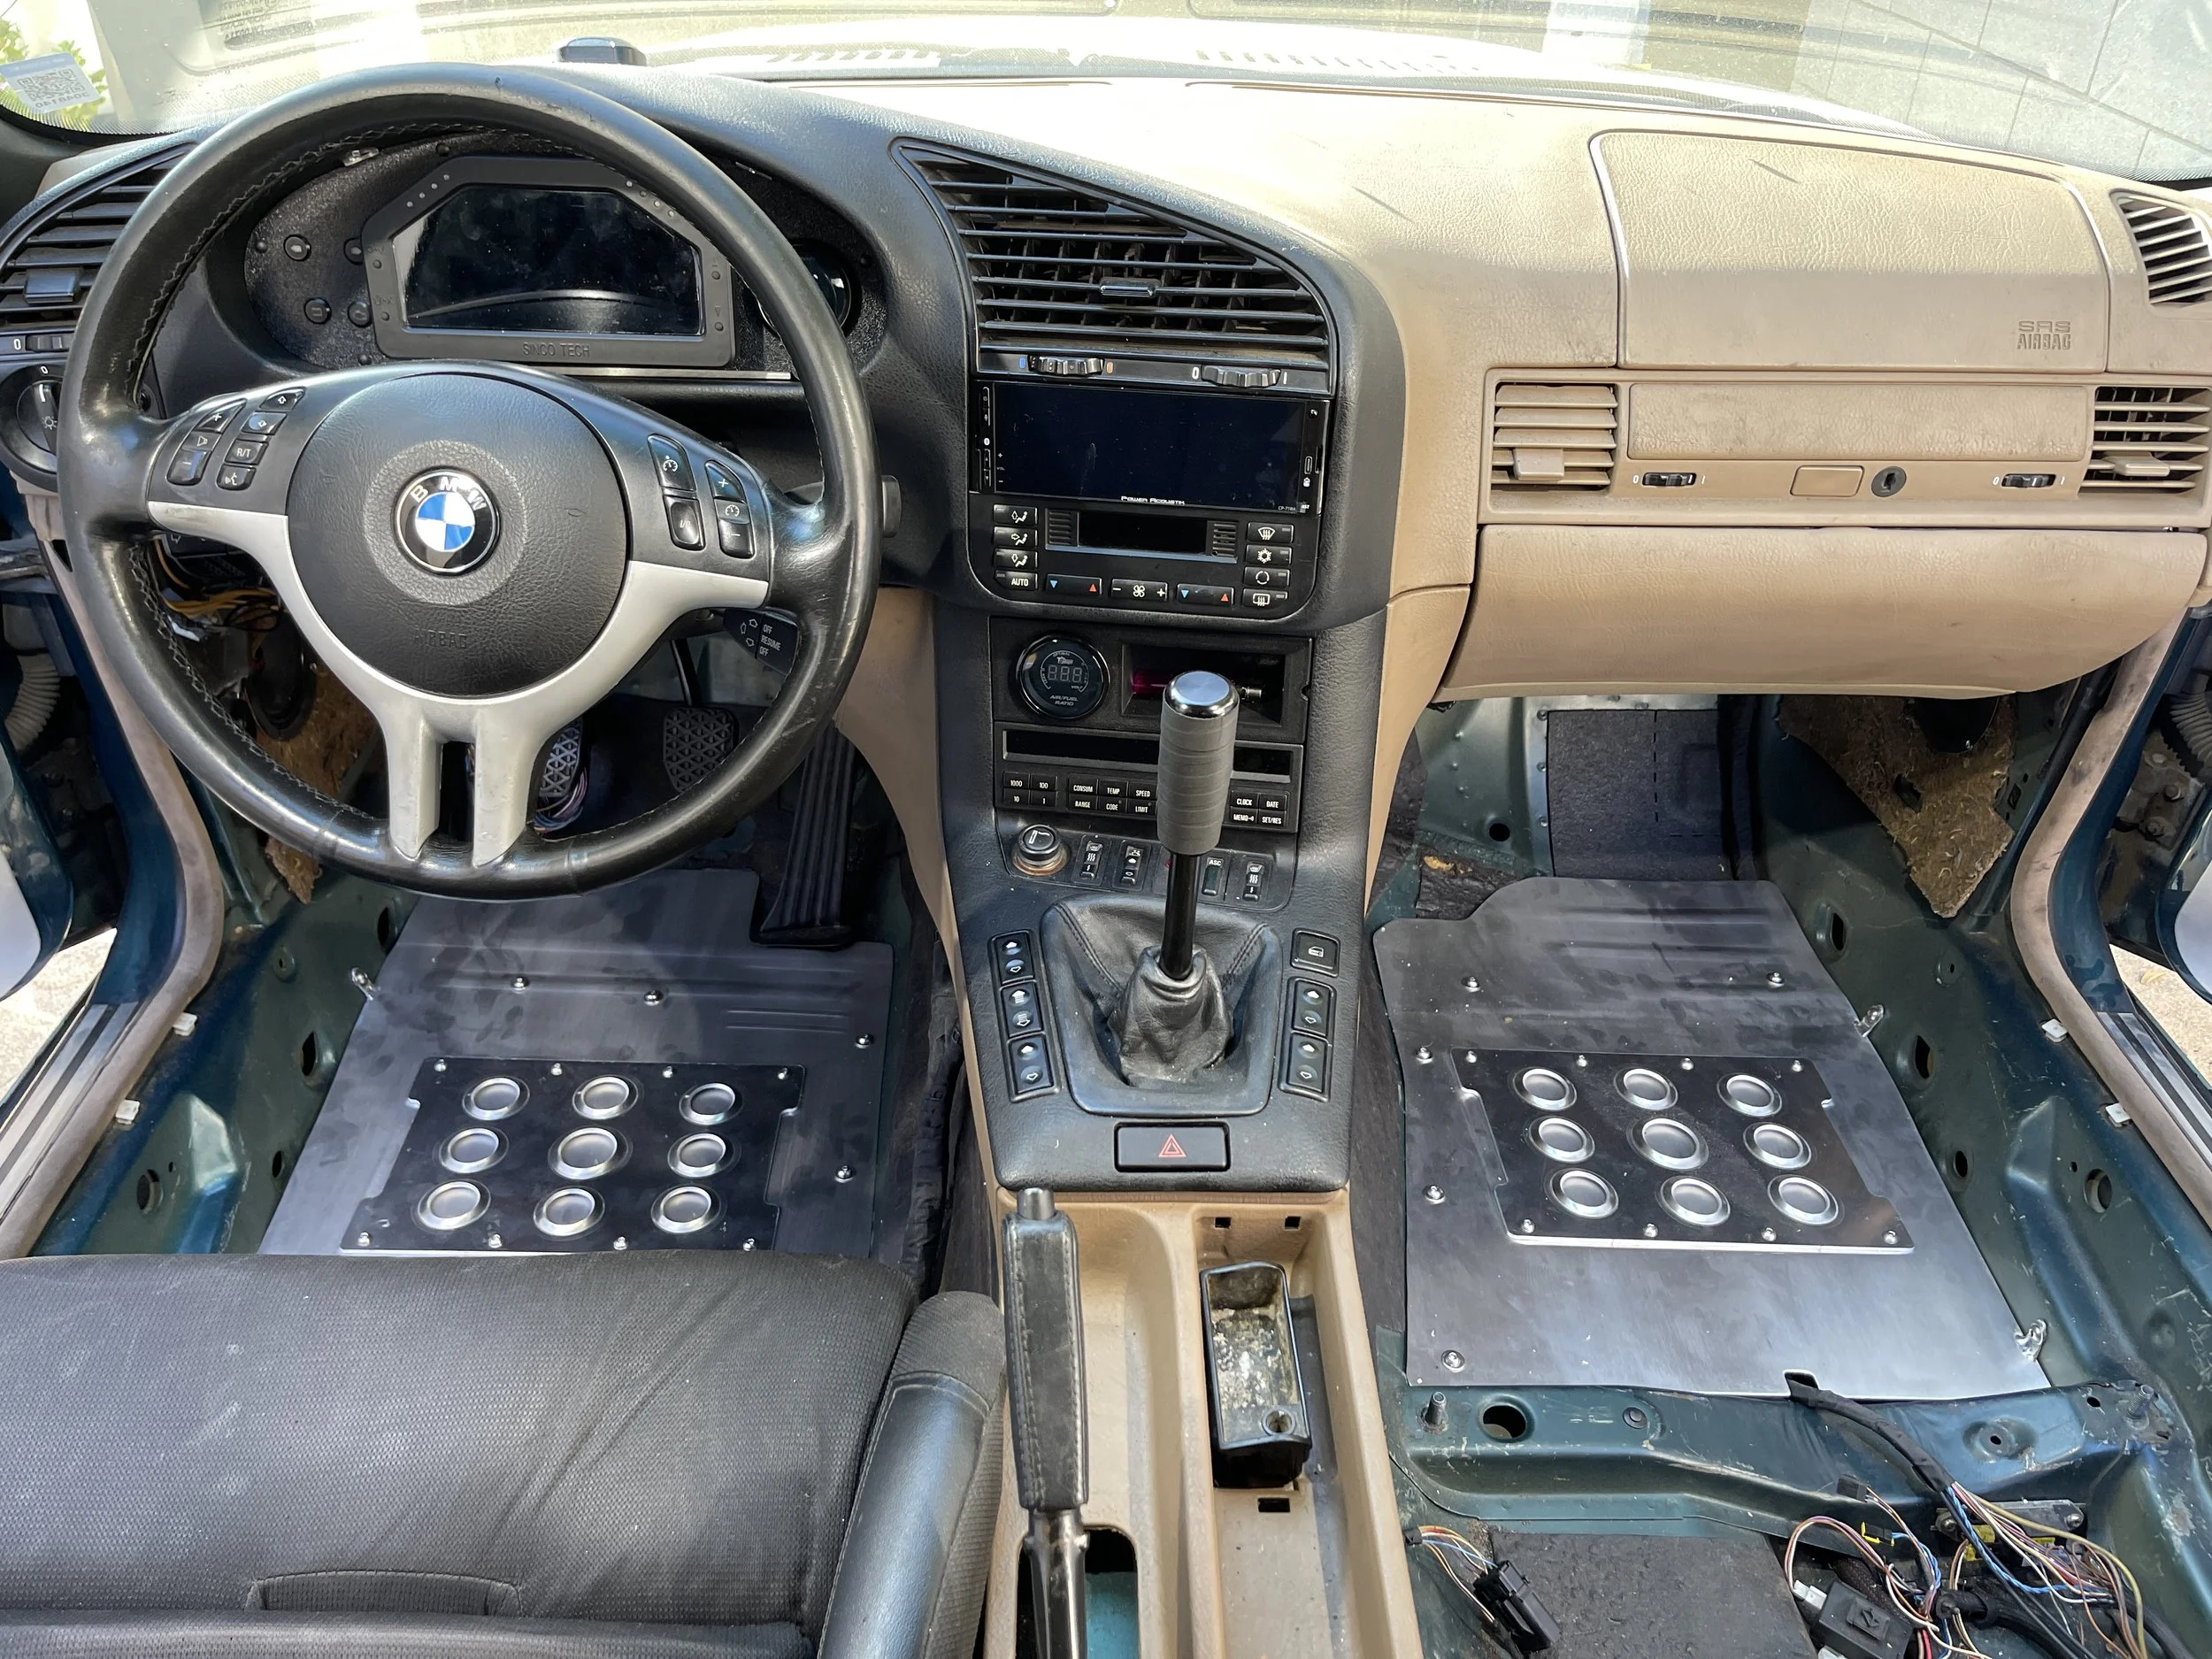
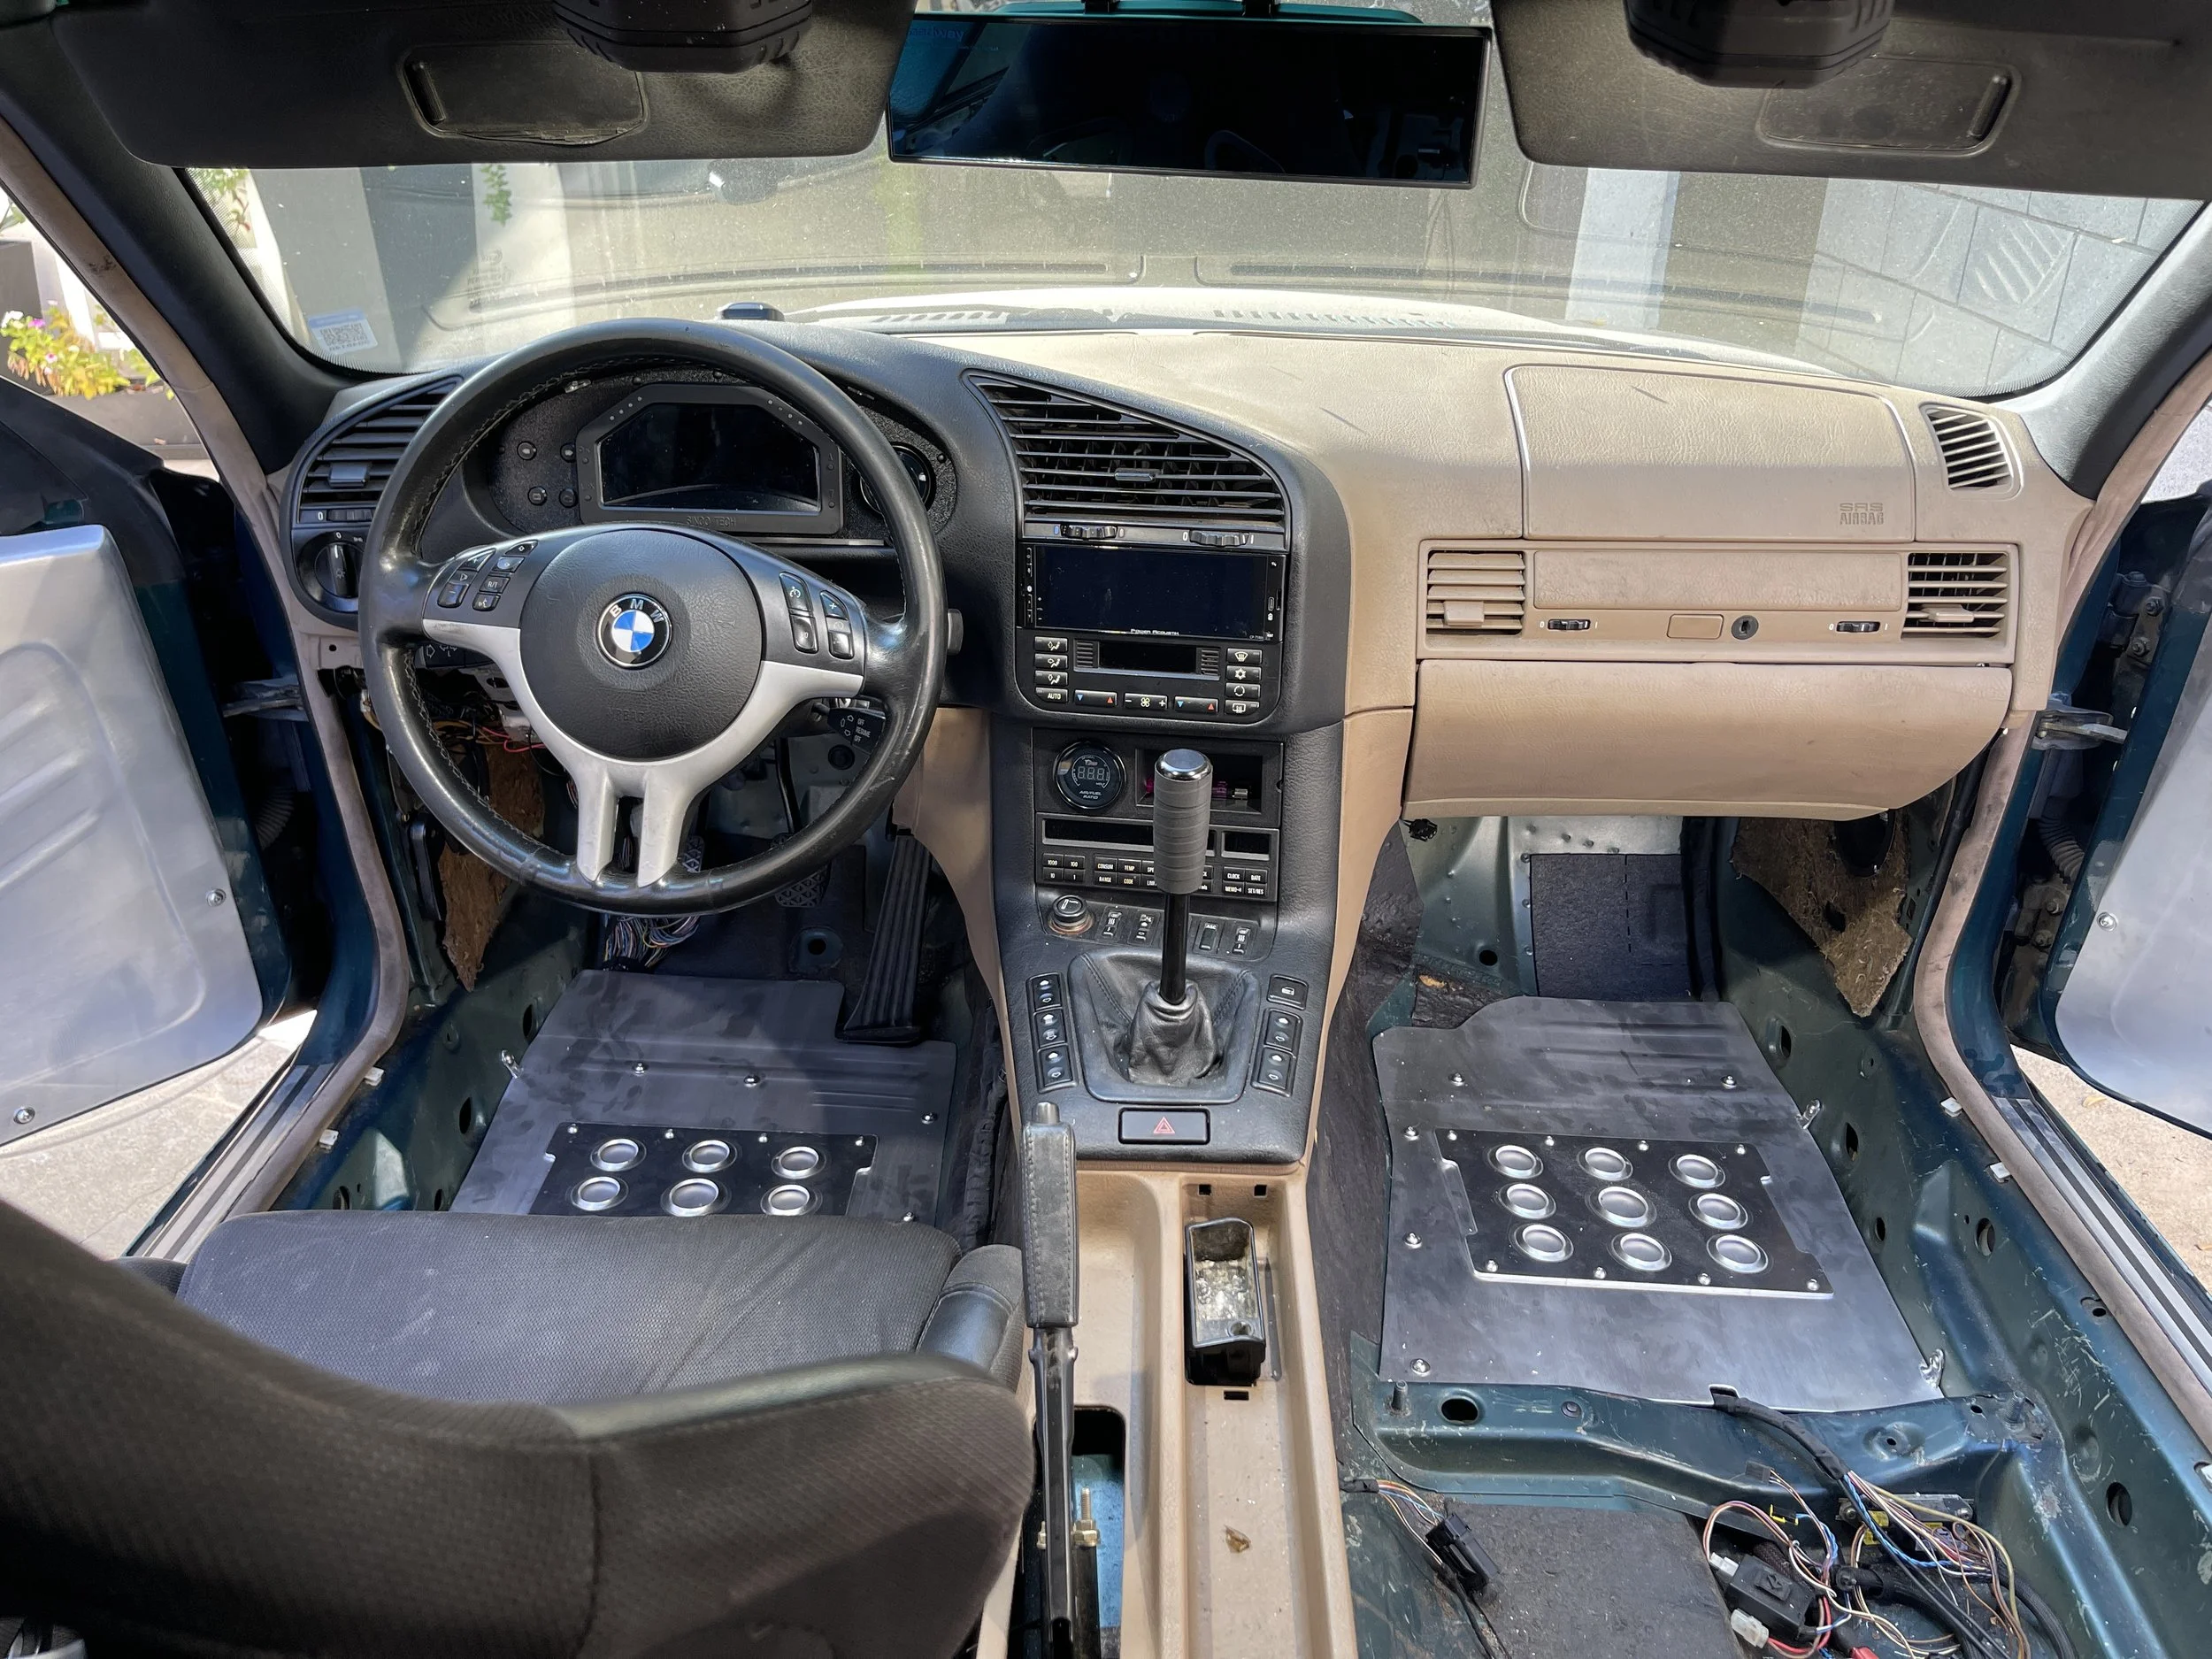
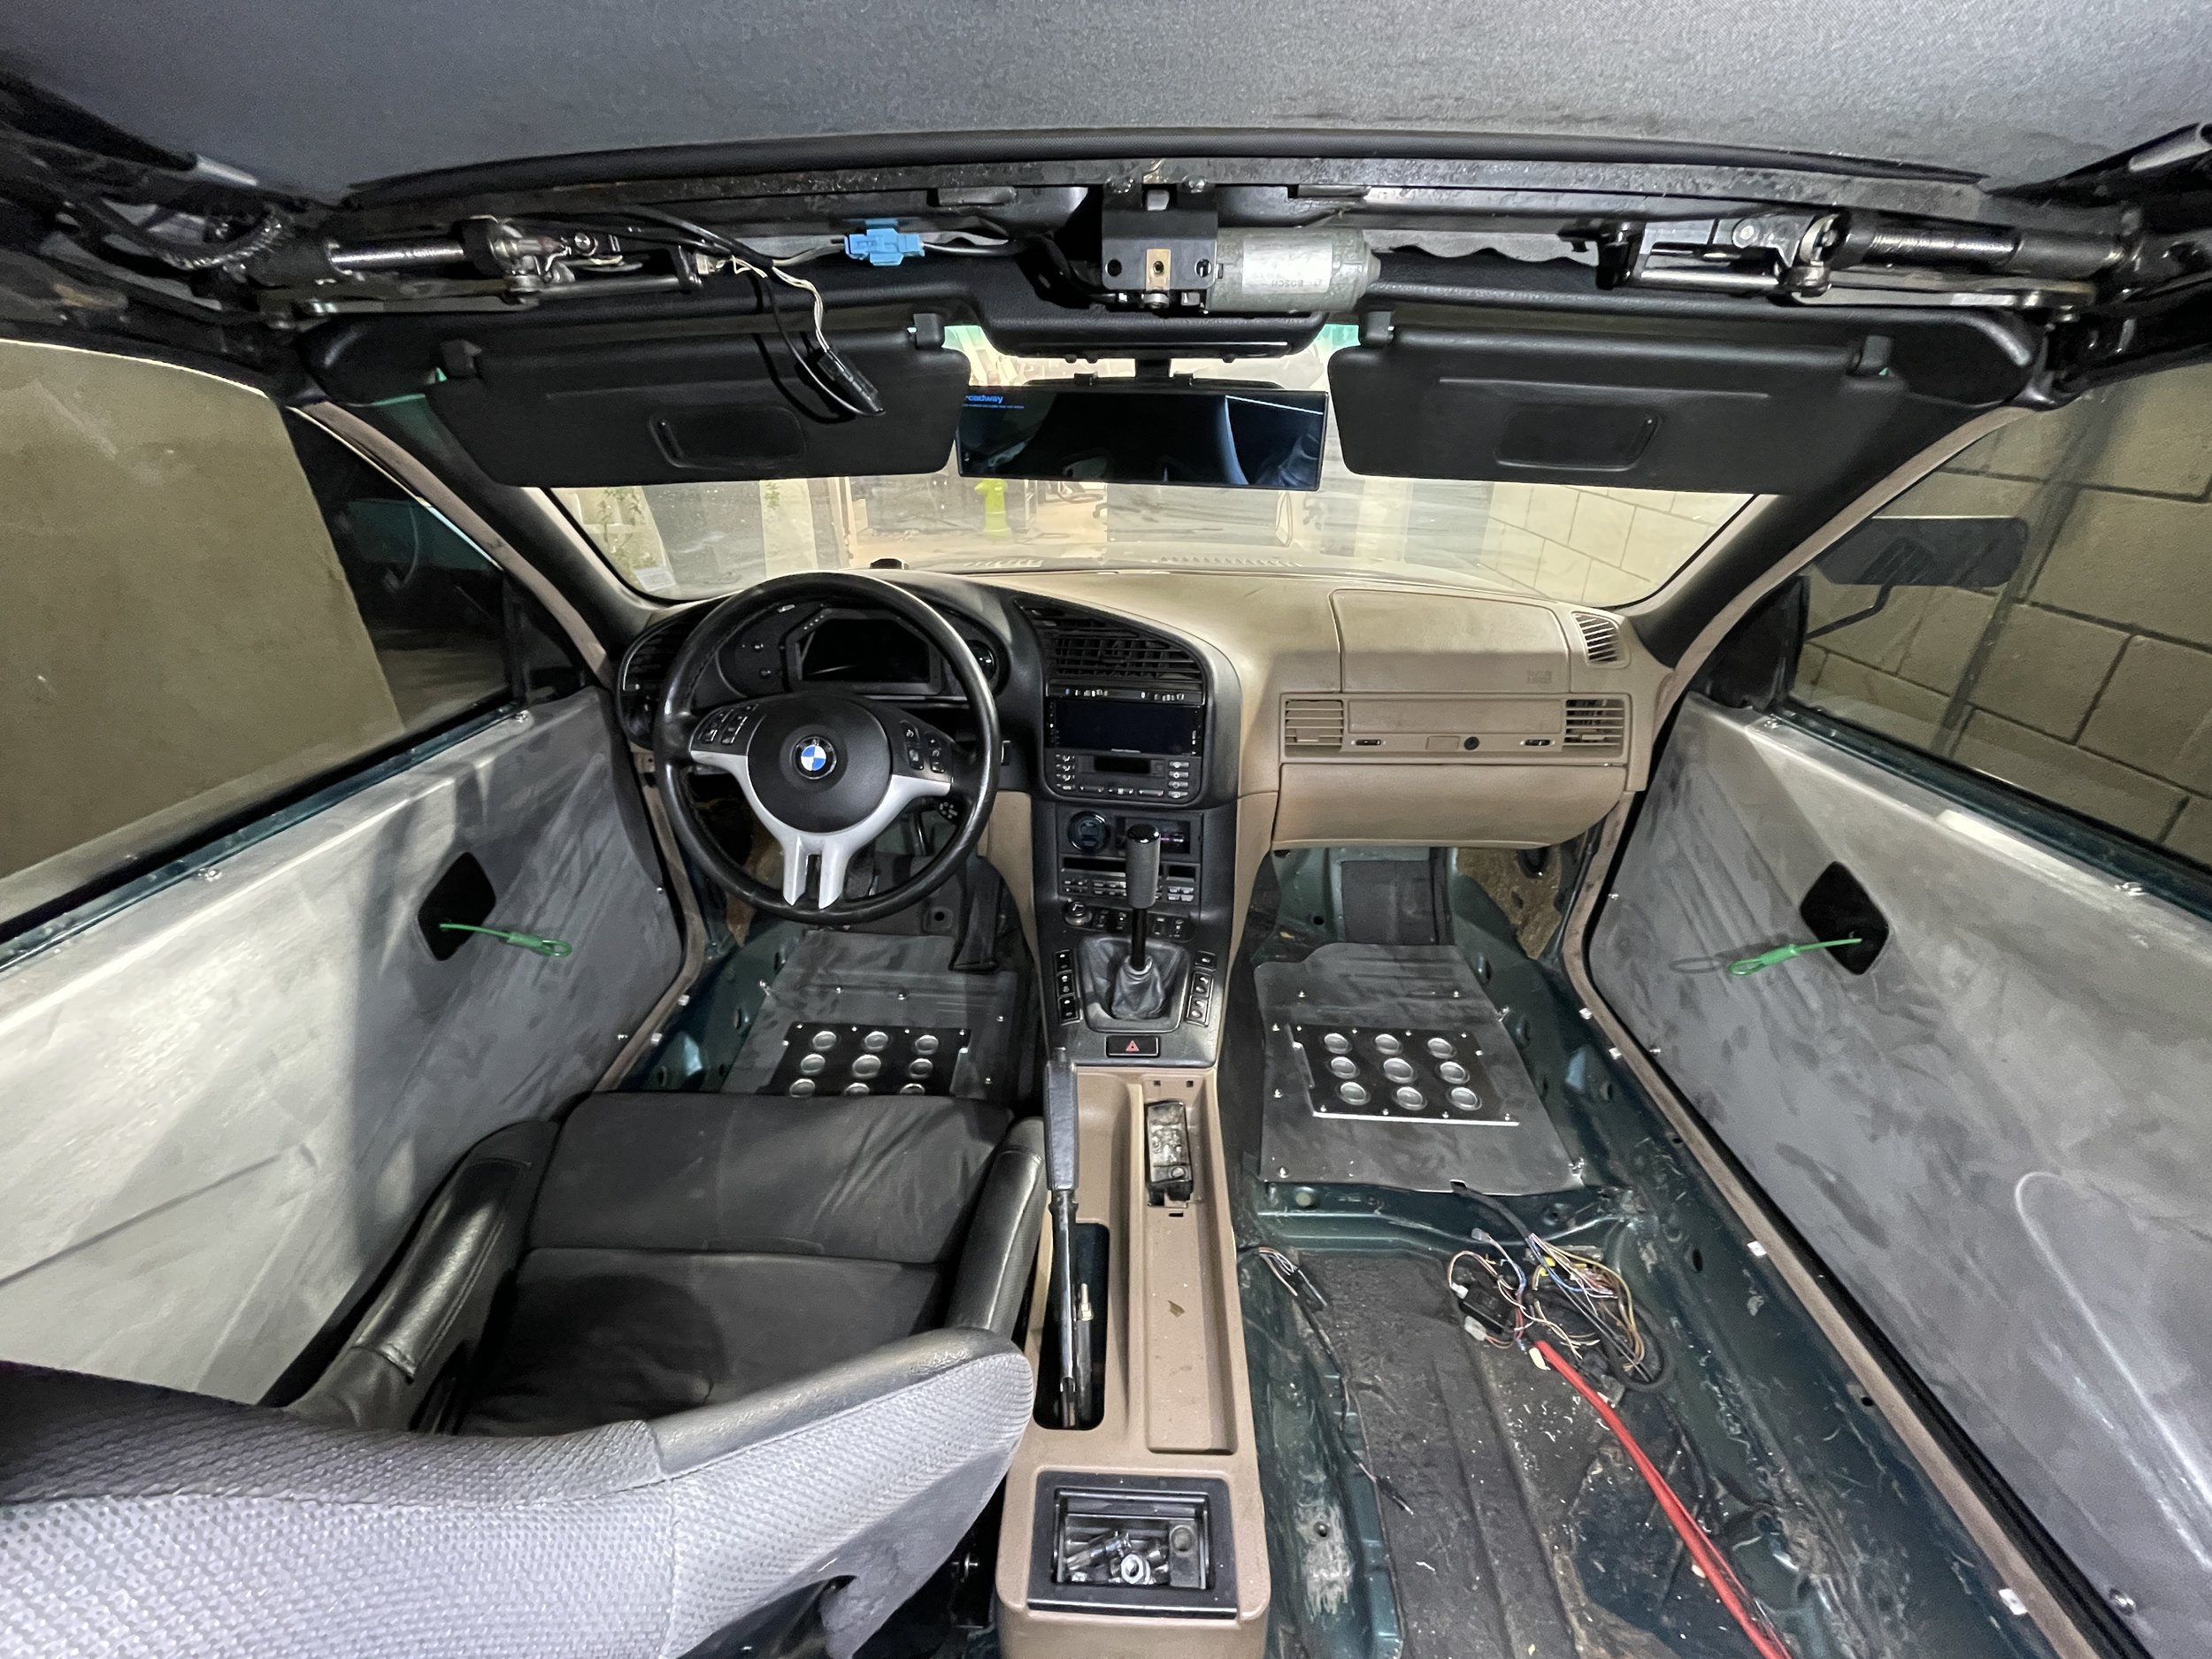
To match the design aesthetic of the front door cards and tie in the floor plates, I began working on some rear panels. These panels hide all the original structure, cutouts, and wire management running to the rear of the car.
To bring it all together, I added a rear cover panel that seamlessly blends the side panels to the vertical rear seat back. I opted to keep the fill panels as separate pieces to more easily manage wiring. Lastly, the rolled center cover hides the original mounting provisions for the OEM seat belts used for the rear seats.
With everything squared away I got the harness bar coated, mounted and the interior is done!
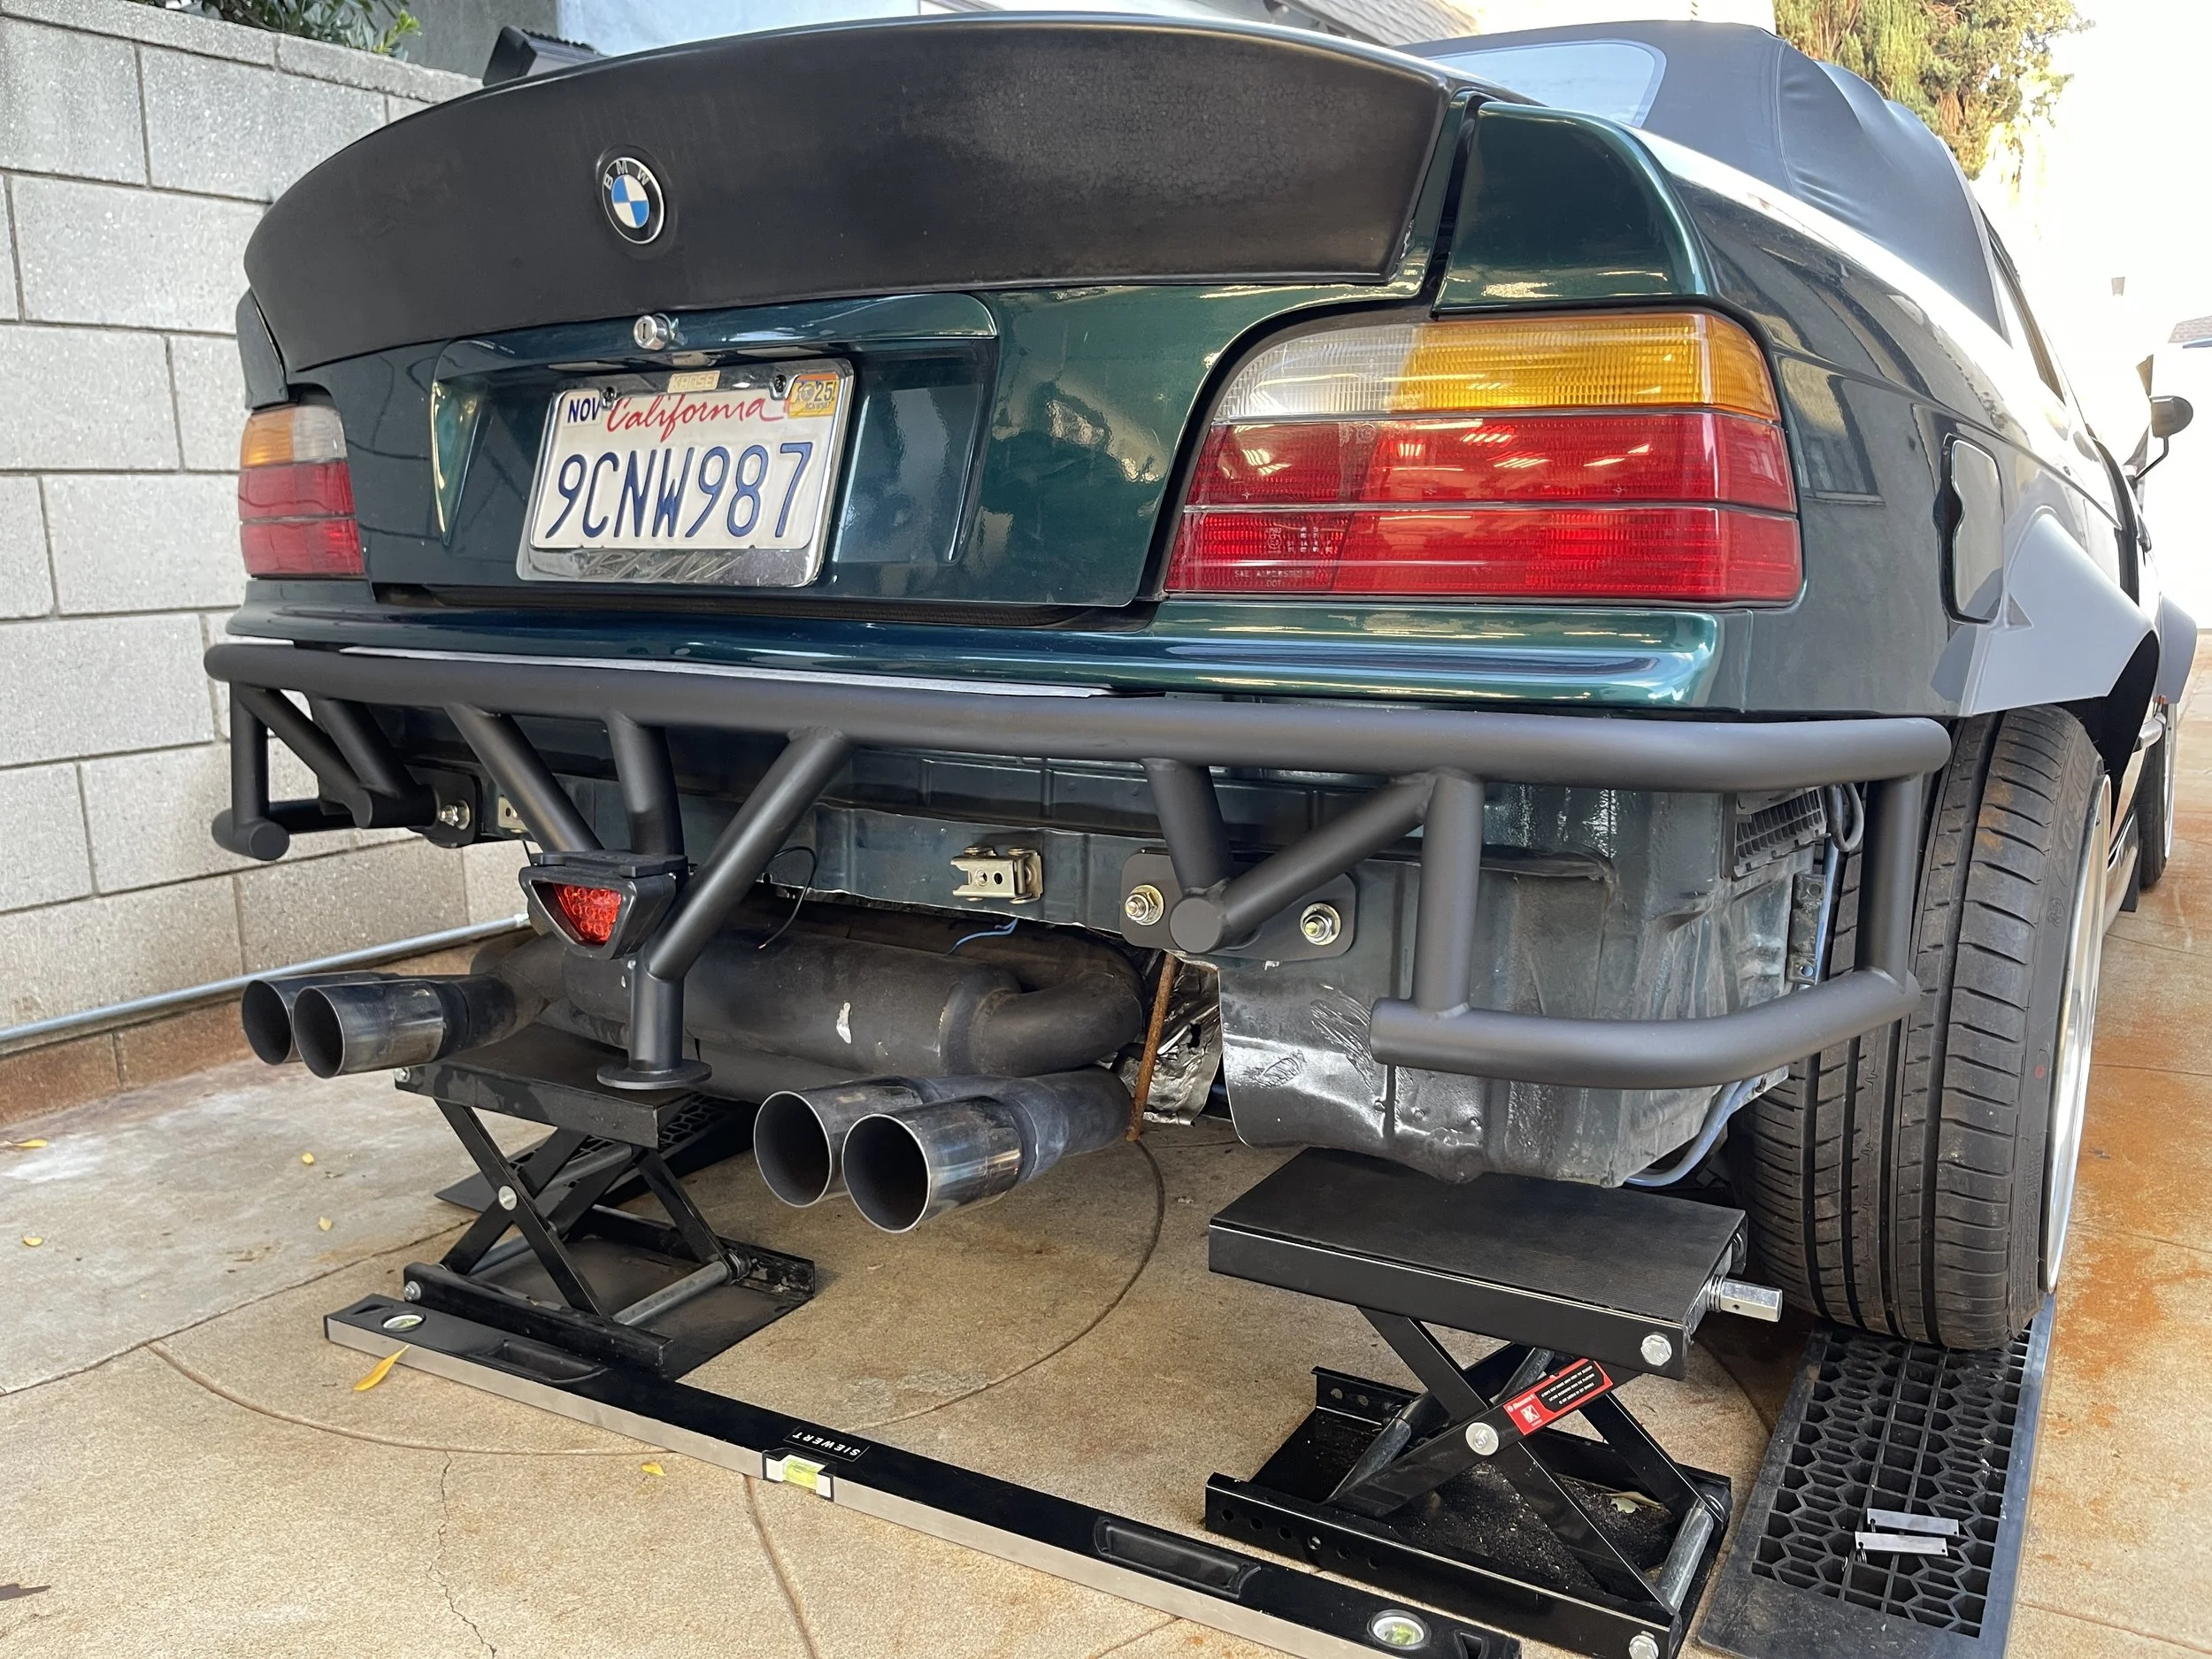
Last up on the list was to start building out a rear diffuser. The demand? Big, BOLD, and in your face…of course, within reason. Granted, this won’t be as big as the typical time-attackish diffusers often seen throughout Japan, it will still have a more rearward design with exposed fins.
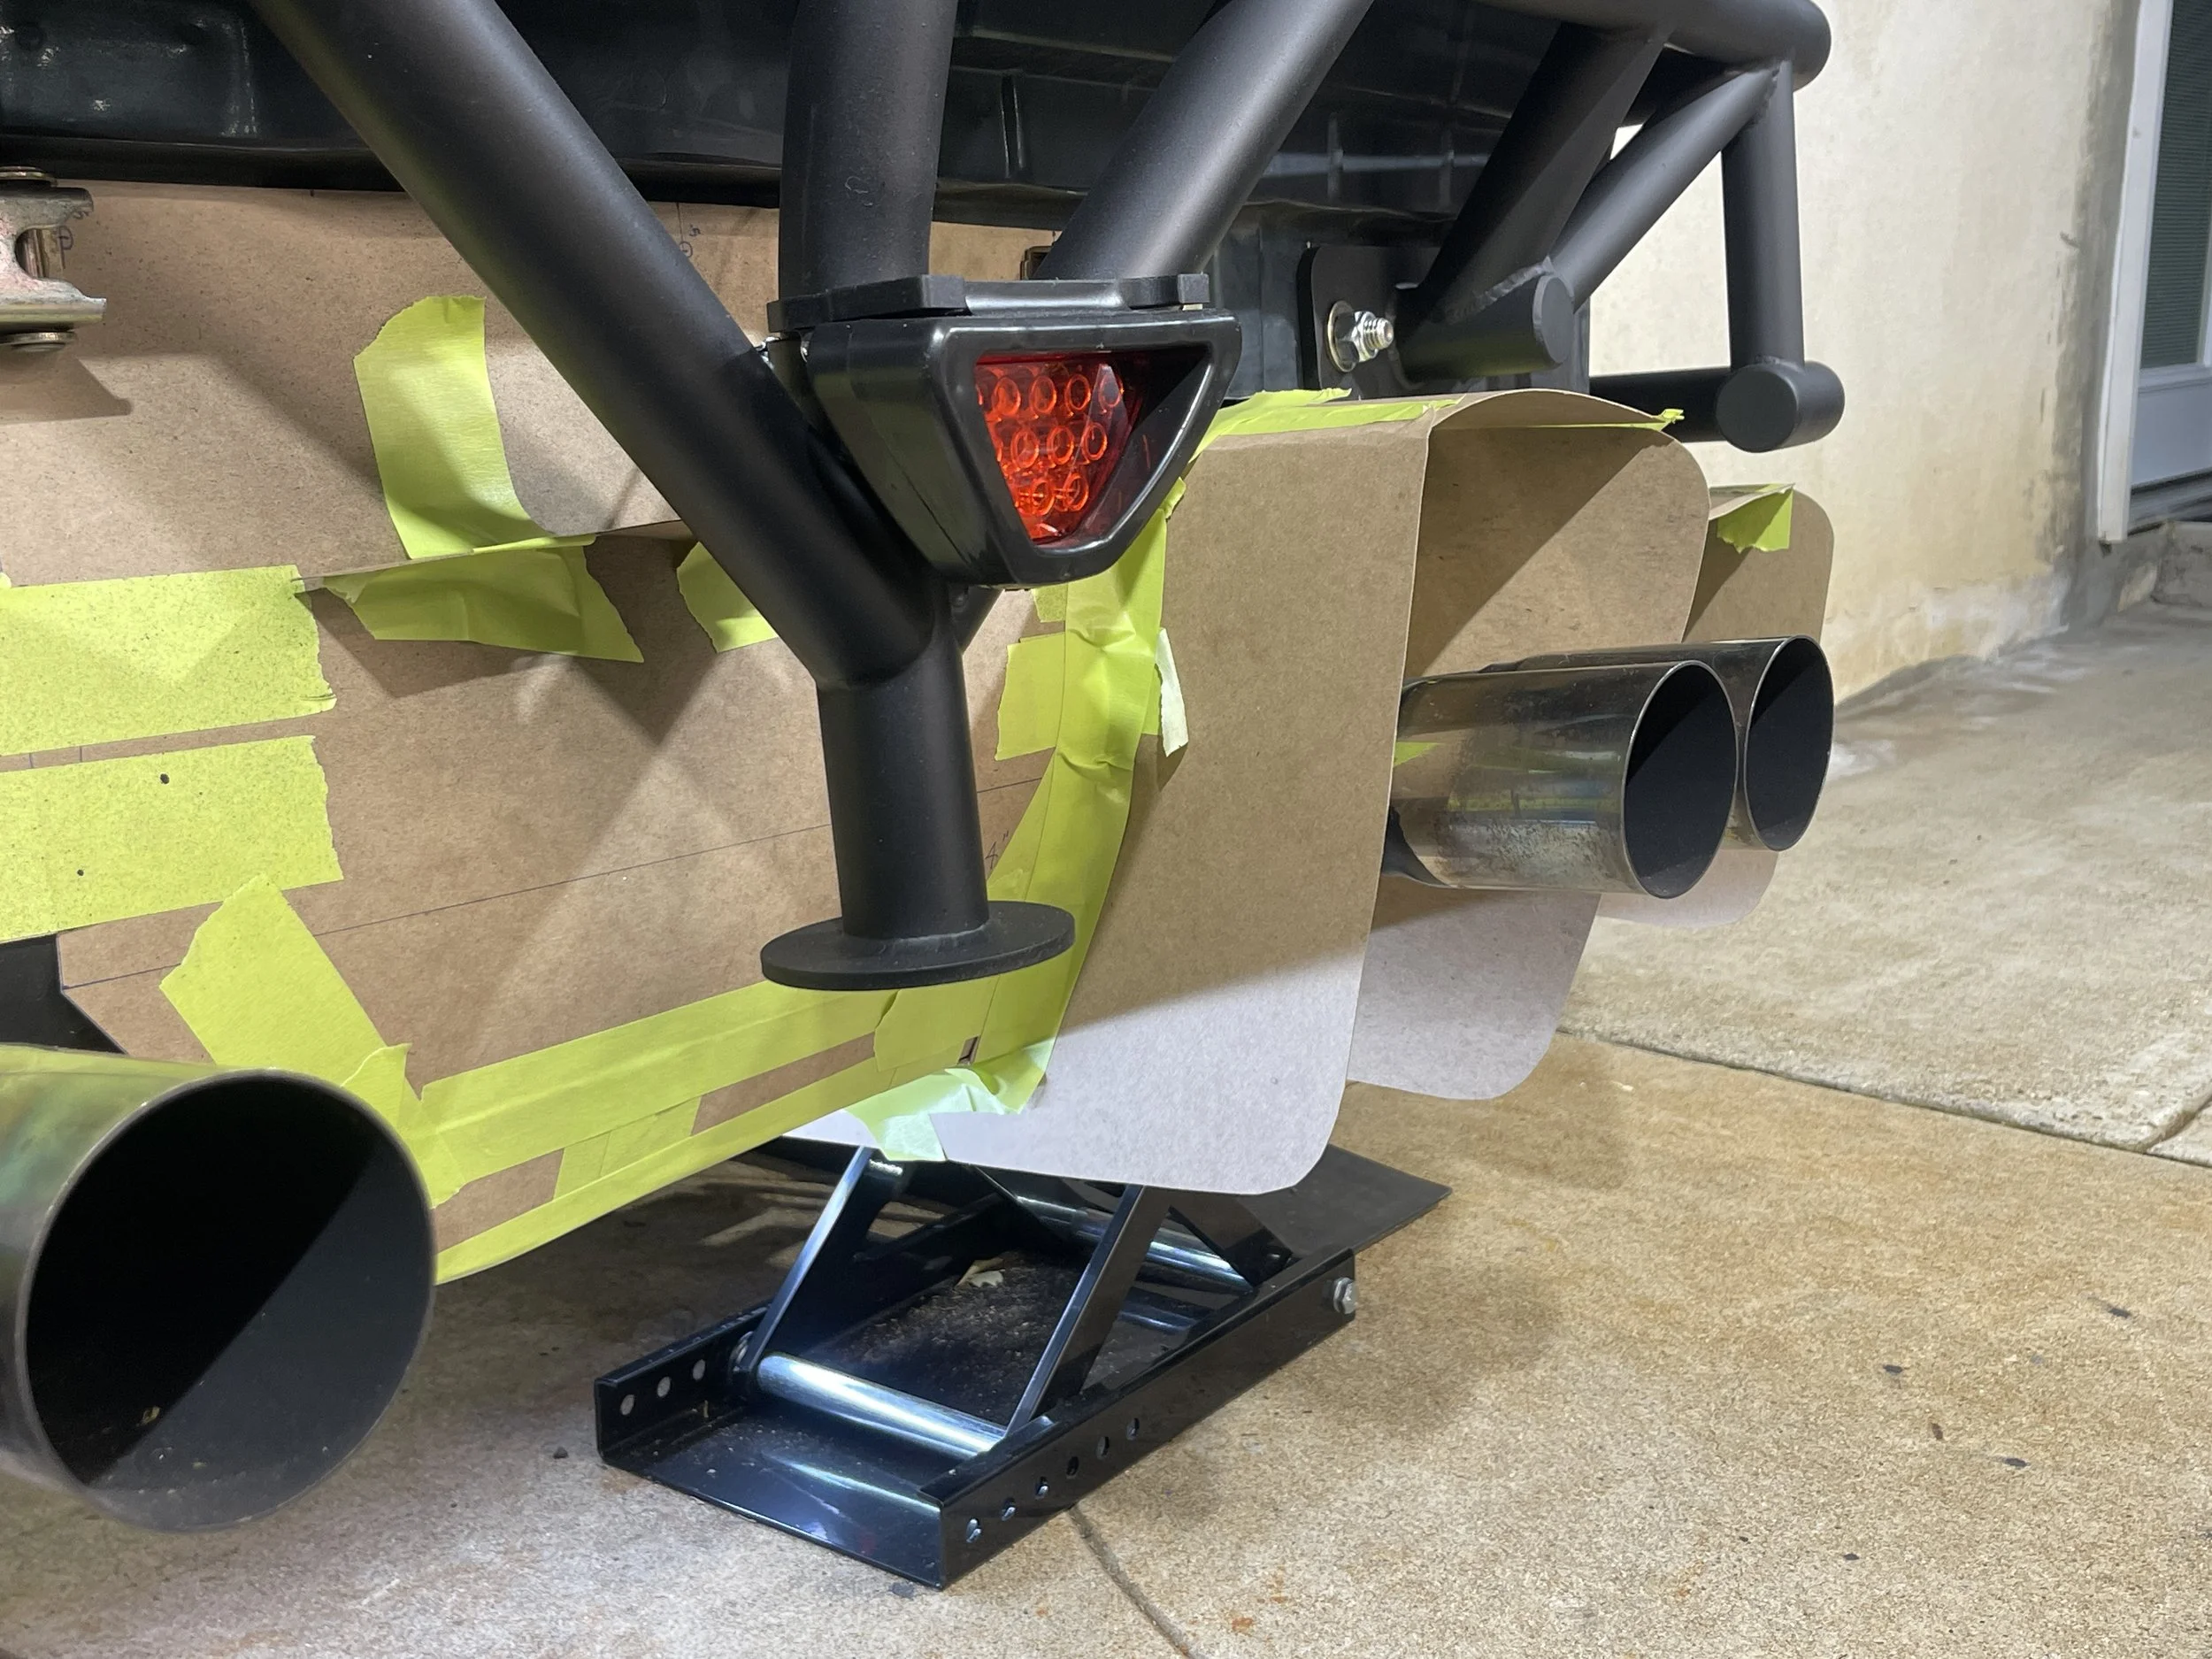
I started off by first building out templates of everything, exact but not EXACT. With the lower ‘tray’ built out under the car, I could move more rear ward and start mocking up the rear vertical plane, and began on the fins and their respective placement. The plan is to have 2 fins on the outermost edges, and 4 vertical fins (connected at the top) as pairs housing each pair of exhaust tips.
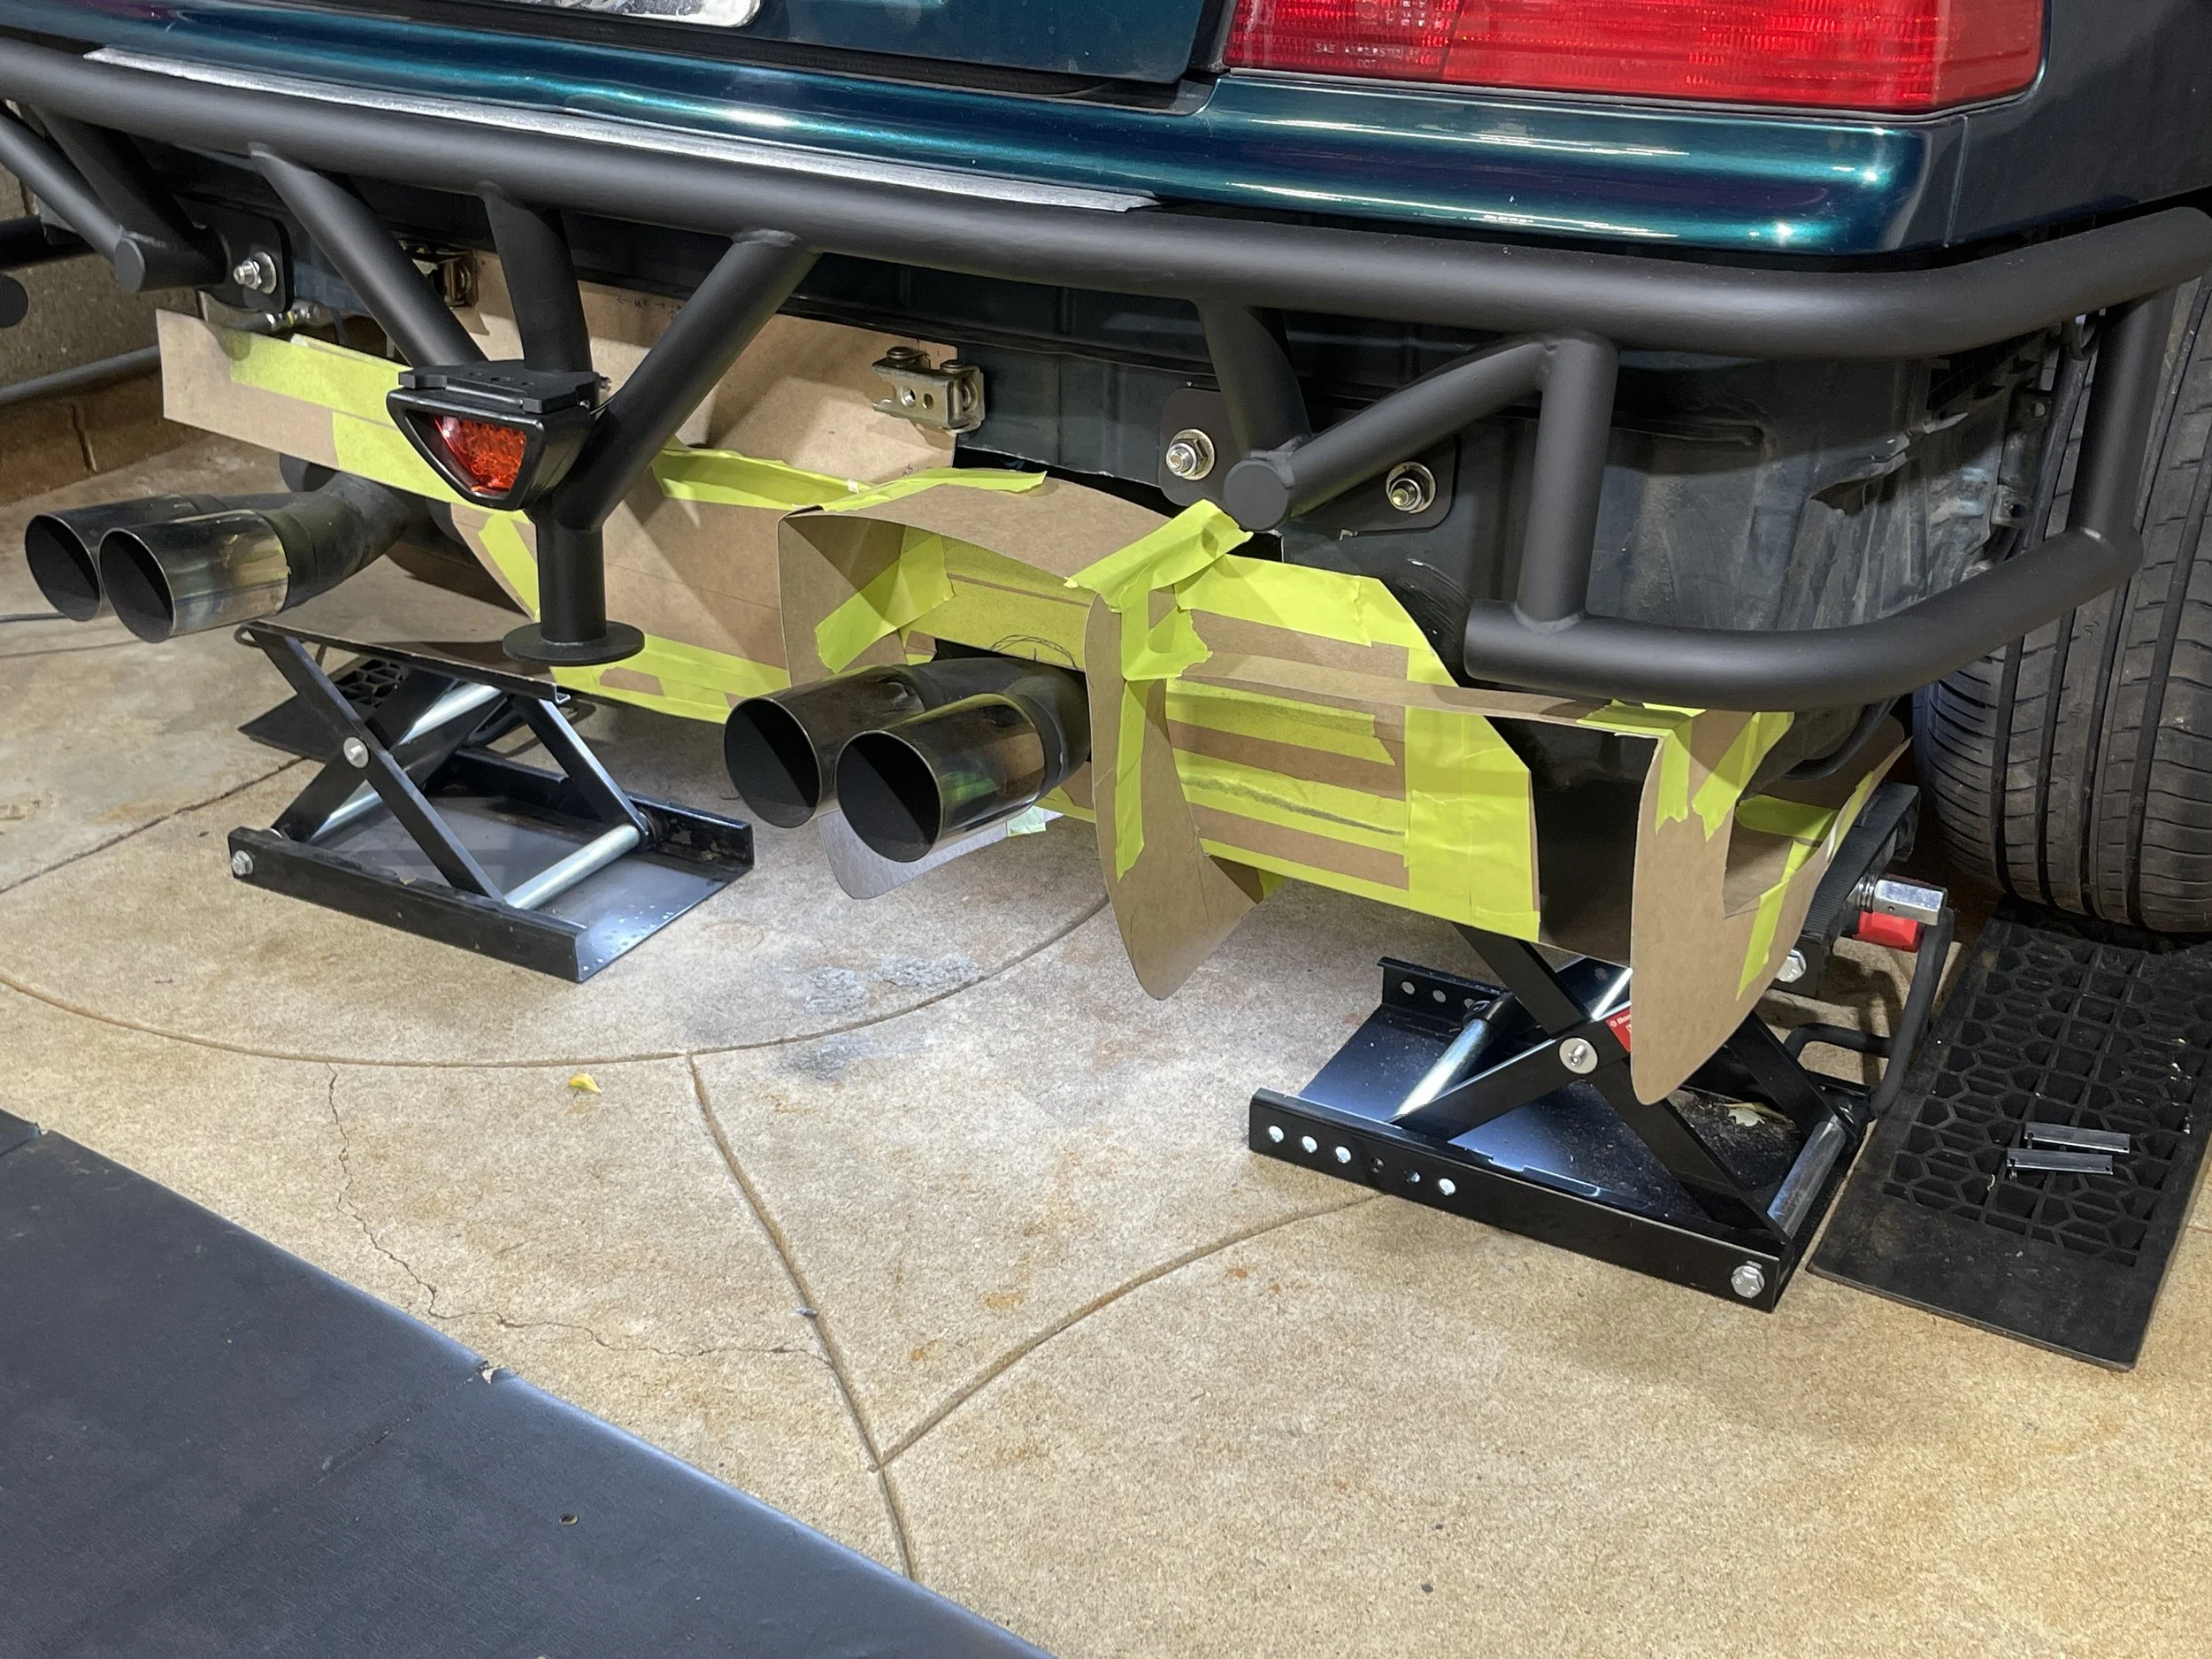
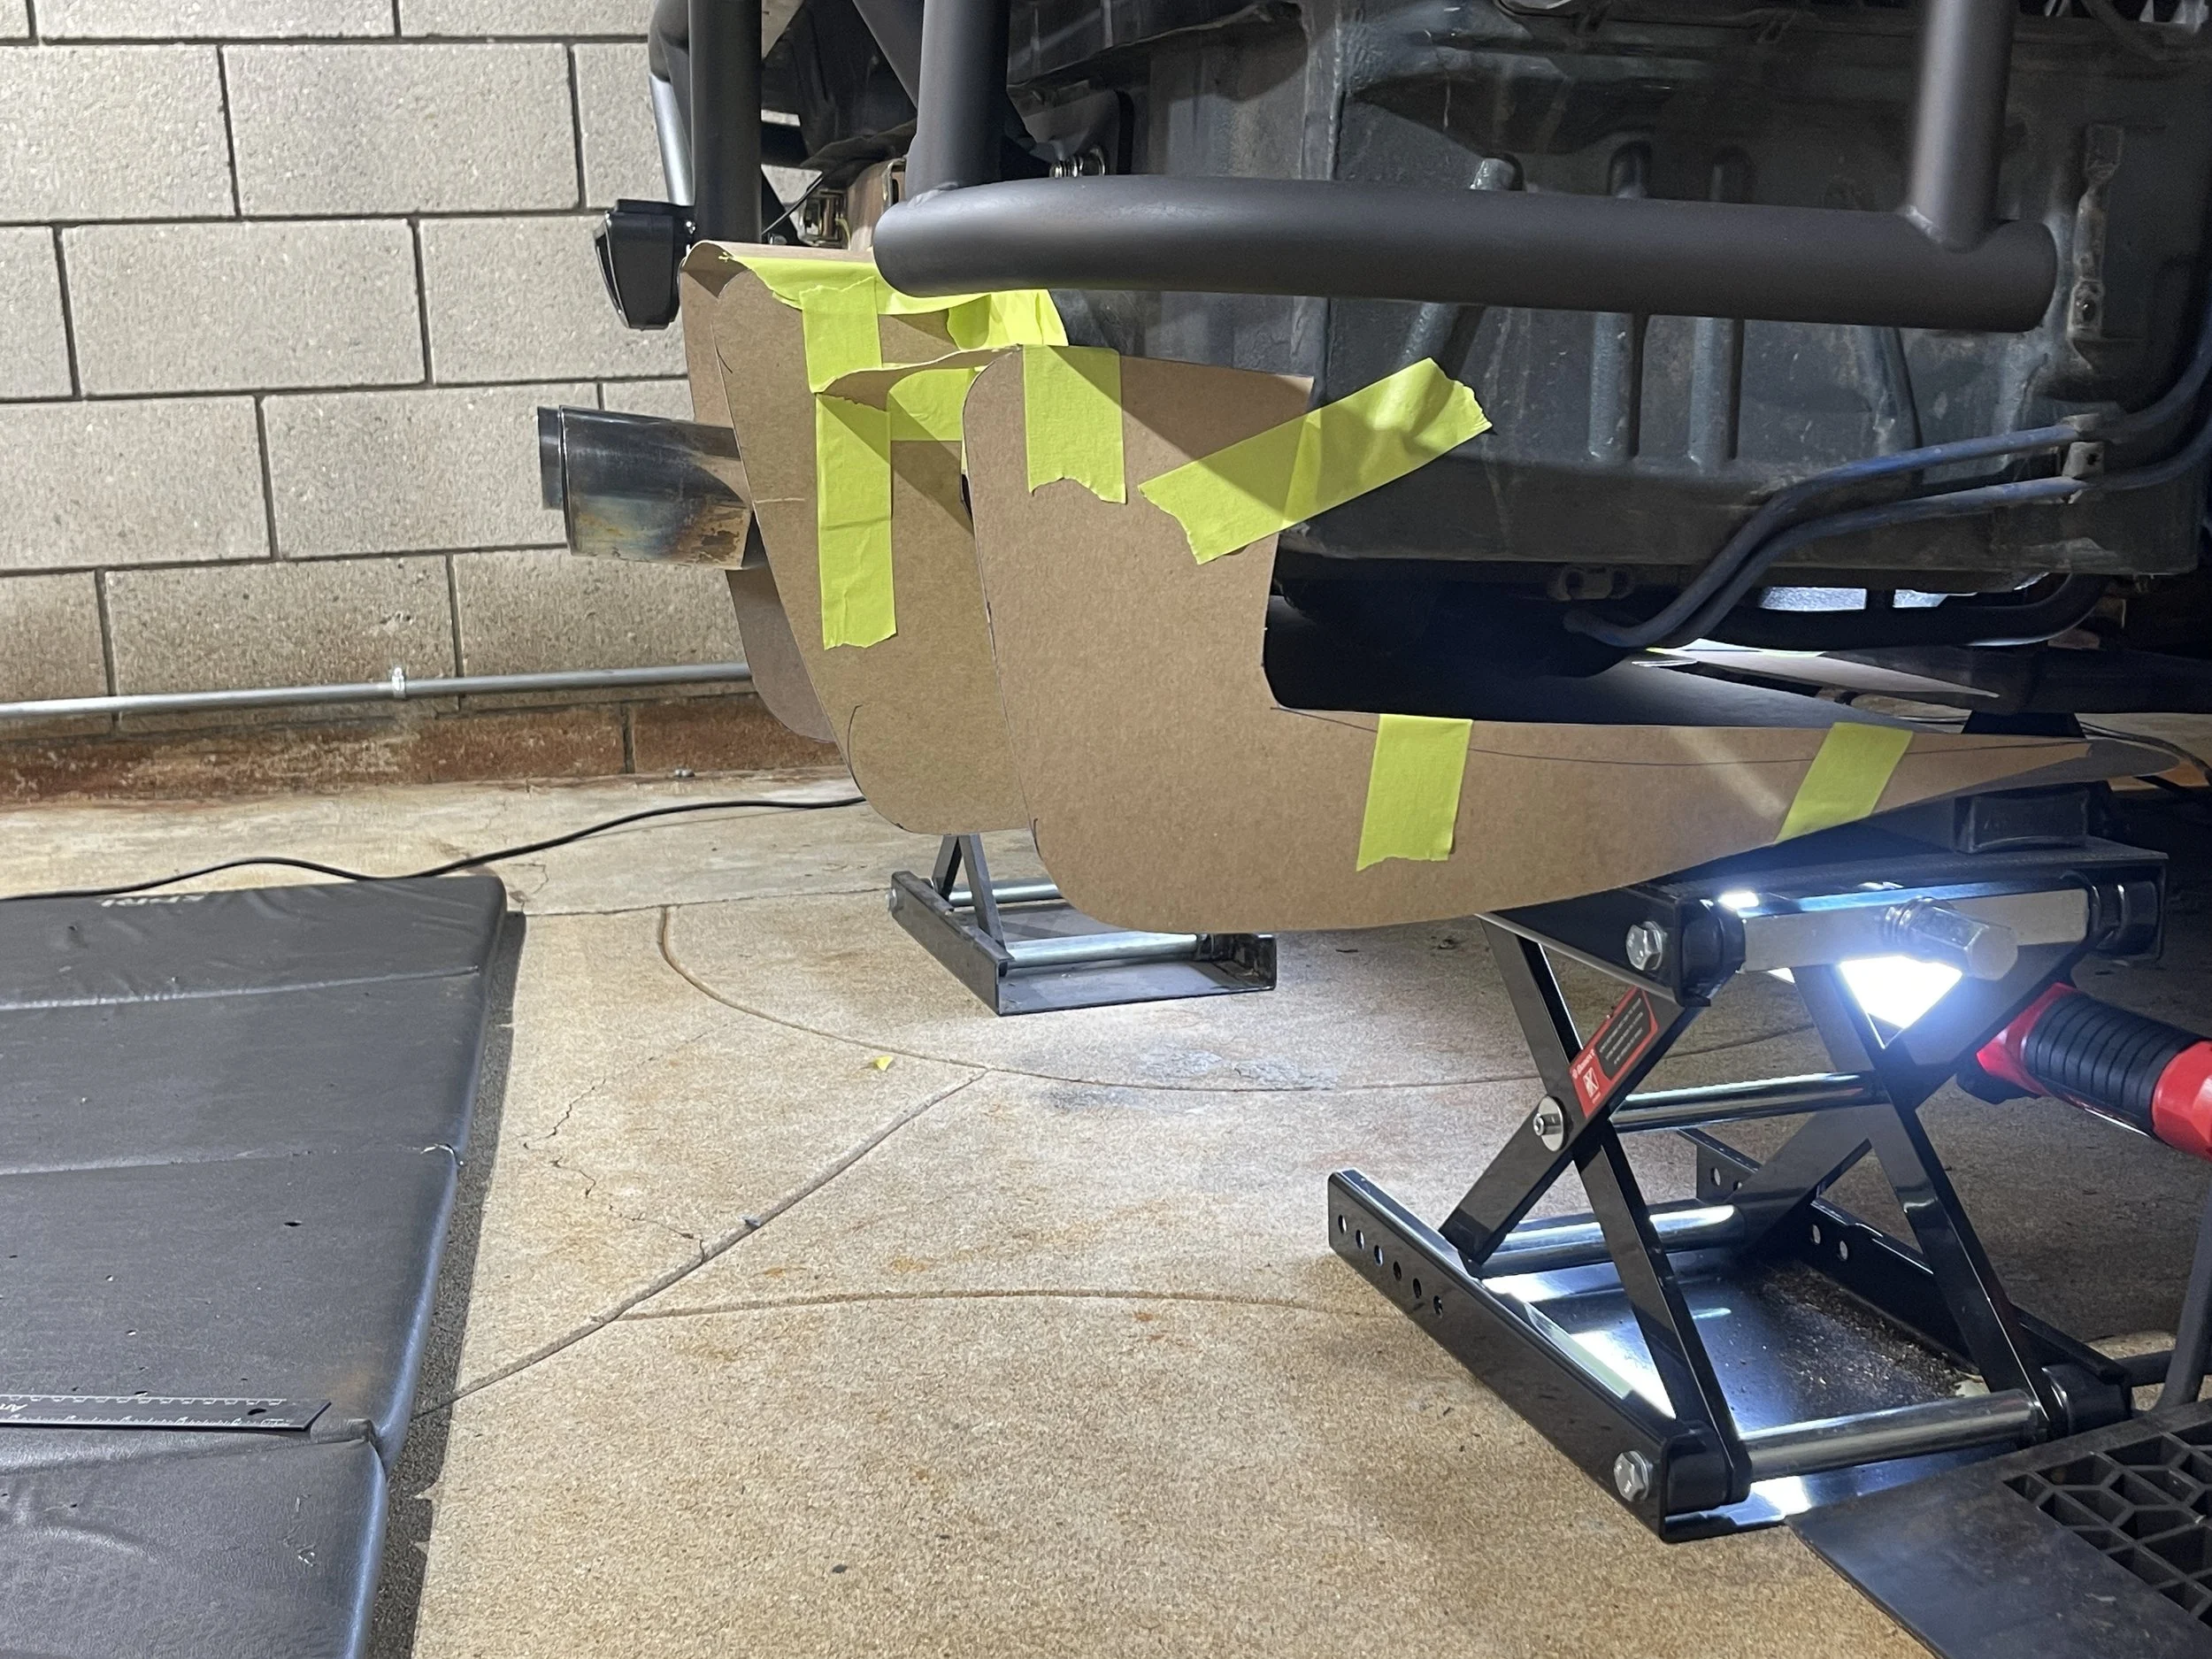

From cardboard to reality …
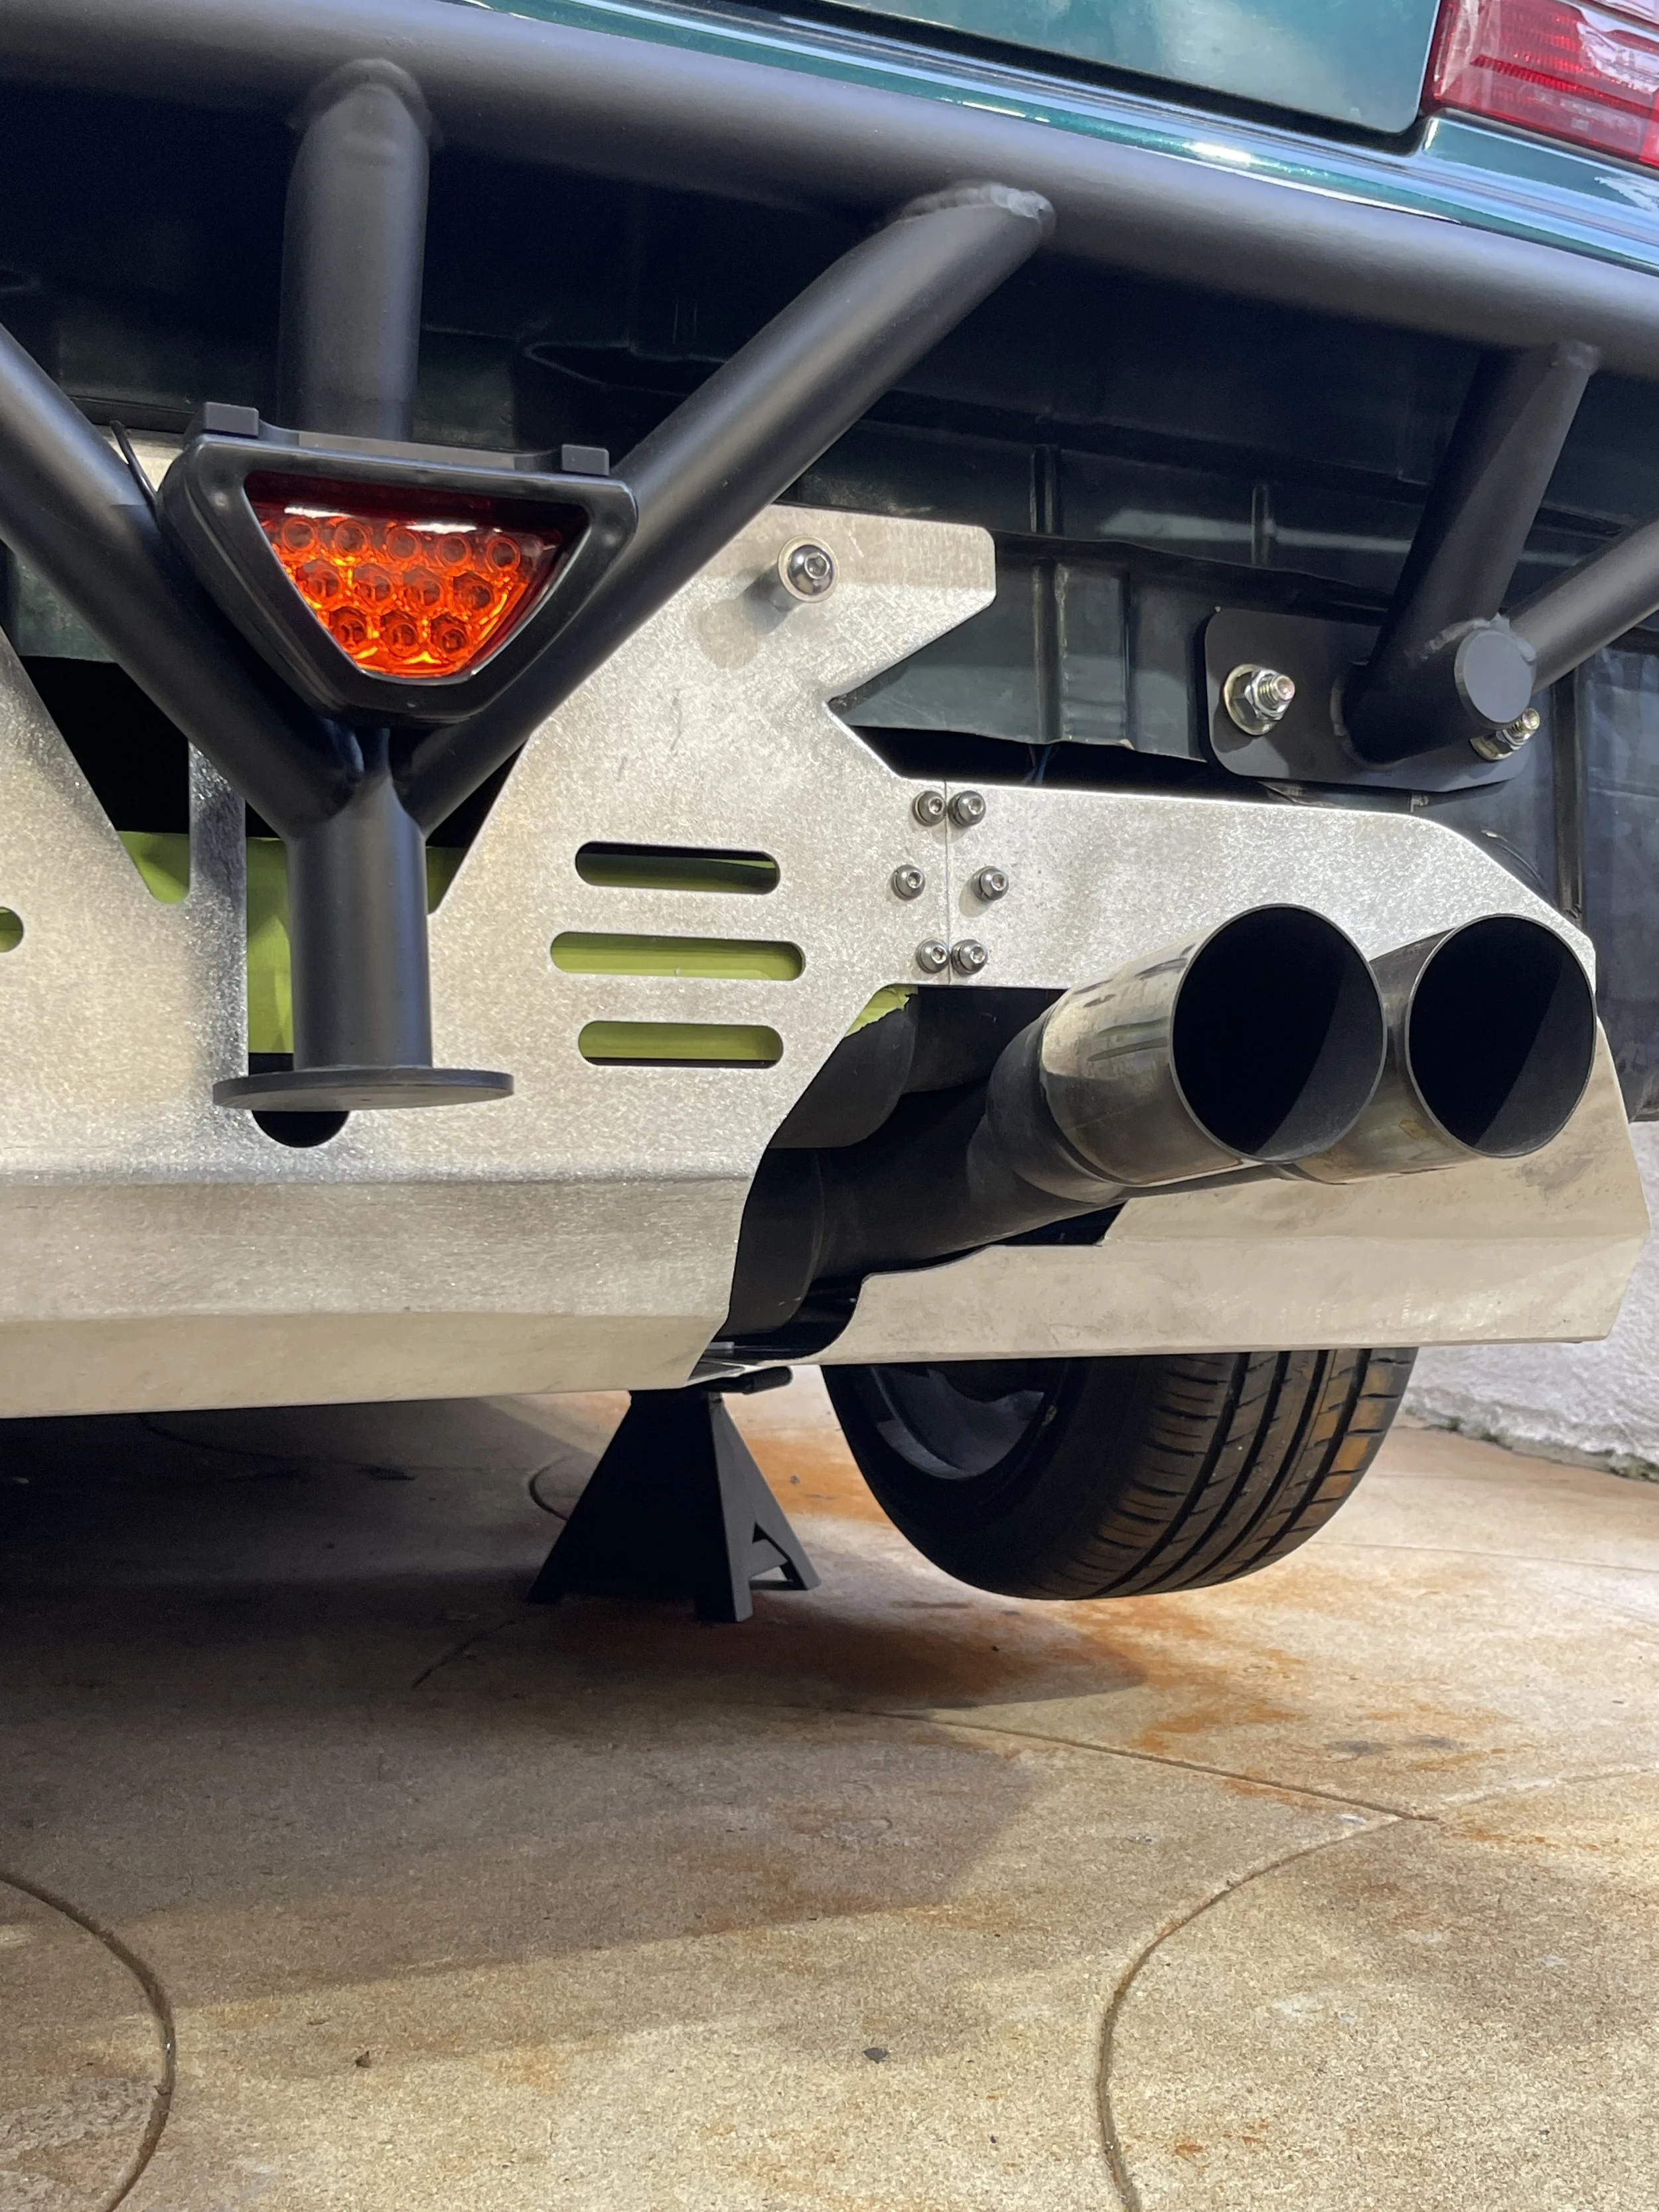
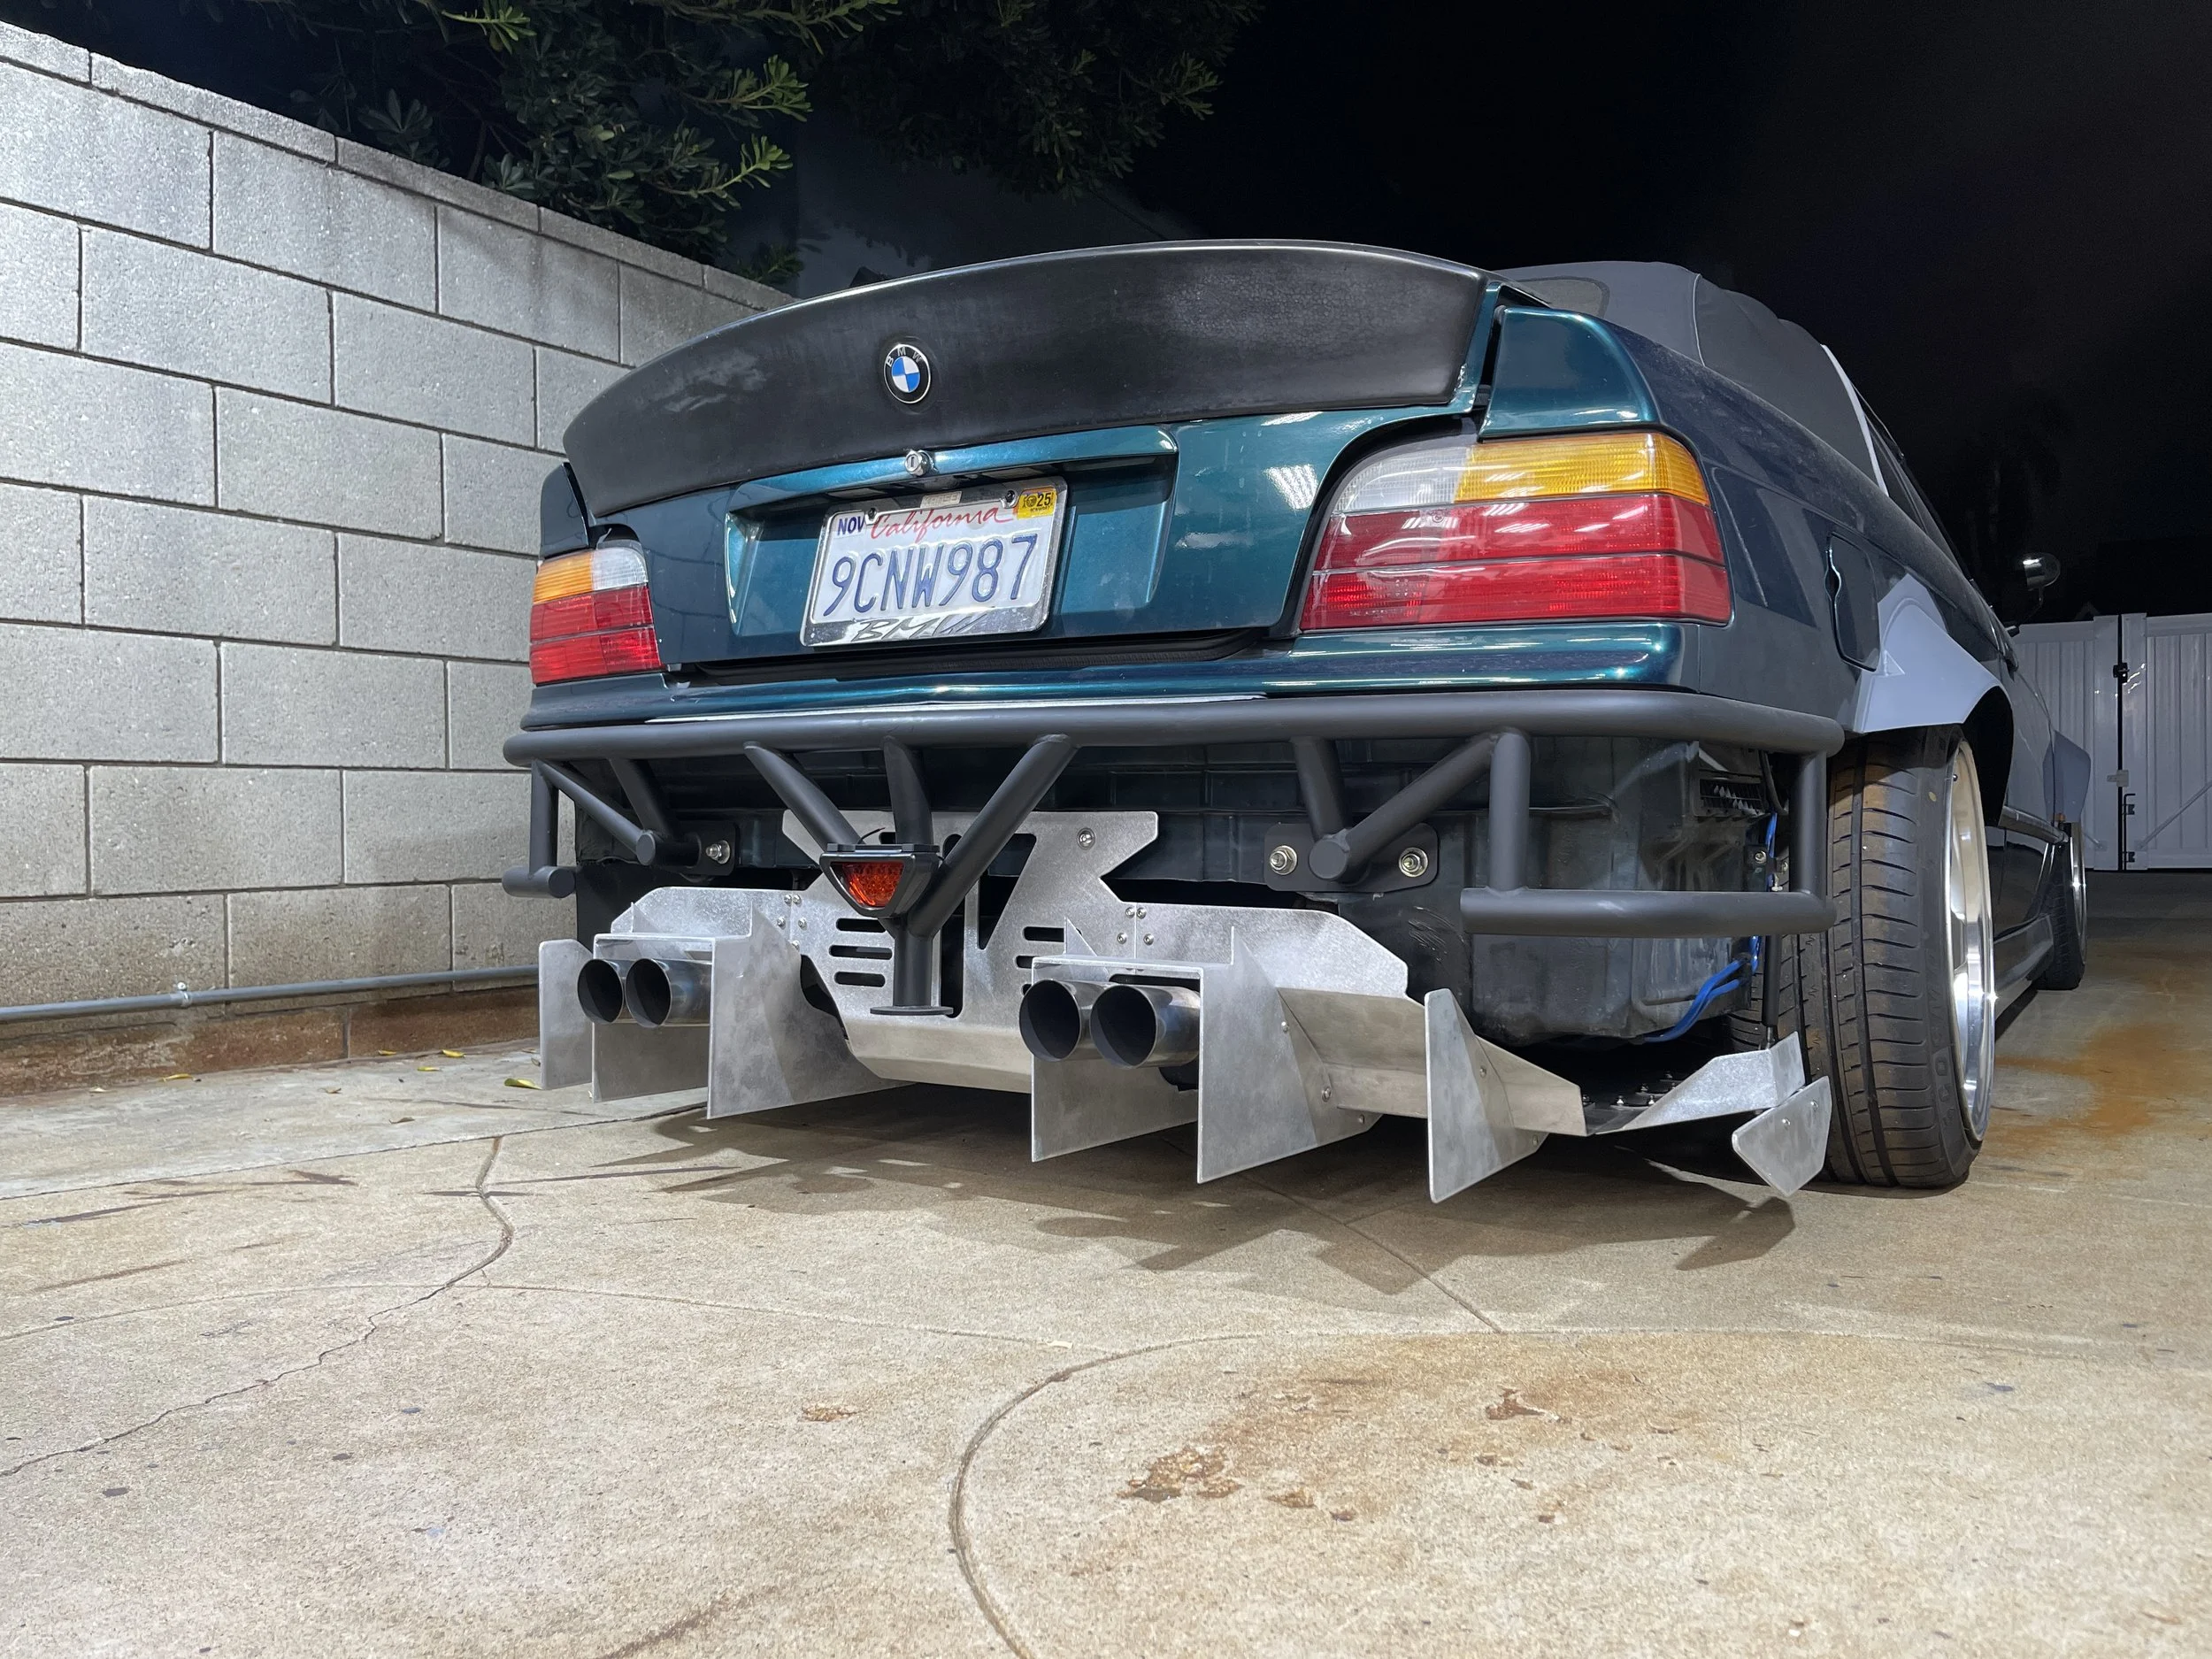
Long days…and longer nights - burning the midnight oil. I was able to get the lower most portion built out and flush with the underside of the chassis from the diff back, and from driver to passenger tire. It has a few ‘breaks’ in its structure as it moves upwards and back towards the trunk. Solid mounting was built in for a rigid and overall study structure. As the overall diffuser started to take shape, I built tabs and adjustable tierods off the OEM bumper slider mounts. These allow for side stability and adjustment of the winglets behind the tires.
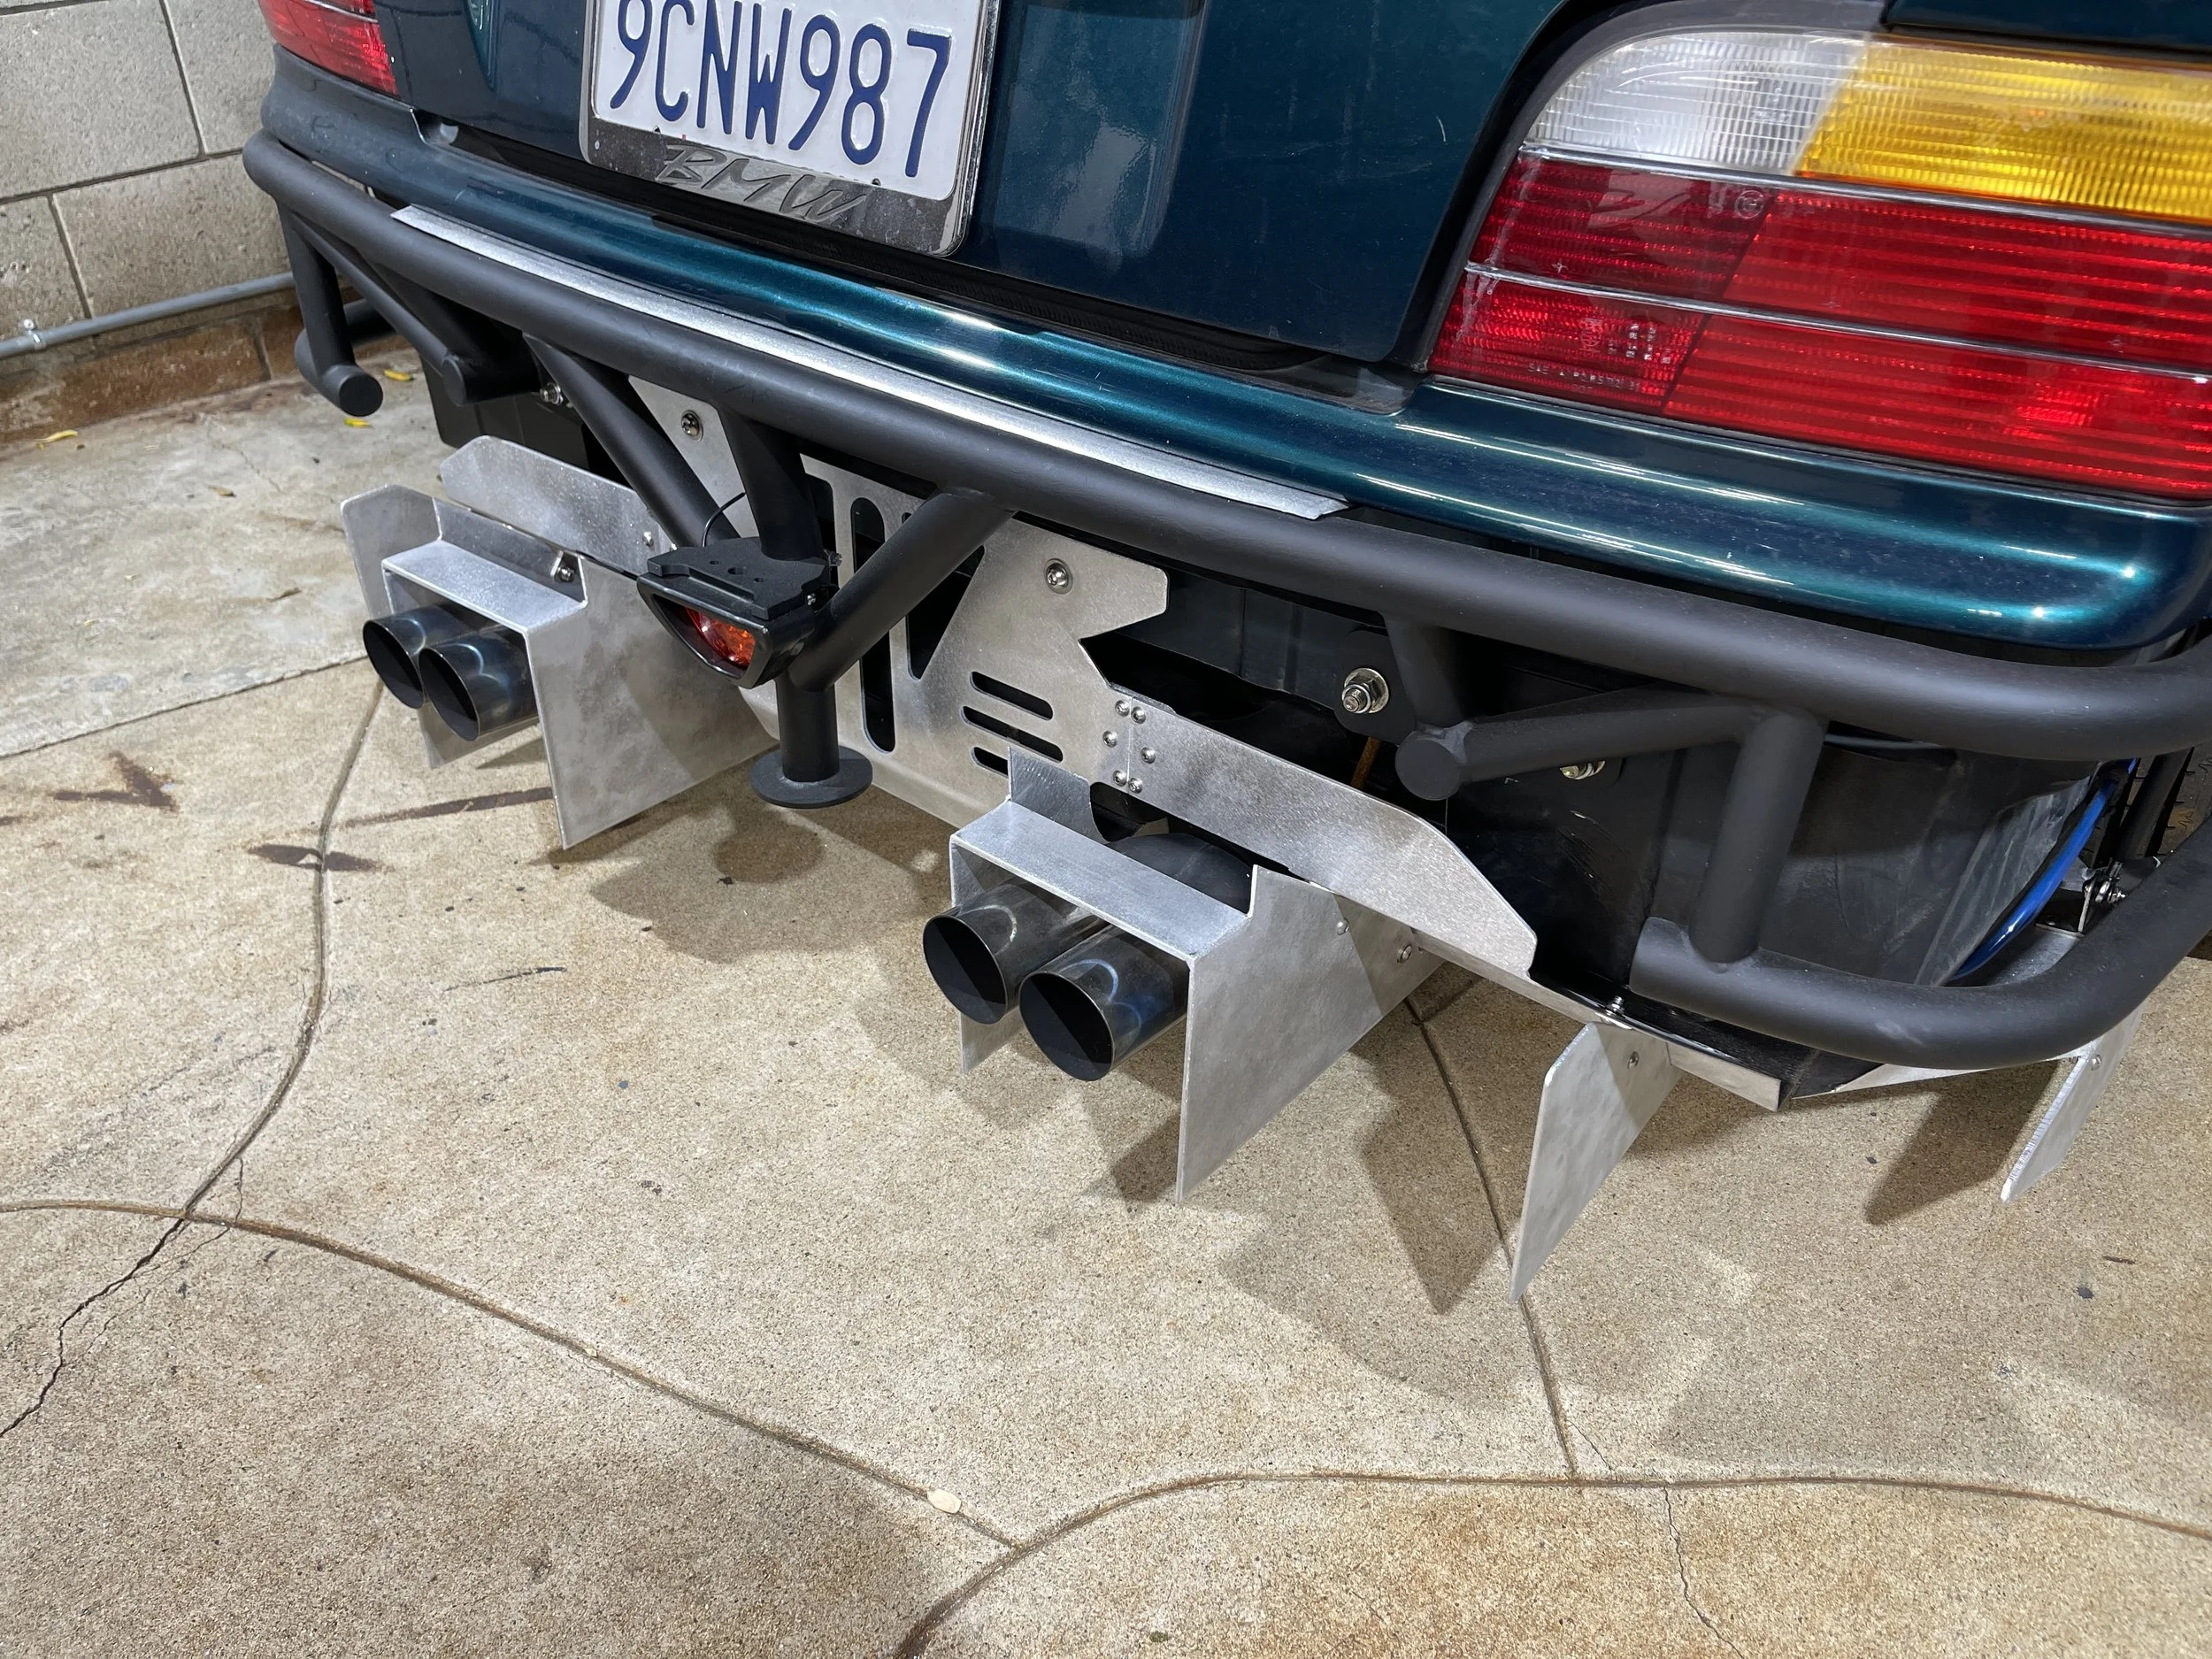
The vertical stabilizers then began to take shape and I began boxing them in. With the exhaust doubling up in the back, I had to abstain from filling out all the panel work - exhausting openings were implemented to allow for the heat to dissipate whilst still channeling the air in an appropriate manner.