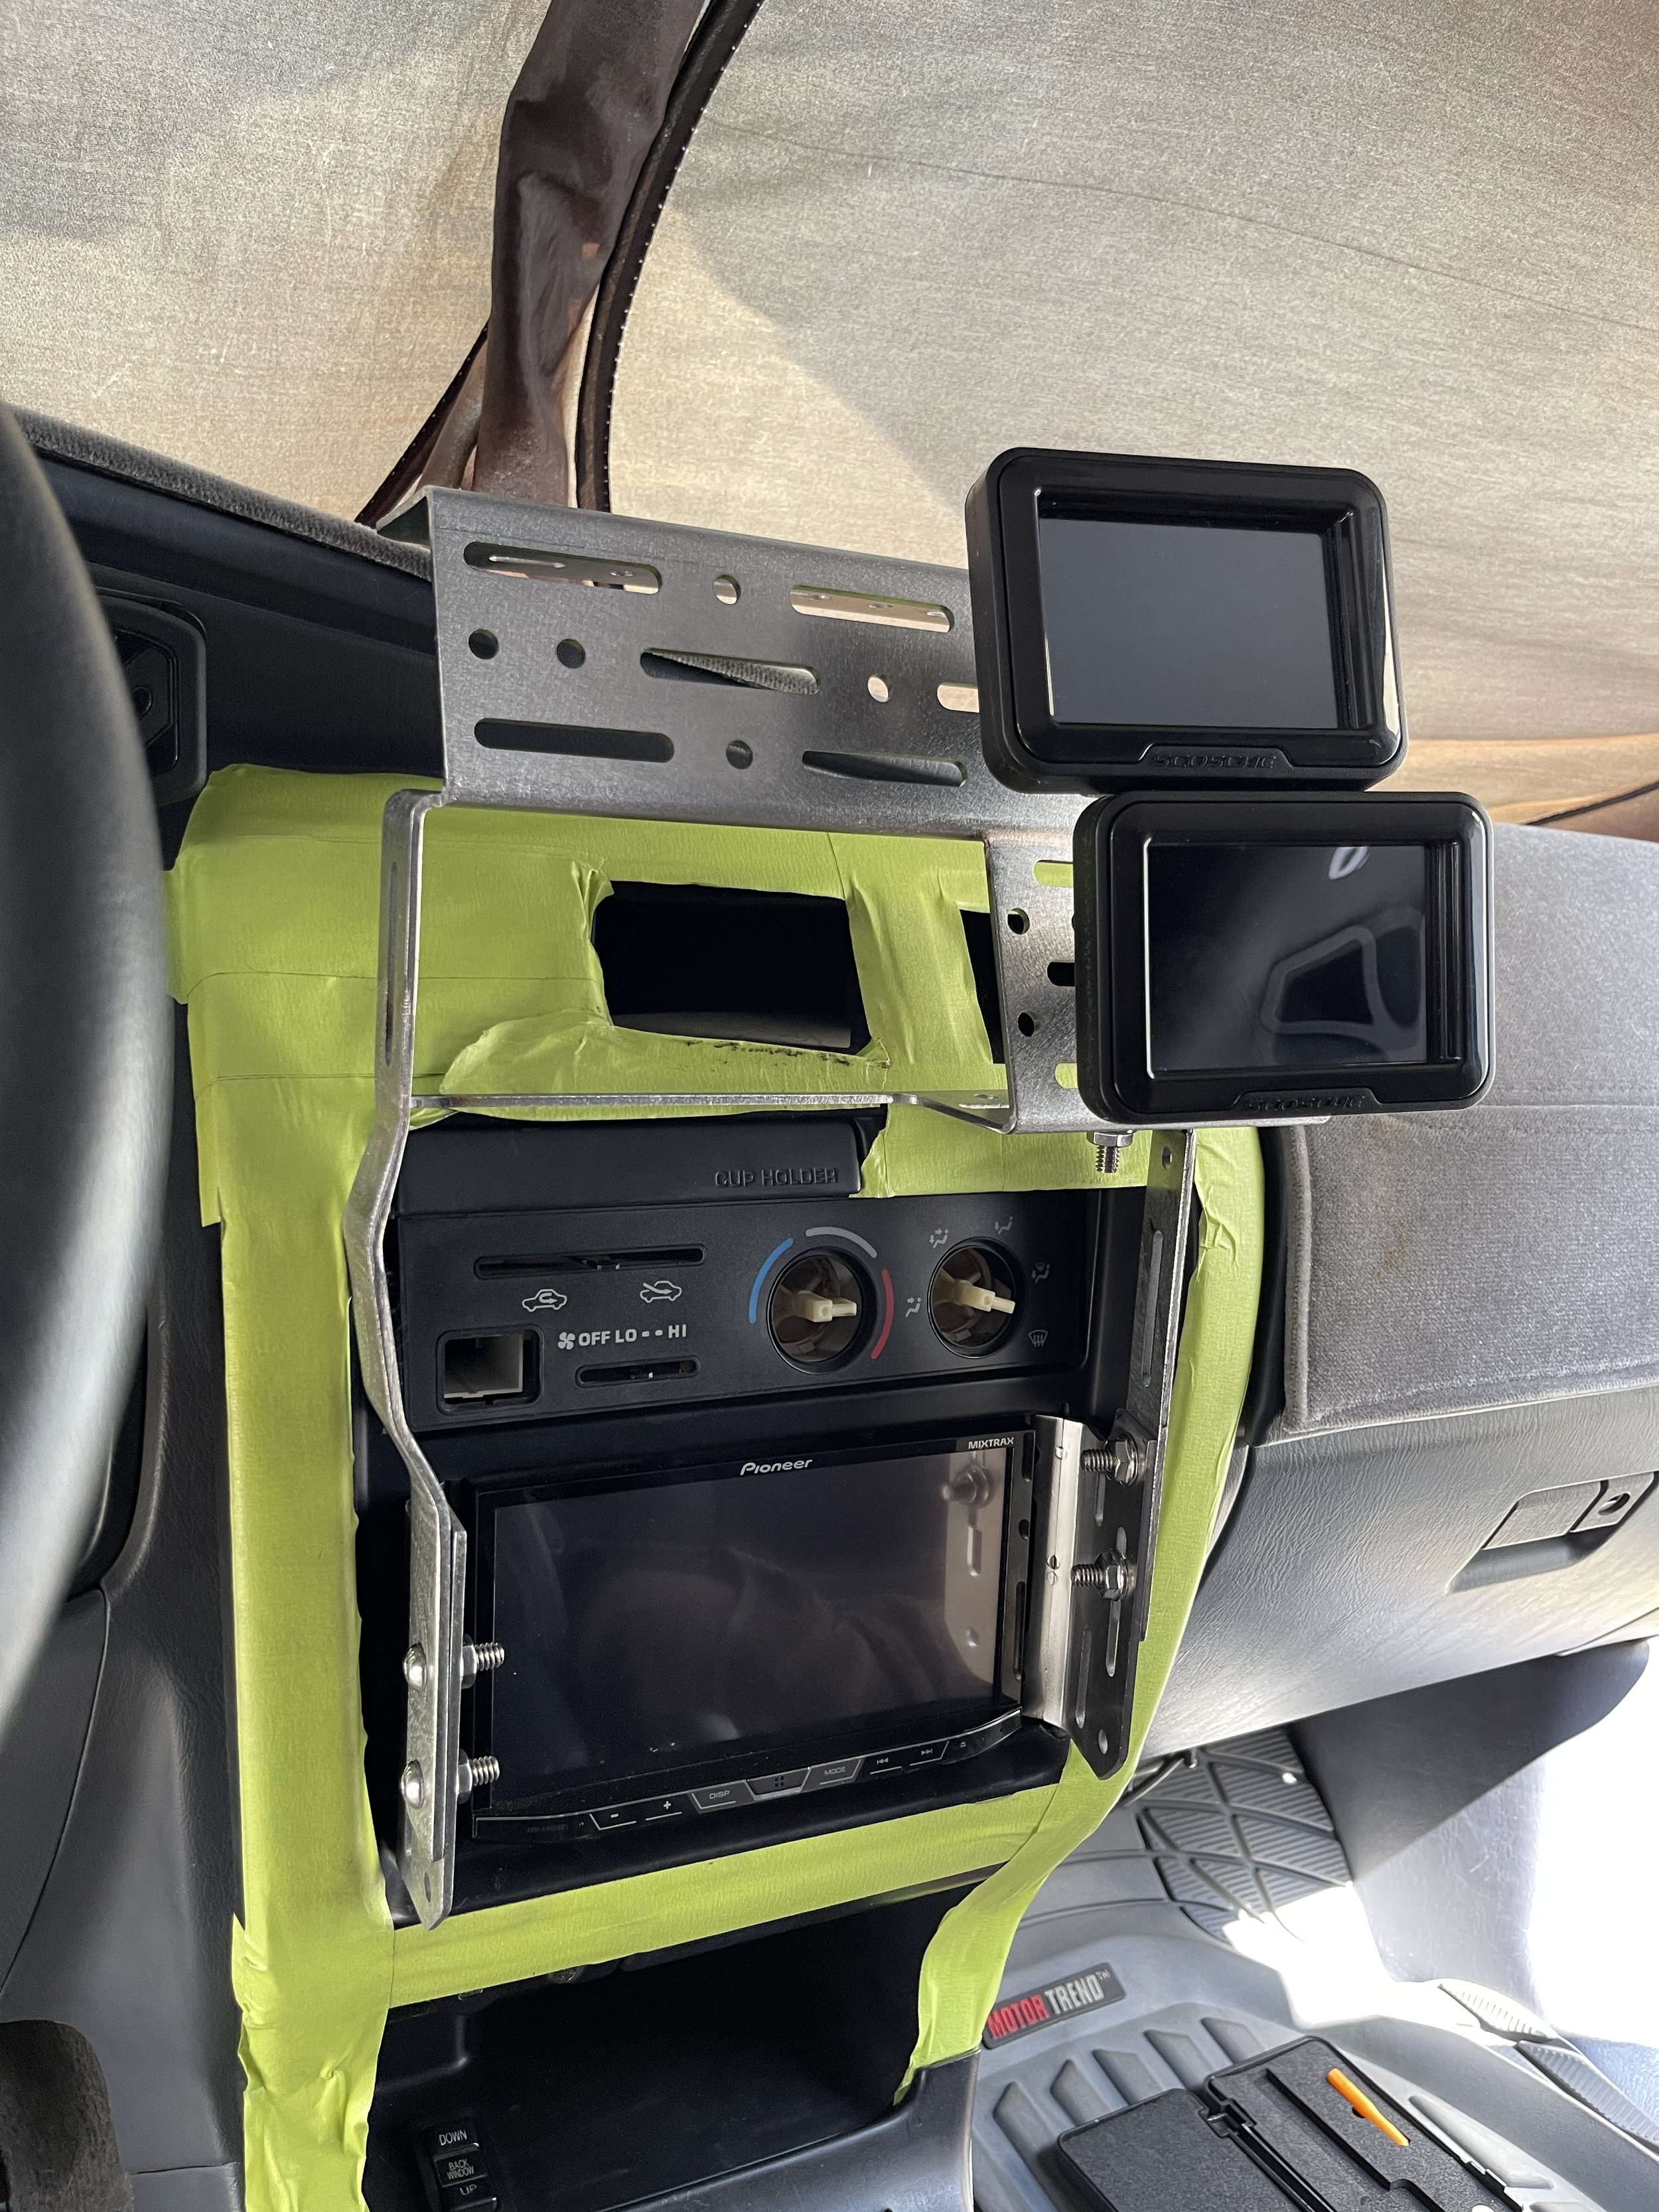
4RUNNER CENTER MOUNT MOLLE SYSTEM Jul 24 Written By A N D R X W While the 4Runner continues to get accessories added throughout it, a home for the control of said add-ons would now be up for fabrication. What I opted to design and build out was a molle system that would bolt directly to the double-din hardware for the stereo. This in turn allowed me to solid mount the system, not drill into the dash or center console, and it kept everything streamlined and within the constraints of the OEM setup. The molle system turned into 6 different pieces - 2 brackets to mount to the double-din, the uprights, and both ‘shelves’. Here is the overall layout of the molle system, minus the two brackets that affix to the stereo. Nestled between the OEM extrusions of the inner dash and the Pioneer stereo unit, the two brackets bolt firmly to their location and would provide a solid base for the accessory mounts above. Mocked up and test fitting, everything clears out. There’s amble adjustment both up and down, as well as tilting fore and aft. I opted to bring it up just high enough to clear the cup holders in their outward position, it also clears the dash on the drivers side with ample room. Blended all together and in their final fitment stages. Note the cut-out in the top left to clear the dash and dash cover. While I was working inside the cabin, I opted to build out a trim plate to cover up the passenger footwell plate. The OEM panel was covered in holes from previously mounted accessories. This provides a cleaner look, and also a good foundation for a fire extinguisher or the like to be mounted within arms reach. With the molle system now powder-coated and mounted up, things really started to tie together. I also utilized some clamshell like covers to tidy up the stainless hardware that affixes the molle shelves in their upright position. The molle system is there, but not in your face nor in the way when adjusting vents, turning on/off the AC or changing stations on the radio unit. A N D R X W